Many creators overwhelm themselves with the need to create content on multiple platforms. In most cases, you already have content—why not repurpose your existing YouTube videos to publish as short-form content on TikTok, Instagram Reels, and YouTube Shorts?
This tutorial will help you efficiently use your YouTube videos to make short-form content. Remember that you should still focus first on making good, engaging content, but otherwise, follow our technical editing tips.
1. Use YouTube Remix
In the YouTube app, you can use any video as a basis for making Shorts with the Remix button. You can use a video’s audio, cut a segment from a video, or use a green screen effect to use the video as a background. If it’s a video you uploaded, you have the additional option to Edit into a Short.
This option is handy but quite limited—you can only select a continuous span of video up to 60 seconds. And your editing options are quite limited compared to using the normal TikTok, Reels, or Shorts creation tools.
You can select a section of a video, then add additional clips either recorded in-app or from your phone’s storage. The main benefits are the simplicity and that the Short will be connected to the original video, which adds an extra layer of discoverability to your content. You can then also save the Short to your device and upload it on TikTok.
2. Reframe Your Video Using Editing Software
This process is primarily for people who have already made horizontal videos in editing software such as Premiere Pro and want to optimize that content by turning it into one or more TikToks. You can also edit TikToks from scratch with Adobe Premiere Rush.
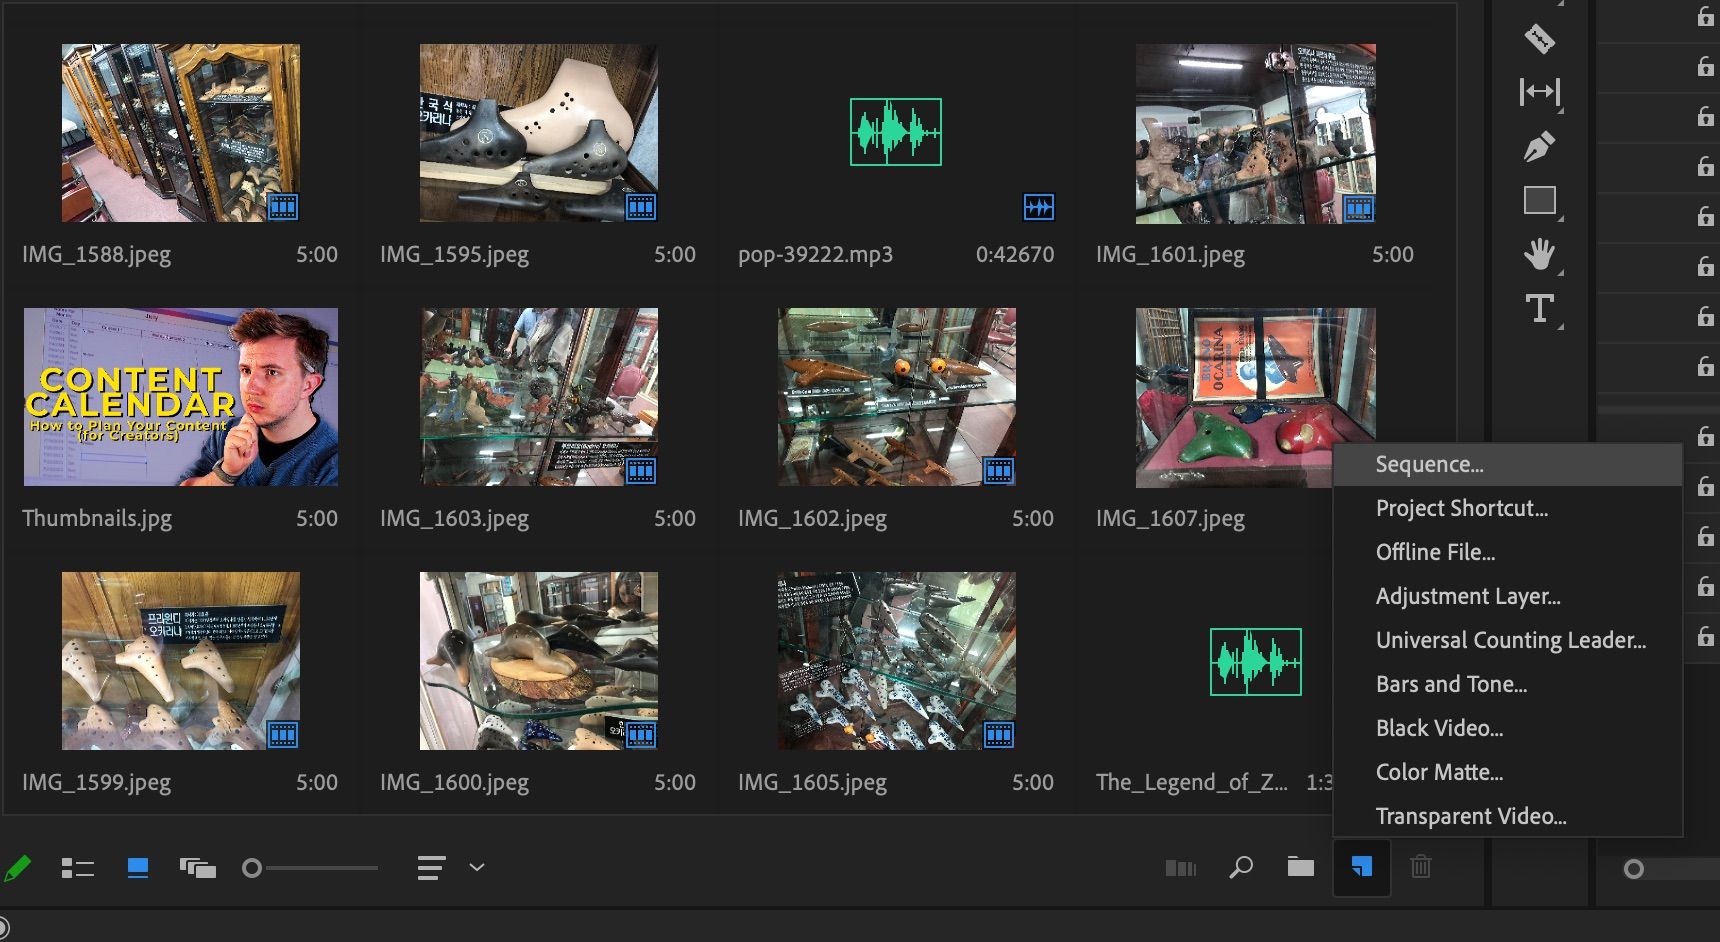
In your editing software, make a new sequence in your existing video project. In Premiere Pro, simply right-click in the project folder (which is by default at the bottom left), click New Item, then Sequence.
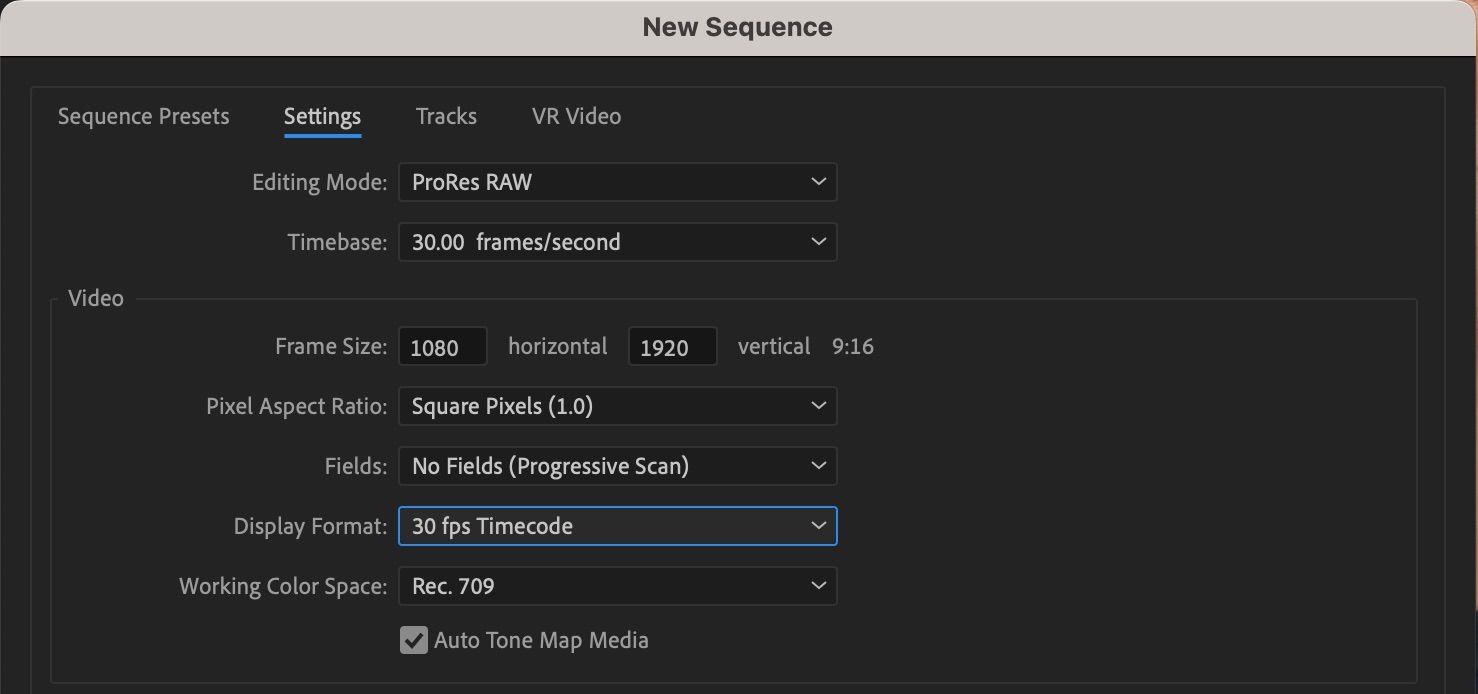
Adjust the sequence settings to 1080x1920 (9x16) or 1080x1080 (1x1) and at the same frame rate as your existing video (likely 29.97, 30, or 60). This matches the portrait orientation of TikTok, Reels, and Shorts.
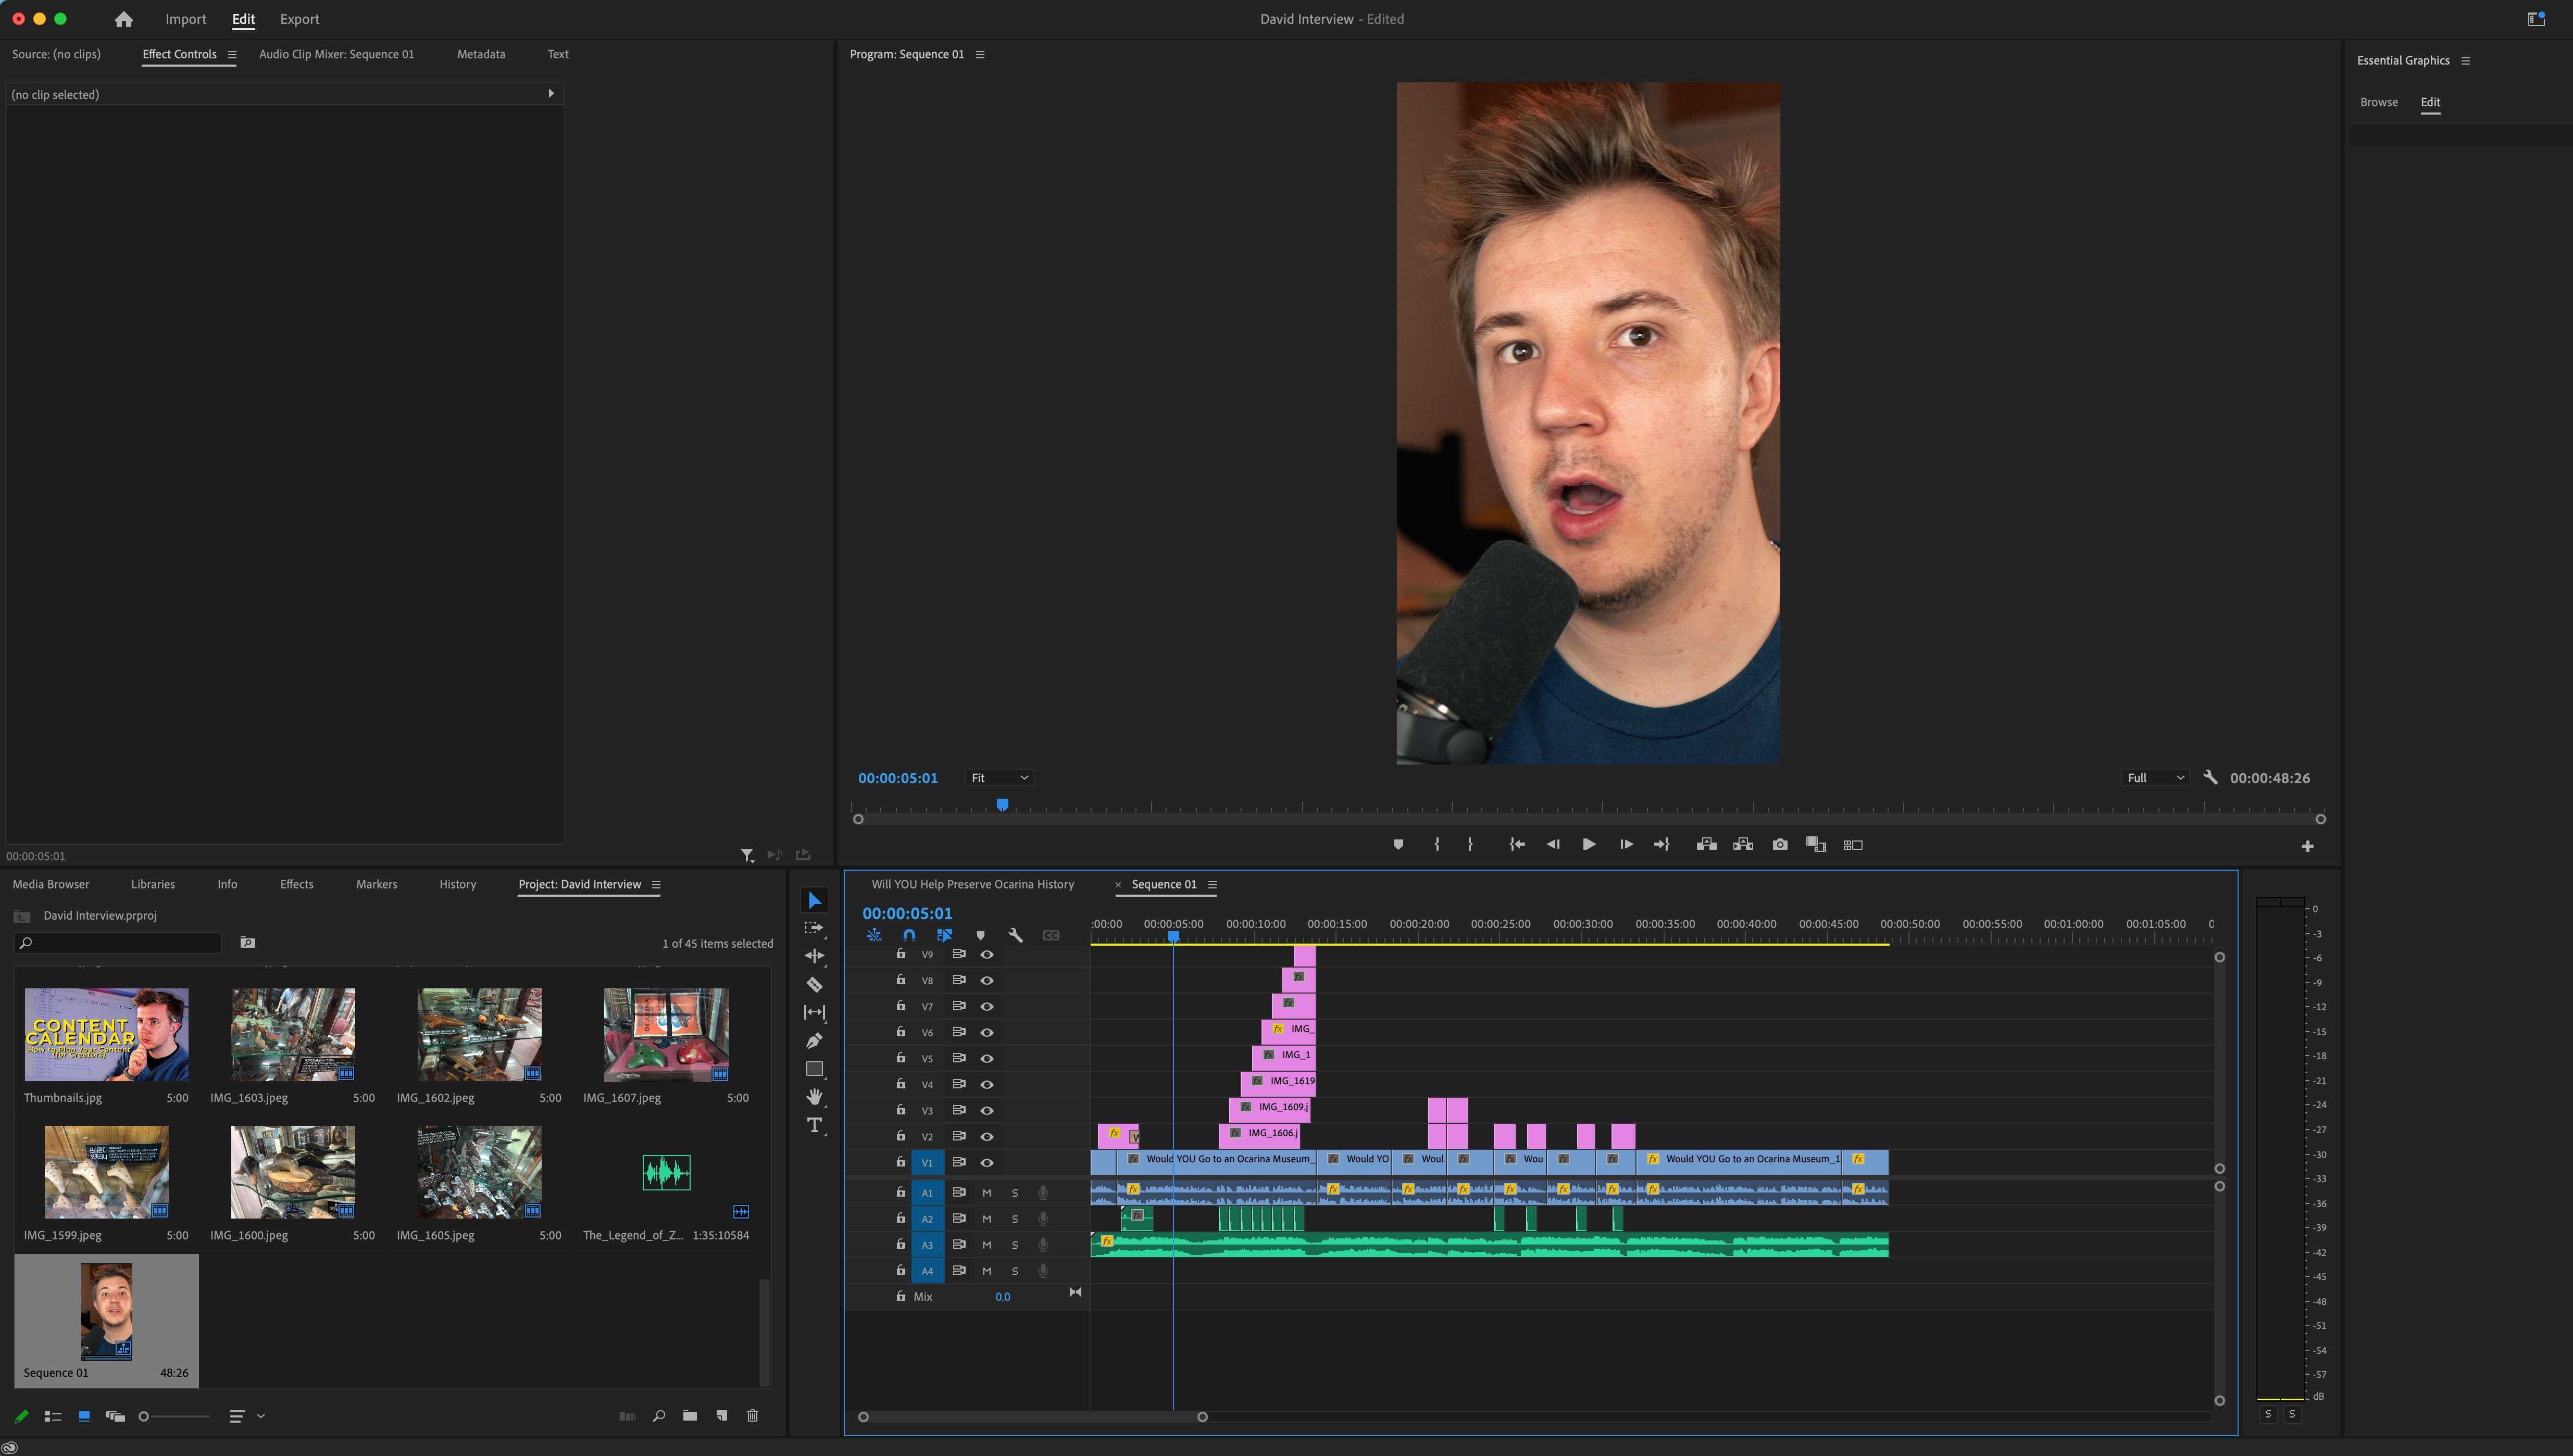
Next, copy some or all of your original video into that new sequence where you’ll be making TikToks. Chances are, your shots will no longer be framed properly or will be much too zoomed in, so now it’s time to adjust the position and scale of your original clips.
If you have one static shot angle, just do this for one clip to start. Otherwise, adjust the clips one by one.
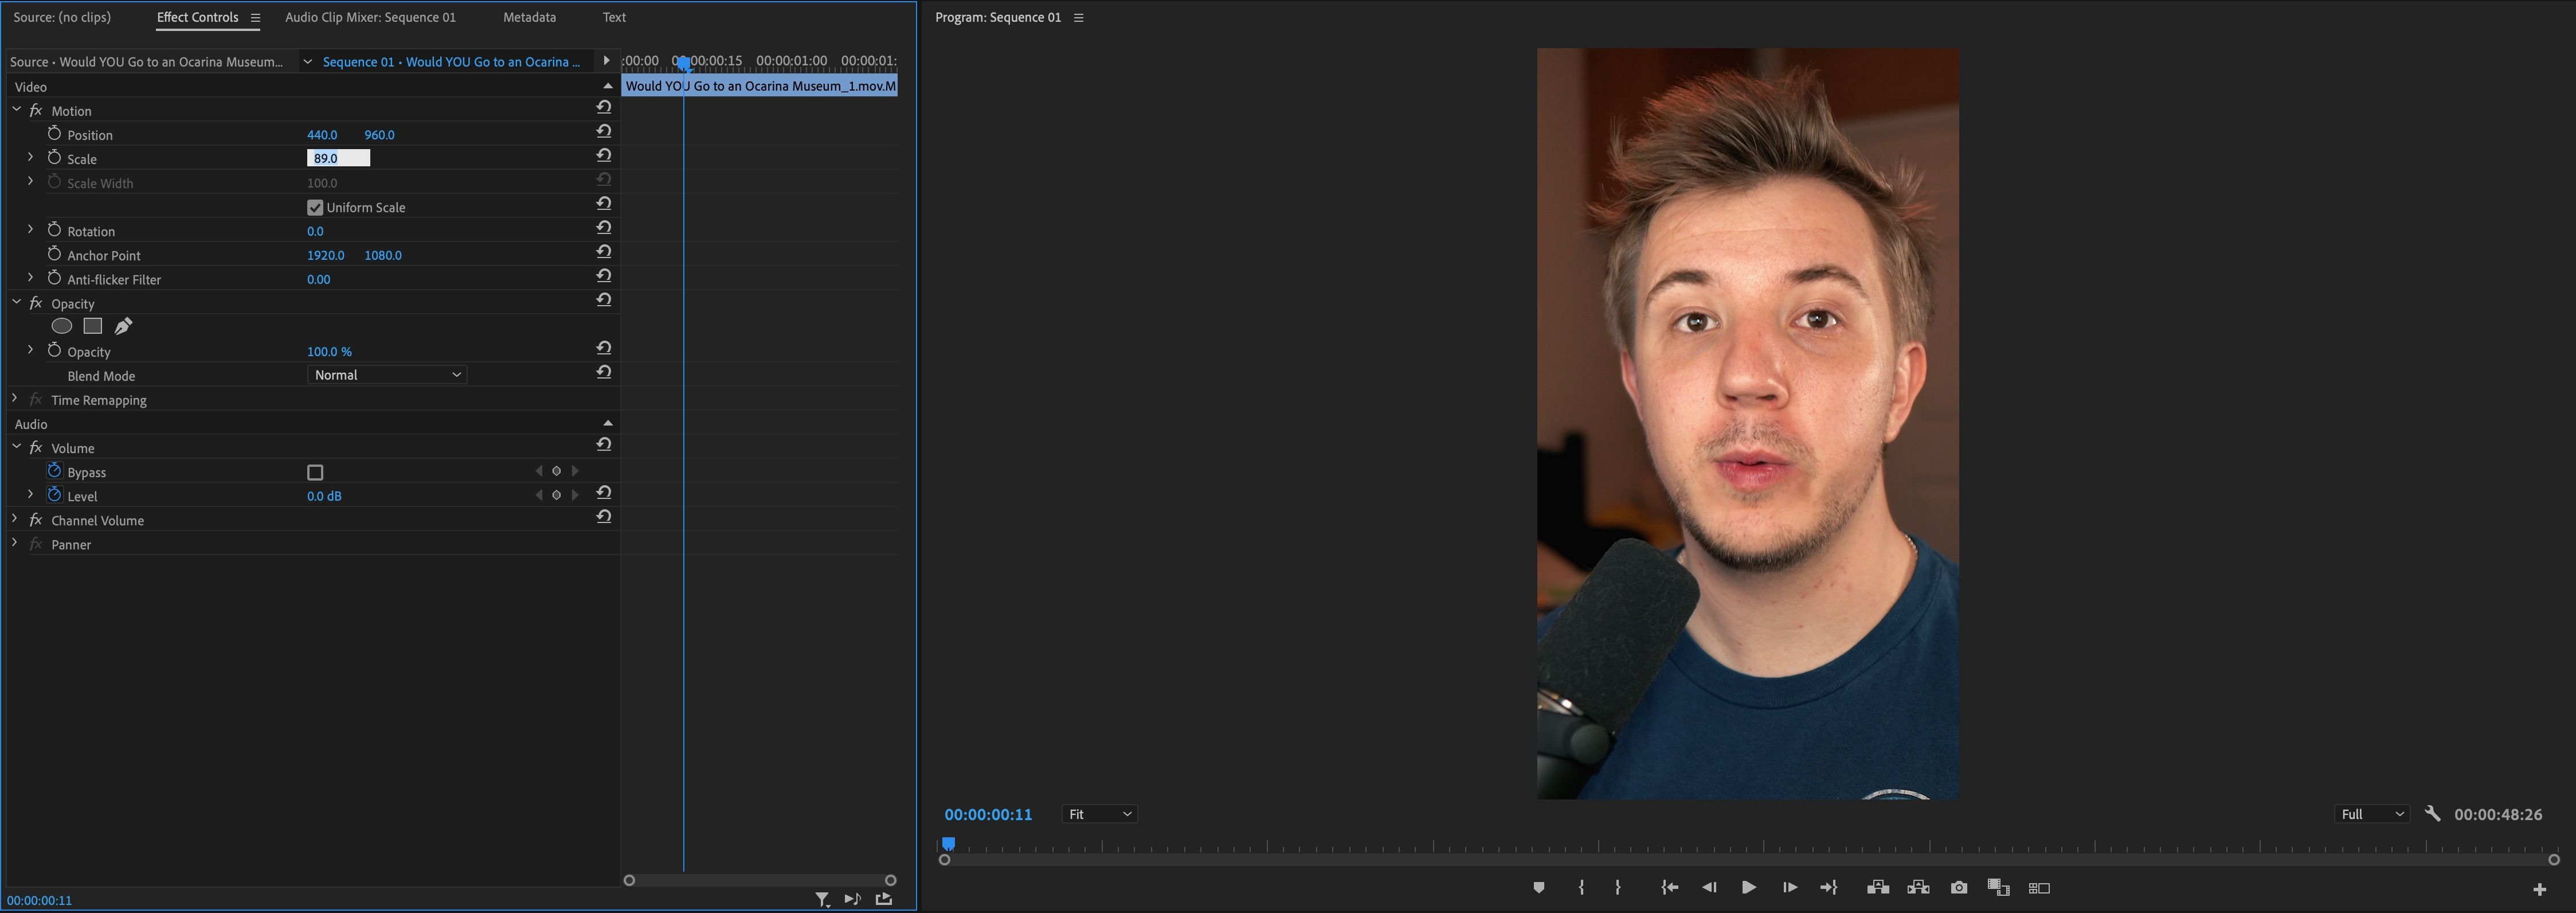
For a 4K video (3840x2160) in a 1080x1920 sequence, set the scale of your clips to 89% to zoom out as far as possible without going out of frame. Then, adjust the framing horizontally to frame yourself as well as you can.
For a 1080p video (1920x1080) in a 1080x1920 sequence, set the clip scale to 180% to zoom in to fit the frame. Then, adjust horizontally to center. If you source video is 1920x1080, consider making your TikTok sequence in 720x1280 (720p at 9:16) or 1080x1080 (1080p at 1:1), so that you have a closer resolution match.
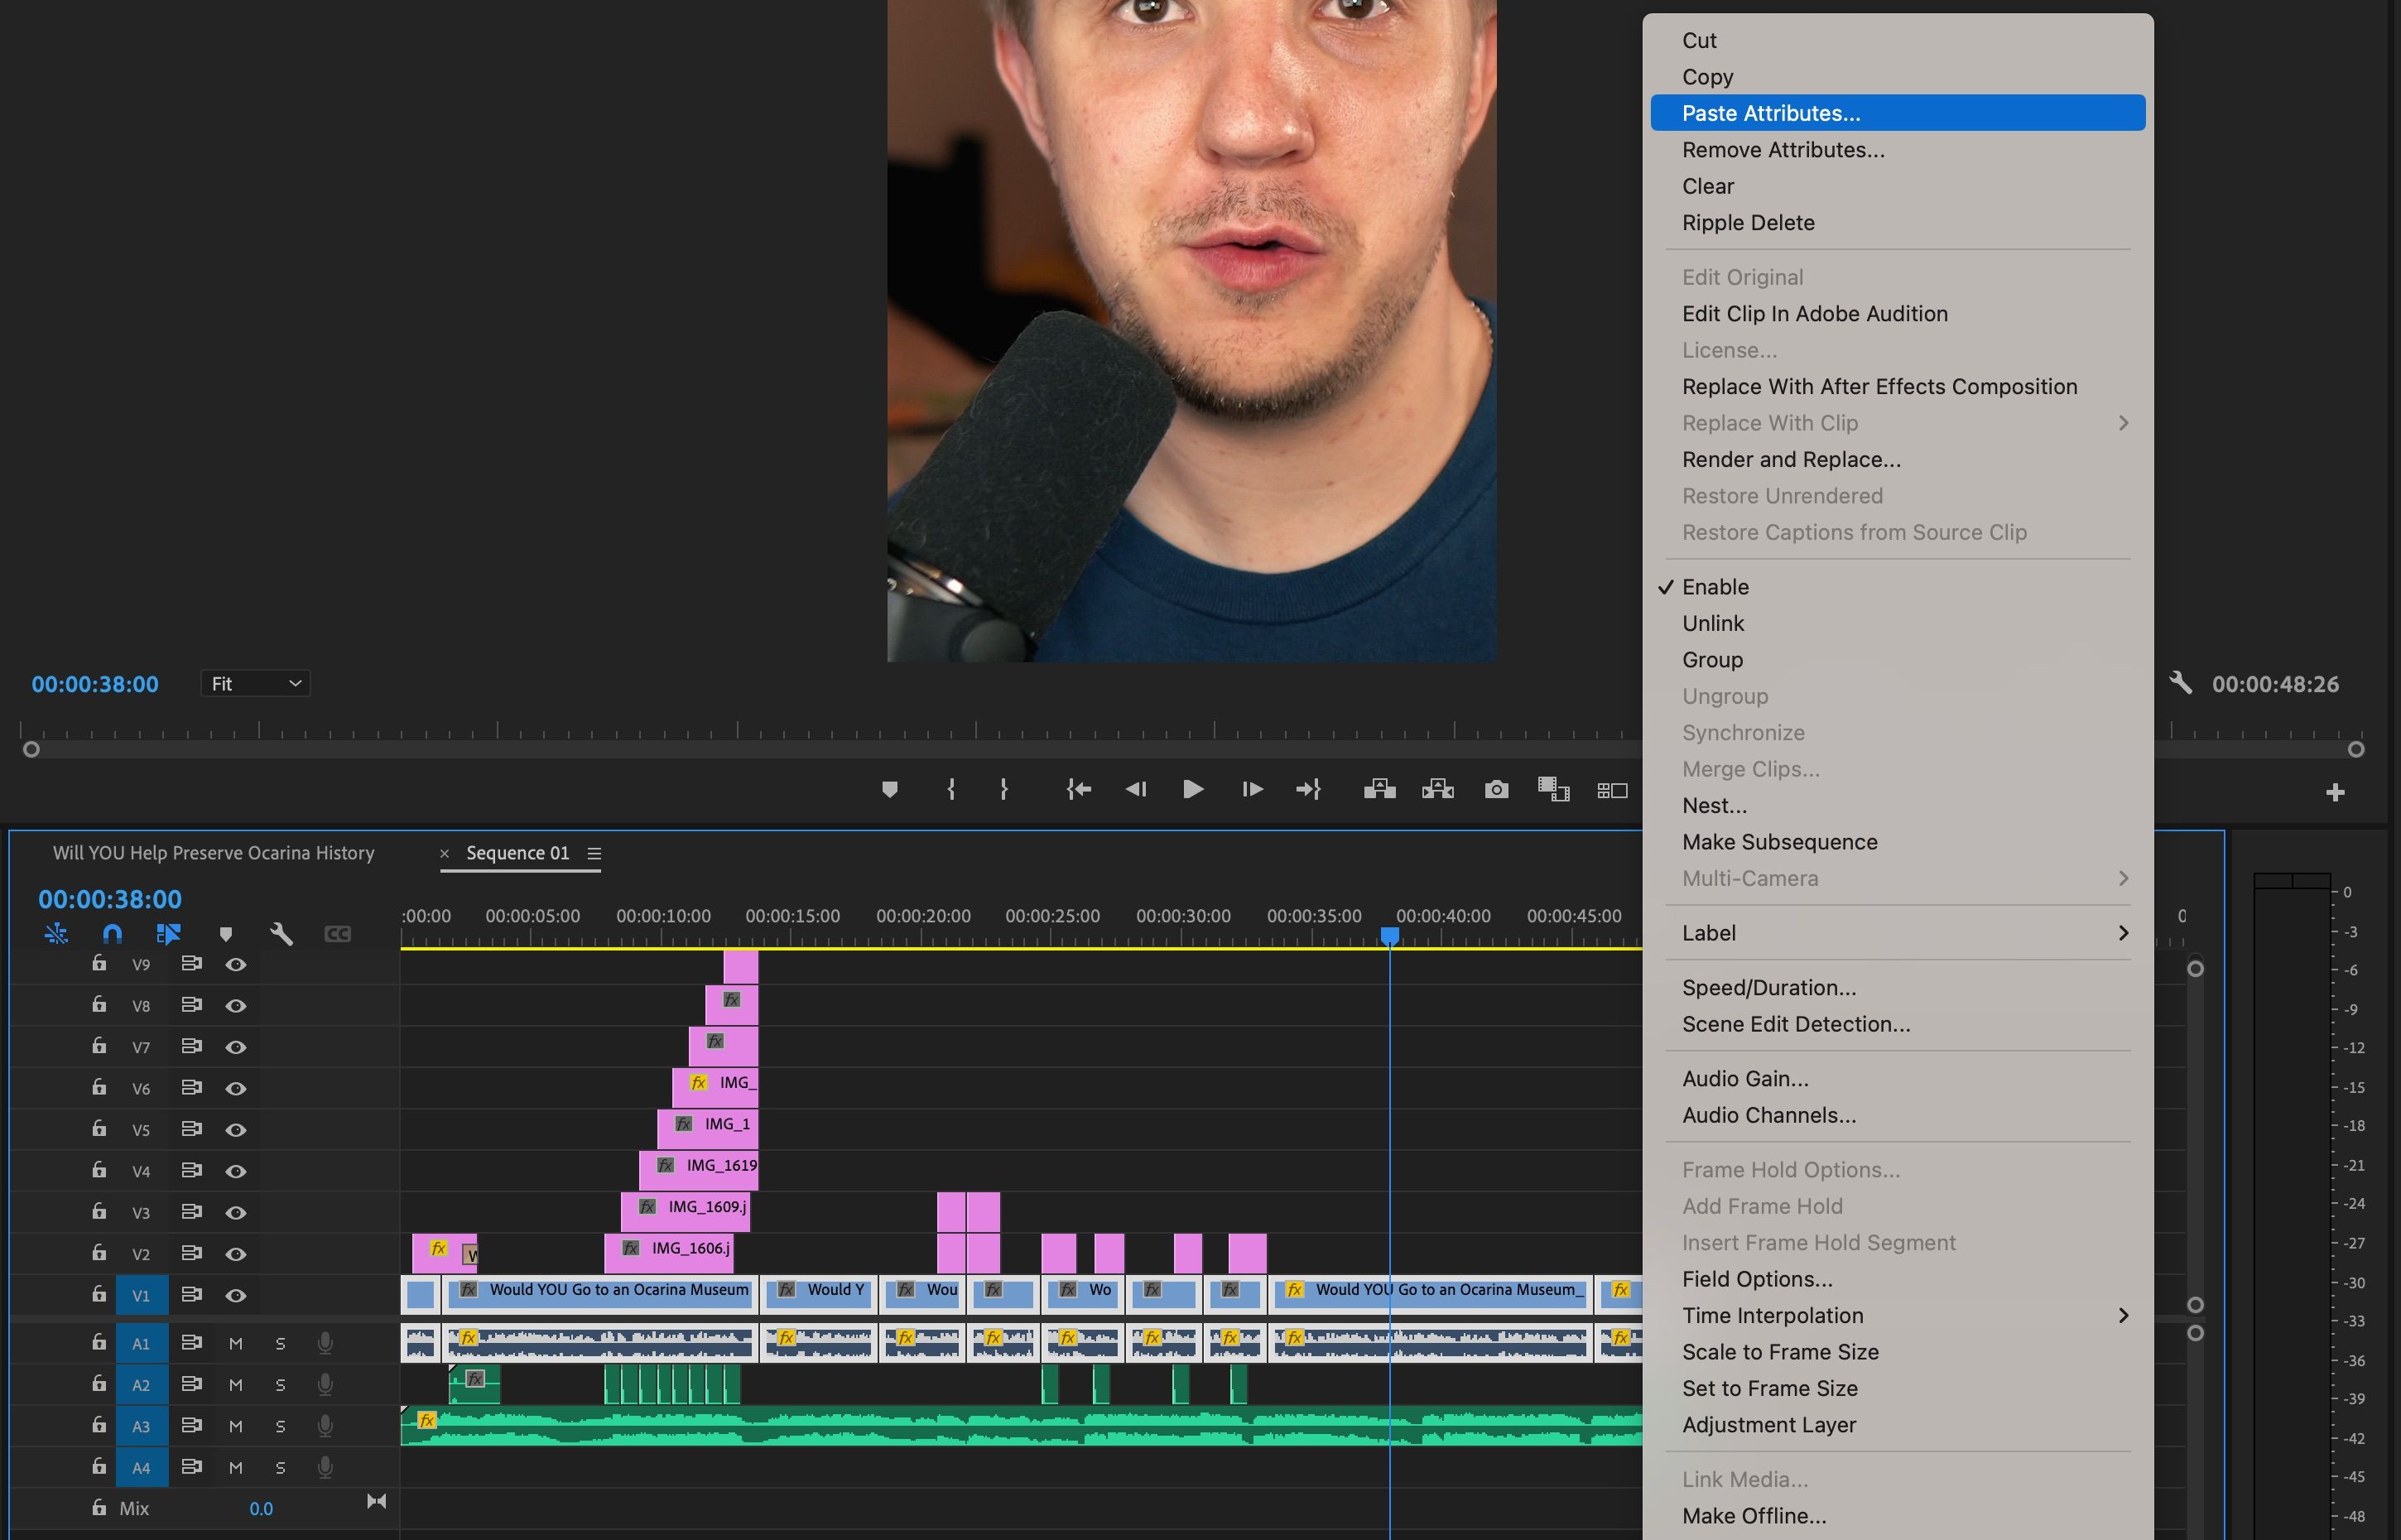
In the case of one static shot across the entirety of your clips, right-click and copy the clip you adjusted. Then, select all clips with the same framing, right-click, and select Paste Attributes. In the popup menu, select Motion to copy the position and scale settings. All clips should have the same scale and position settings as the adjusted one.
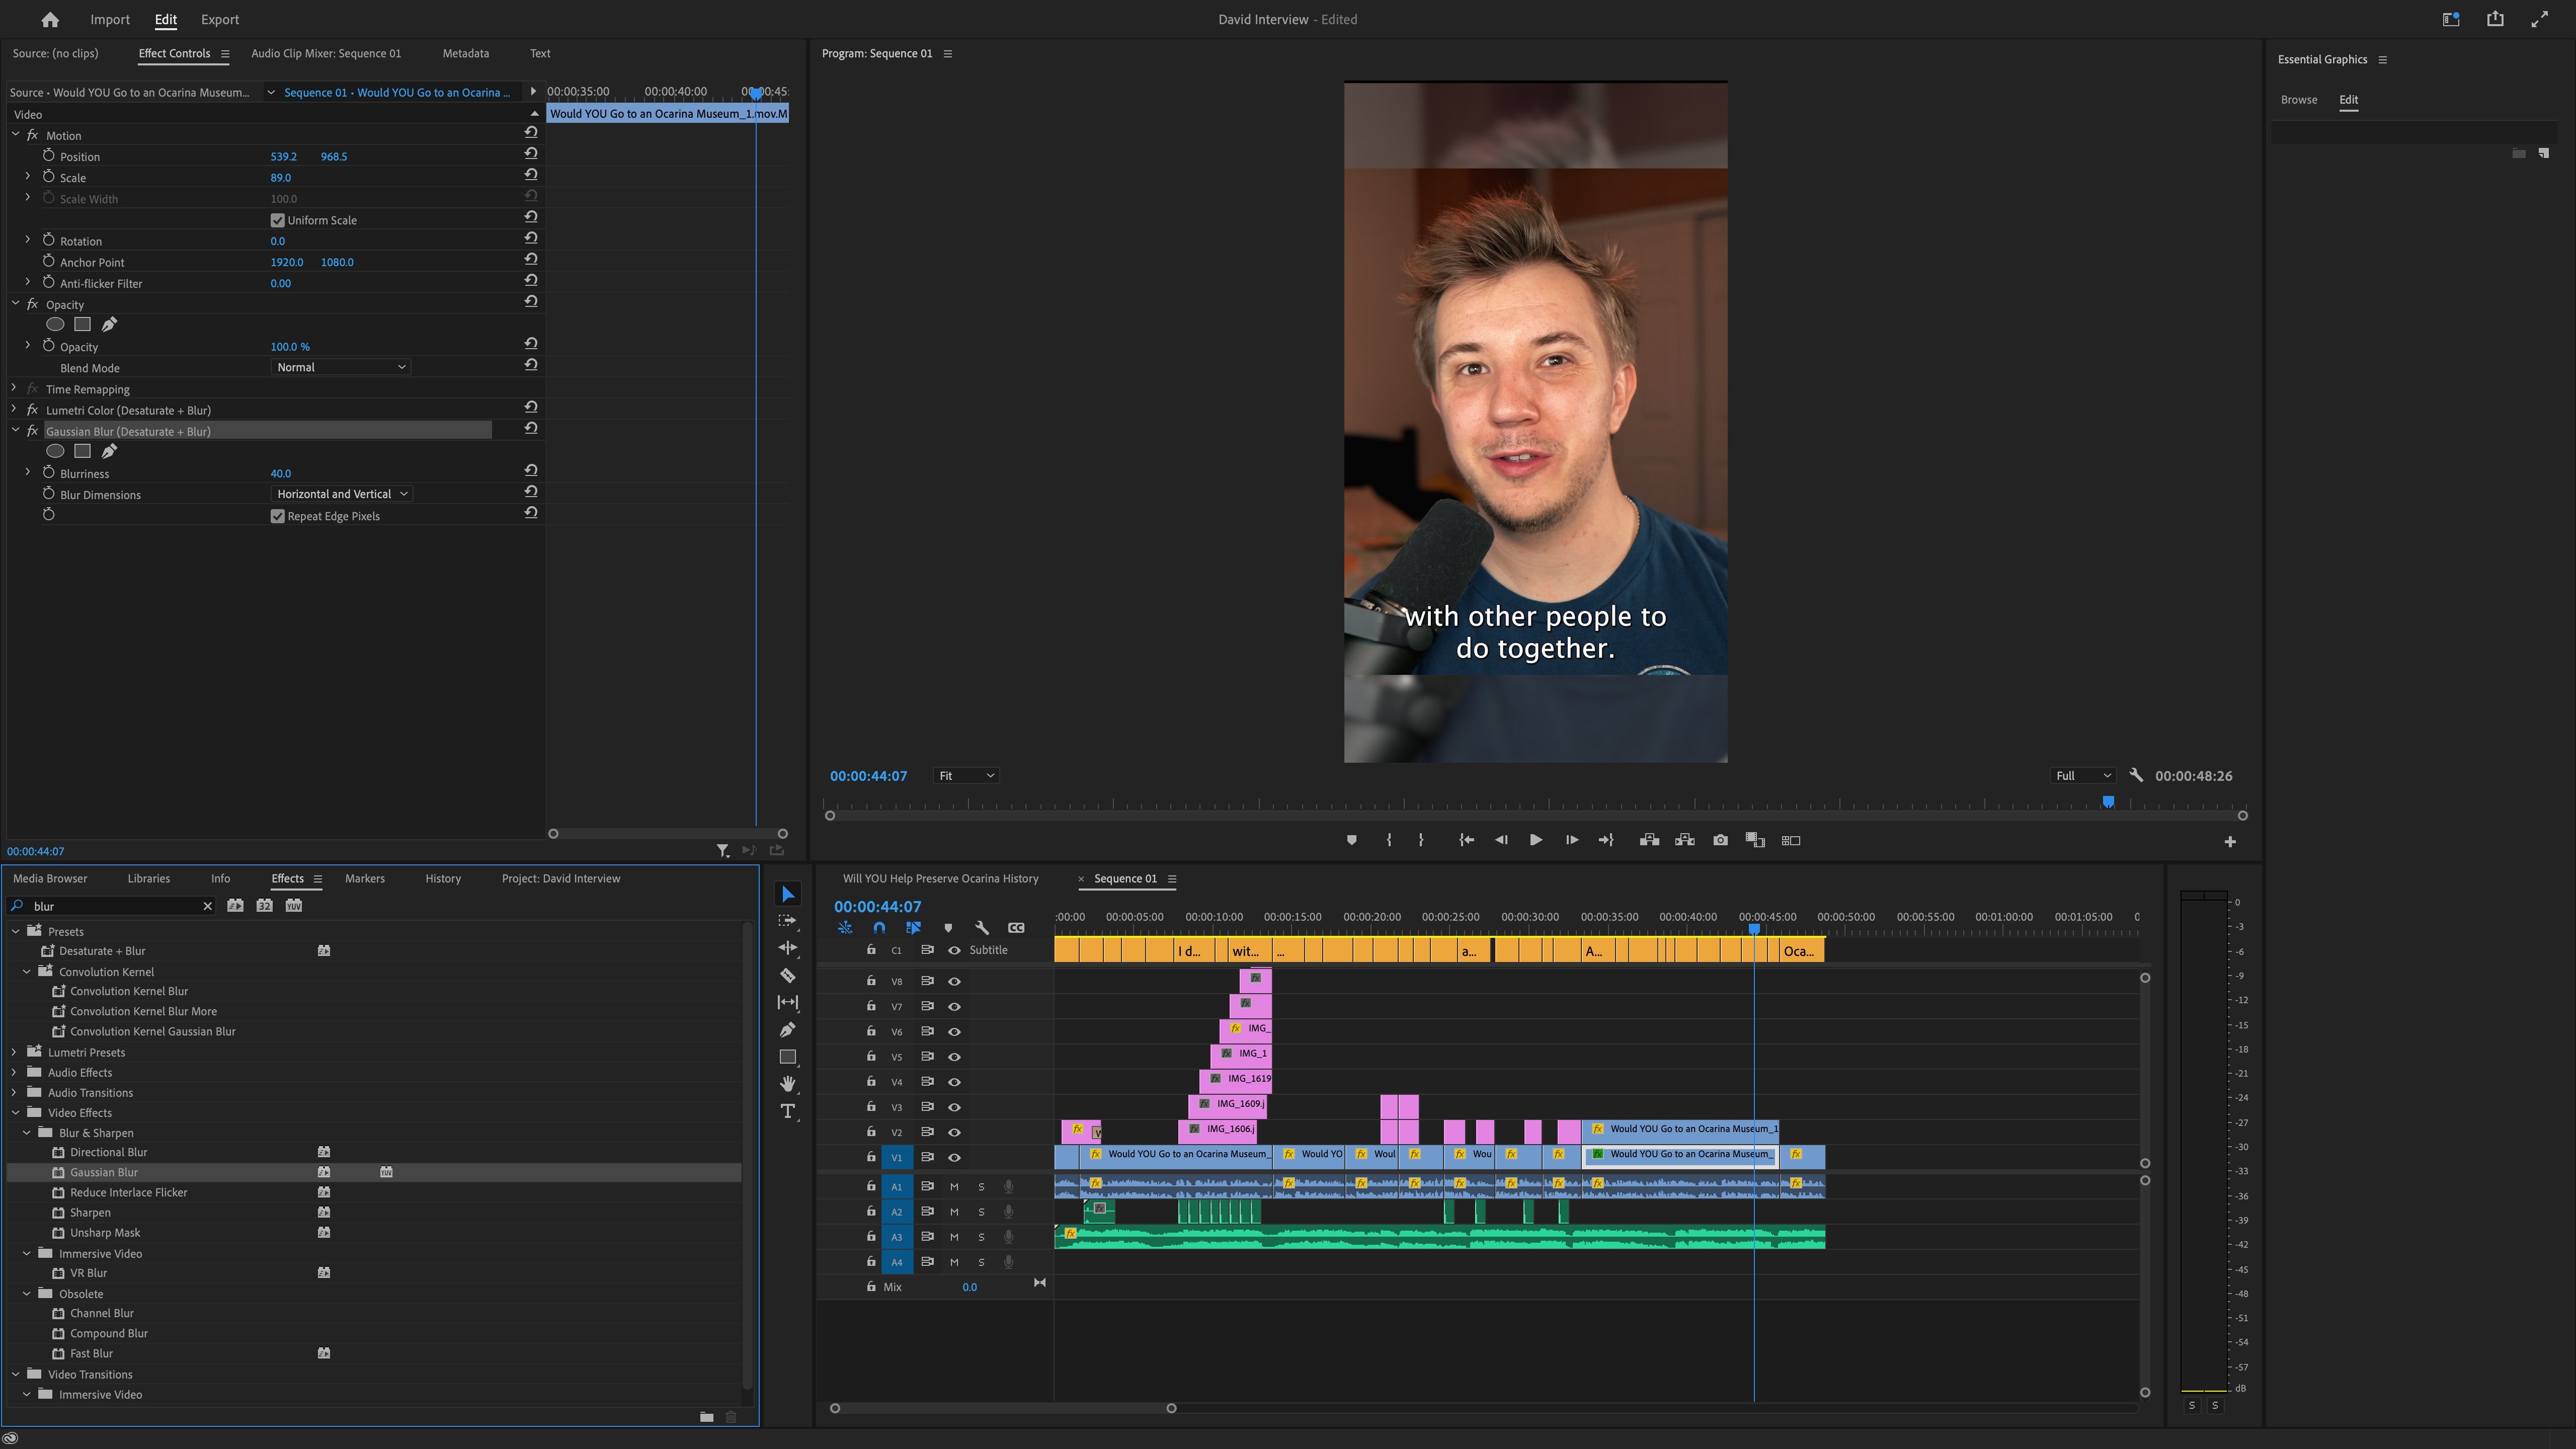
If your video is too zoomed in to reasonably fit in the frame with the above method, zoom to fully fit yourself and then add a background. One fun, more stylish, method to fill out the frame is to copy your same video clips under the main ones and add a blur effect.
If you're a streamer and would rather eschew most of the editing process, you can also create pre-formatted TikToks in OBS while you stream.
3. Create Stylized Captions Using Editing Software
In short-form content such as TikToks, many viewers watch them with the sound off or otherwise consume them more passively than long-form content (hence why you can watch an hour of TikToks and remember none of them).
Adding captions to at least some of the video, if not all of it, can help service these silent or passive viewers by making it easier for them to understand the video’s premise at a glance.
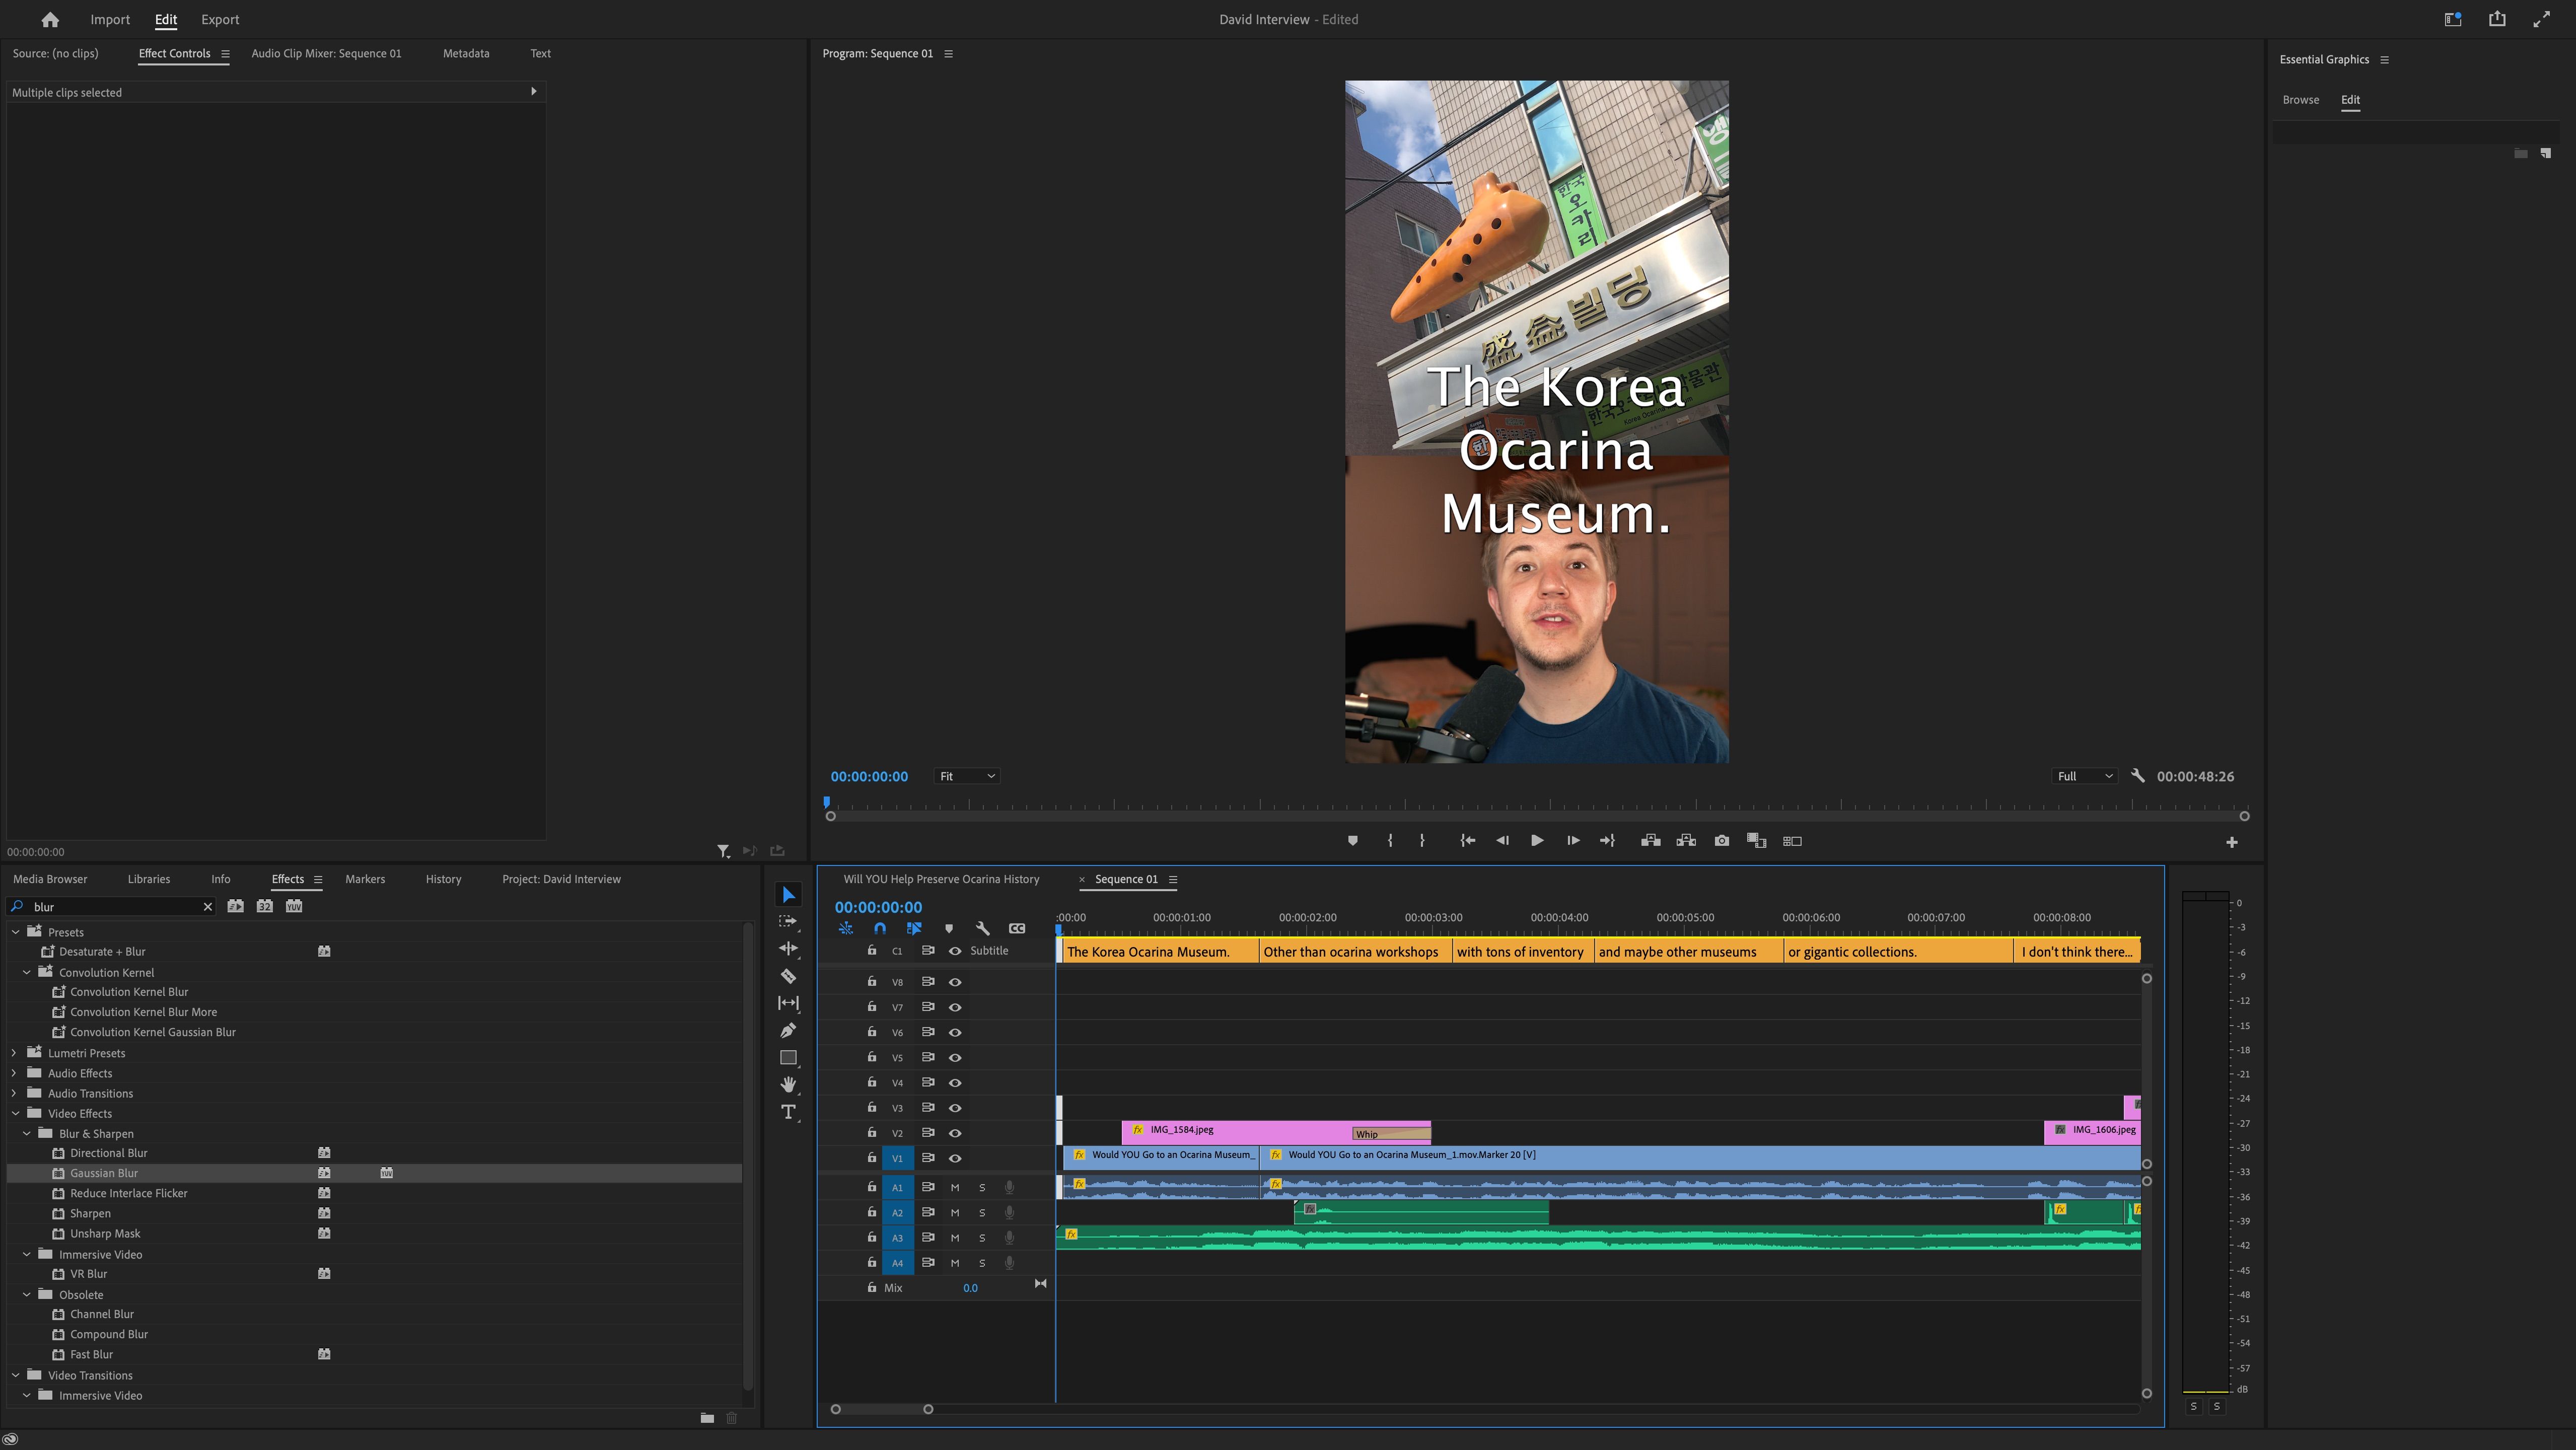
We have a far more in-depth tutorial for utilizing captions in Adobe Premiere Pro, but we'll summarize the workflow. First, use speech-to-text to make quick a transcript of your TikTok sequence. Correct that transcript (including punctuation), then use it to make captions.
Now you have captions! They may appear plain now, but you can apply bulk edits to all of them to make them more stylish.
To do so, select all the captions in your newly generated caption track. In the text setting window on the right side of the screen, you can find adjustments for font and text position. There are also settings such as drop-shadow for depth and stroke for an outline.
This is somewhat limited compared to manually writing and editing captions using the text tool, but it's a much faster way to stylize your captions to your liking. Your specific caption style will vary, but we recommend moving the text closer to the center of the screen via a negative Y value in the Align and Transform setting, and making the font larger as well.
4. Create a TikTok Thumbnail From Your Video
The last technical step to consider is making a TikTok thumbnail in your editing timeline. You can select any frame from the video to be the thumbnail of the TikTok, but when uploading, the first frame is the default thumbnail, so it’s most efficient to make a good first frame.
Note that on a TikTok user’s profile, the thumbnail cuts off the top and bottom of the video to a 3:4 aspect, so whatever you want to have there should be within the middle 75%. In the case of a 1080x1920 video, the specific thumbnail framing is 1080x1440, so the top and bottom 240 pixels will be cut off.
It’s also worth noting that Instagram Reels have a 1:1 aspect ratio for thumbnails on your main profile and a 9:16 aspect ratio in your Reels tab. Whereas YouTube Shorts have almost a 9:16 aspect ratio with a slight top/bottom cutoff. In any case, framing a thumbnail to fit in the middle 75% of your frame will optimize it for most platforms.
As for making a thumbnail, add stylish text that summarizes the topic of the video and ensure the visuals are eye-catching. Another strategy would be to simply make an eye-catching, digestible thumbnail in photo editing software and set it as your first video frame in Premiere.
On TikTok, thumbnails aren’t the most crucial step, as most people discover content through their For You page. That said, if anyone checks your profile after discovering you, your videos should be easily identifiable with clear thumbnails.
Edit Less by Repurposing Your Content
As crucial as these technical tips are, remember to make engaging content! The more engaging the original YouTube video is in terms of shot composition, B-roll, stock footage, and audio, the easier it'll be to turn it into a TikTok.

