Using mail merge, you can personalize bulk emails and letters by using placeholders. All you need is a database of contacts and a template for emails or letters to them.
In this article, we will show you how to create a Microsoft Word mail merge using an Excel database. The steps are taken from Microsoft Word and Excel 2016, but the process is the same for all editions.
How to Do a Mail Merge From Excel
The mail merge uses data sources from a database and places them in respective placeholders to personalize your bulk emails. These databases could be anything from the below-mentioned list:
1. Open your Microsoft Excel spreadsheet.

2. Create a manual contact list in Word when using mail merge.

3. Choose contacts data from the Microsoft Outlook app.

You have two sets of options to choose from:
- Gmail contacts in a compatible file.
- Microsoft SQL Server.

Microsoft Excel workbook database is most preferred when you need to use mail merge in Word. For mail merge, you’ll use Excel to create a database that Word will use later on.
If you don’t have an Excel file with contact details, you may use this sample Excel file for trial purposes.
To avoid any inconsistencies in your bulk emails or letters, you need to tweak your Excel file as mentioned below:
- The first row should only have column headers starting from cell A1. Word will use these column headers as Merge Fields when you use Microsoft Word mail merge.
- You should edit the column headers to match the placeholder names that you’ll be using in the email or letter template document.
- You need to ensure that the spreadsheet file contains contact data as one record per row pattern. For example, in the current tutorial, every available contact detail of the customer James Butt is accessible between cells A2 and J2.
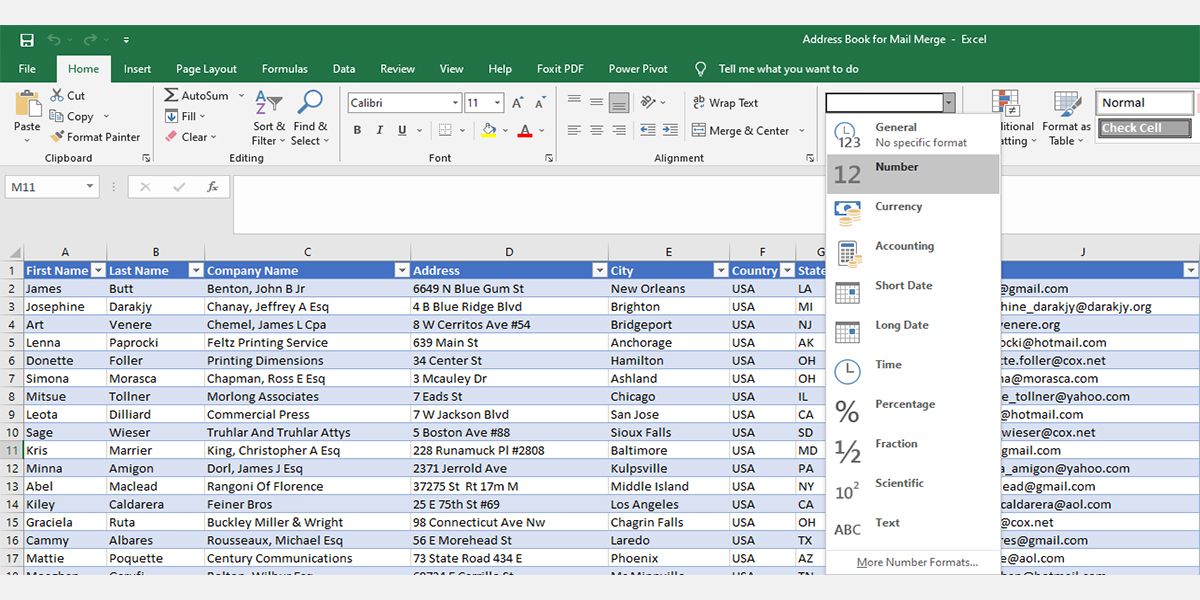
- Numeric data for any contact, like ZIP codes, discount percentages, mileages, currencies, etc., should be in the appropriate number format.
- To make any changes, select the cell or a range of cells that contains the numerics.
- In the Home tab, within the Ribbon, click the dropdown arrow besides General.
-
Make all additions before linking the mail merge Word document to the Excel database file. Once you make all the changes, save the Excel file.
- The Excel database file of your contacts should be present in the local storage of your computer.
- Ensure that all data are in the first sheet of the Excel workbook.


How to Do a Mail Merge in Word
After creating the database in Excel, you need to open the email or letter template that you want to send to many recipients. Follow the steps as outlined below:
1. On the Ribbon, click on the Mailings tab.

2. In the Start Mail Merge group, you’ll need to click on Start Mail Merge.

3. You’ll see six mail merge document types. Click on Letters or E-mail Messages.
4. On the Start Mail Merge group, click on Select Recipients. You'll see options such as Type a New List, Use an Existing List, and Choose from Outlook Contacts.

5. You can choose any of the above three options depending on how you want to link the contacts list to the template letter. In this tutorial, let’s select Use an Existing List to utilize the Excel database that you created or downloaded earlier.
6. On the Select Data Source dialogue box, locate the folder where the Excel database file is available. Once you find the file, select it and then click on Open to load the database into Word's mail merge.

7. You’ll see the Select Table dialogue box. Exit the box by clicking OK without making any changes in the dialogue box.

8. That's Great! You’ve successfully linked the source data with the Word mail merge program.
9. Word will automatically match database column headers with merge field items. To ensure appropriate matching, go to Write & Insert Fields group on the Mailings tab of the Ribbon and then click on Match Fields.

10. Match Fields dialogue box will show up. On the left side column, you’ll see the merge field items. On the right side, you'll find matching data from the linked Excel database.
11. It’ll be the same if you use other source data like Outlook contacts or exported contacts from Gmail. Ensure that there are no mismatches by scrolling through the list. Click on OK to close.

12. On your template letter, put the cursor ahead of the first letter and press Enter a few times to make some space above the letter body.
13. Place the cursor on the top of the document and then click on Address Block in the Write & Insert Fields group on the Mailings tab of the Ribbon.

14. On the left side of the Insert Address Block dialogue box, you can choose the name, company name, address, country, etc., formatting options. On the right side, you’ll see a preview of the address block.
15. You can use the Match Fields options to rectify any input data mismatch. Click OK to add AddressBlock within chevrons.
16. Next, click the Greeting Line in the Write & Insert Fields group after AddressBlock, giving it a line spacing.

17. The Insert Greeting Line dialogue box will appear. You may make the changes as you desire and then click OK. The GreetingLine within chevrons will show up in the letter.
18. You may click on the Preview Results command on the Ribbon to see how the letter looks.

19. You can also add custom merge fields apart from AddressBlock and GreetingLine. Let’s say you want to add Vehicle Make and Model within the letter body.
20. To do that, open the Excel database file linked to mail merge and add the Vehicle Make and Model column header. Enter vehicle details and save the Excel file.
21. Now, go to the mail merge Word document and repeat steps four, five, and six.
22. Now, select any word or a few words within the letter body and then click on Insert Merge Field on the Write & Insert Fields group.
23. On the Insert Merge Field box, choose Database Fields, and then select Vehicle Make and Model. Click on Insert to add the custom merge field.

24. This is how you can add as many variable placeholders as you want to customize each letter or email that you send. Microsoft Word mail merge will automatically match data to the name of the recipients.
25. On the Ribbon, click on Finish & Merge command and then choose Print Documents or Send Email Messages. You may also click on Edit Individual Documents to proofread your emails or letters before sending them.

Use Mail Merge to Boost Email Productivity
Now you know how to do a mail merge using Microsoft Word and Excel. Use mail merge to send tailored emails faster and set up a good rapport with your professional or personal contacts. Keep using Word to make your professional and personal life easier than before.