Setting Up a Live Performance Stream: Budget to Professional
Looking to get in on live streaming? Here are a few ways to get started job done. See how to set up a live performance stream professionally and on a budget.
While it may be some time before we get to experience in-person live performances again, many performers, musicians, and other artists are moving their shows online.
If you’re a performer who’s interested in live streaming or someone looking to provide streaming services to others, there are a handful of ways to make it happen — no matter your budget. We’ve broken down a few of these approaches and rounded up some gear suggestions, ranging from entry-level to professional.
So, let’s get started and get you online.
Entry-level Streaming Setup
As always, the budget is everyone’s main concern. The best way to keep costs down is to use what you already have. Fortunately, 2020 does provide some great avenues for live streaming on the cheap, while utilizing some gear you may already own.
Software
Let’s start things off with the software. The broadcast software is how you’ll coordinate the graphics, media, and video footage into a single feed that’ll be broadcast across the platform of your preference (Twitch, Facebook, YouTube, etc).
The go-to at the moment is OBS (Open Broadcast Software) — an entirely free, open-source program that can run on even modest computers. OBS is a user-friendly, straightforward program with robust features that can carry you into a professional setting.
Learning OBS will get you familiar with the functions of live streaming and how a live broadcast functions. As with any software, there’s a learning curve, so we suggest giving things a test run before debuting a live show.
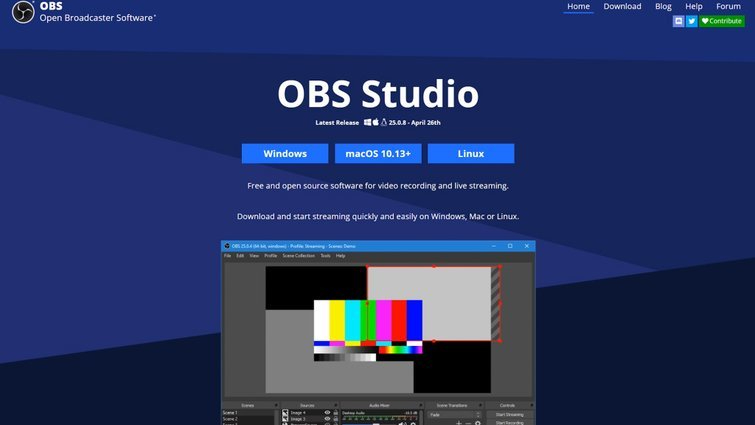
Learn the ins and outs of streaming with OBS Studio. Image via OBS.
Camera and Audio
Having a good image to send over the stream is important. But, to cut costs, try to utilize the gear you already own.
Luckily, most camera companies have recently released software that makes their cameras usable as webcams. You’ll simply be able to connect your camera to your computer via a USB cable and get a signal into OBS. If you own a camera released within the past couple of years, chances are it’s compatible with the new software. Be sure to check the compatible camera list first — before getting started.
Here are some of the recent releases:
- Canon EOS Webcam Utility
- Sony Imaging Edge Webcam Utility
- Fujifilm X Webcam
- GoPro Webcam Desktop App
If you don’t own a dedicated camera of your own, don’t worry. Using your phone as a camera is still an option. We’ll start off with the option for iOS users. If you’re an Android user, the steps are a little more complicated, but you can skip down below.
For the best quality and low-latency approach, you’ll want to connect your iOS device via USB directly into your computer running OBS. In order to do this, you’ll need to download the app Camera for OBS Studio. While this app is not free, it’s cost-effective versus purchasing a camera able to do a similar function. Running the app will make your iOS device function as a webcam.
To get things going, you’ll also need to install the Camera for OBS Studio on your computer so that OBS can also recognize the phone. As a bonus, the iOS app will give you access to a few professional video tools built into the camera — like zebras, exposure control, white balance, histogram, and focus peaking.
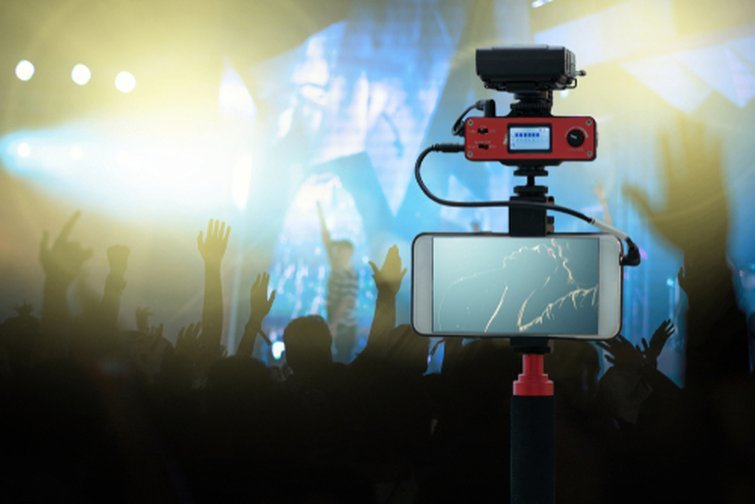
Begin by connecting your iOS device into your computer via USB. Image via TZIDO SUN.
If you’re an Android user, you’ve still got options. You’ll be using a wireless video-over-Wi-Fi type of function called NewTek NDI Protocol. Essentially, you’ll be using your phone as a media server, then sending your video signal to your computer within your local Wi-Fi network. This is efficient (in theory) but could be prone to some lag and quality issues. The quality of your network, phone’s signal, video, and computer could all be a factor in how well this feed works.
To get things going, you’ll need to install IP Webcam from the Play Store onto your phone. This will give you the option to start the server from your phone when running the application. Within OBS, you’ll create a media source that’ll display the signal from your phone. While it’s a pretty straight-forward process, it can be a little tricky if this is your first time in this territory. Luckily, we’ve found a simple and concise setup tutorial that walks you through all the steps.
For audio on a budget, you may be required to use either the onboard microphones built into the camera you’re using, or an external microphone that can feed right into your camera (Røde Videomic or Diety V-Mic). This isn’t the best solution when it comes to capturing good audio, especially with a music performance, but it may be what fits within your budget.
OBS does have some built-in audio features — such as audio limiters, noise-suppression, compression, and noise-gate — that could prove useful. Be sure to monitor your audio levels within OBS to ensure you’re giving a good signal out and not peaking.

For audio, either use the built-in camera mic or an external mic that feeds into your camera. Image via TZIDO SUN.
Within a minimal budget, there’s a lot to improve upon, but this is a perfect starting point. It can get your feet wet in the live-streaming world. Once you have a few streams under your belt, you’ll know where you could improve the quality and where you should save to take the next quality jump.
Mid-level Streaming Setup
Getting a mid-range live-stream setup and keeping things within a specific budget can be a bit tricky. A lot of the options assume you have access to a specific level of gear already, such as a video camera or microphones. Here’s how you can step up your live stream from the entry level without getting too pricey.
Software
This is the one area you’ll be glad to hear you won’t have to spend any more dough on. OBS is still a solid option for any level of stream. If you’re venturing into this category, be sure to take the time to learn the more robust features of OBS you may have been ignoring before.
Utilize the Scenes option to transition between pre-show slides, breaks, live performance, and the end credits. Build out graphics that could be shown over the video feed to let viewers know more information about the artist and/or production. Production-quality not only comes from the gear and cameras being used, but how well it’s all broadcast to your audience.
Video
If you’re stepping up from the camera phone option above, consider purchasing a camera from any of the major manufacturers that have the ability to use the camera as a webcam. See the links above for compatible cameras. Budget-friendly models can be purchased for about $500 (FUJIFILM X-T200, Canon EOS Rebel T7).
You may have a camera model that isn’t supported by the manufacturer’s webcam utilities, yet has the ability to output a clean HDMI image. Cameras such as the Blackmagic Pocket Cinema Camera 4/6K, Sony a6300, Fujifilm x100V, or Canon C100 aren’t able to connect via USB to your computer, but can provide a clean HDMI signal out to an external recorder.
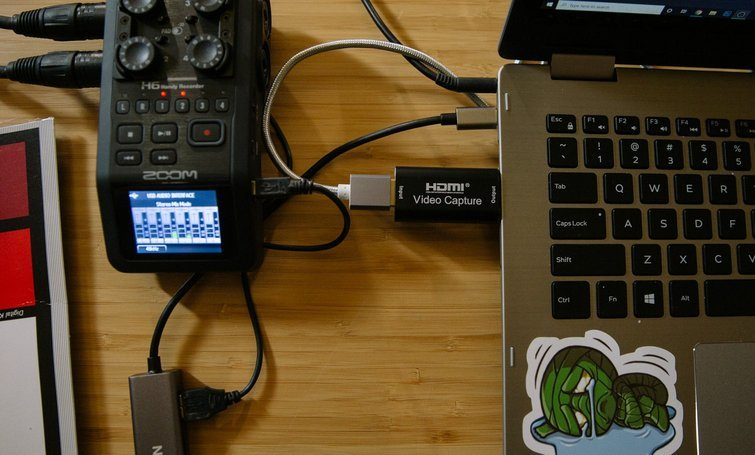
In order to use this signal, you’ll need a video capture device. These devices will take your HDMI signal from the camera and make it a USB signal your computer will be able to use as a webcam. Many of these devices are so easy to use, you could have a streamable video in a matter of seconds. These USB devices are limited to a 1080p output, though many streaming platforms are capped at 1080p anyway.
These devices usually fall in the $30-$100 range, depending on the output, connectivity, and features. A standard USB 2.0 dongle will run on the lower end, while a USB-C or Thunderbolt connection will be a bit more expensive.
If you have multiple cameras available, you may be able to use multiple capture devices and create a multi-cam stream. Be sure to test this out ahead of time, as your computer may not be able to handle the throughput of multiple cameras.
Additionally, if you’re mixing different cameras from multiple manufacturers, be sure to get the color profiles as close as possible. Simply white balancing similarly may not be enough. OBS does allow for some color tweaking and adjustments within the application.
Audio
Improving your audio game is just as important as the quality of your video. The goal is to have multiple audio inputs with the ability to control them independently. Just like your video camera, you may be able to use some gear commonly found in a filmmaker’s arsenal.
Portable audio recorders — such as the Tascam DR-40X or Zoom H6 — allow the use of the recorder as a USB audio interface instead of just an external audio recorder. This serves the same function as the video capture devices above, just for audio. Your computer may require some drivers installed, so check with the manufacturer of your audio recorder to make sure you have the right software installed. If you don’t own a portable audio recorder, they’re a great investment to add to your gear list.
On a budget, microphones can be a bit tricky, especially when dealing with music recording. The portable audio recorders mentioned above are able to double as dedicated microphones, but aren’t geared for music recording specifically. If you’ve hit your budget limit, you could use video microphones to do the trick — such as a lavalier or shotgun microphone. While this isn’t ideal for music recordings or professional musicians, it could do the trick for the time being.
Investing in some entry-level music microphones would be the ideal route if you plan on continually providing live music performances. Luckily, there are a few budget-friendly options for music recording microphones that’ll provide enough bang for the buck.
For vocals, the Shure SM58-LC is a perfect starting point. This microphone is tailored specifically for vocal pickup, sports a cardioid pickup pattern, and built-in wind/pop filter. It also has the added benefit of actually looking like a microphone for a musical performance, so the audience isn’t wondering why a boom mic is being used for vocals.
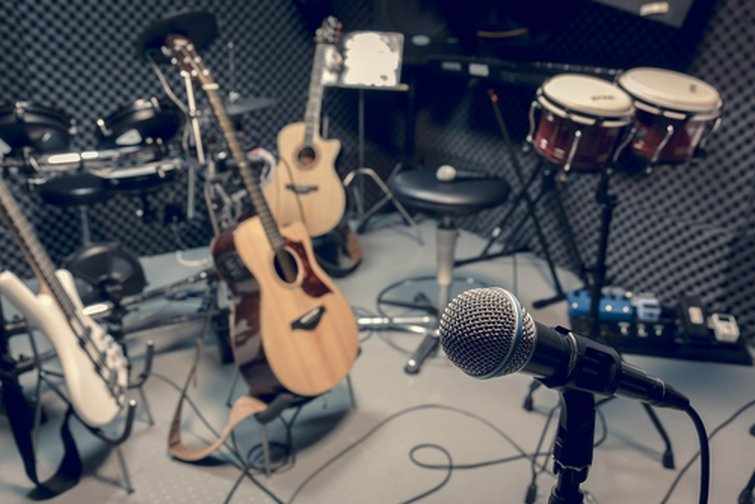
For long-term recording, invest in some entry-level microphones. Image via OSABEE.
For the instruments, the Shure SM57 will have you covered. This microphone will be used to pick up the audio coming straight off an acoustic guitar or drum set. At about $99 each, picking up multiple microphones may be a good option if you plan on recording a larger performance outside of a singer-songwriter-type setup.
This mid-level range is a good starting point if you want your live stream to look and feel professional (yet on a budget). Behind the scenes, you may be finding creative solutions to get the stream going, but on screen, it has the ability to look and sound great.
Professional Streaming Setup
Where the previous tiers were options that could get you online and streaming with the lower barrier of entry, professional gear is built for the specific reason of live streaming. In the professional setting, stability, ease-of-use, and organization is key. It may seem like a lot of dough upfront, but on a professional set, you get what you pay for.
Video
Assuming you already have your camera situation figured out, you’ll want multiple professional-level video cameras, ideally with similar video quality or from the same manufacturer. Utilizing cameras across the same manufacturer will make color-matching and overall quality consistent while switching between angles.
Connecting all of your cameras is where the professional-level streaming gear comes into play. You may have seen a TV studio switcher before — we’ll be using something similar for this setup. The Blackmagic Design ATEM Mini is a production switcher built for multi-cam live-stream productions.
The production switcher will allow your setup to use up to four high-quality video inputs via HDMI input, transition between cameras with the push of a button, and add graphic overlays from the device. Moves and changes that would require navigating menus and clicking around in the OBS software can all be done by hand with dedicated buttons.
In addition to organization and studio-level switching, the Atem Mini line also gives producers access to ATEM Software Control Panel software. Many features available within OBS (graphics, text, effects) can be managed more easily and efficiently within this software. You’ll be able to program presets, view source feeds, tweak graphics, mix audio, and do advanced macro programming. The control panel will serve as a middle-man between the switcher and the OBS feed.
With the use of other computers connected via ethernet to an Atem Control Panel, you’re also able to split the workload of a single broadcaster. Others running the ATEM control software on other computers can handle the graphics, audio, or camera settings. This can free up a dedicated person to control specific aspects of the broadcast. Starting at $300 for the base model, this is a great pickup to take your production to the professional level without breaking the bank.
Audio
Similar to video, the professional-level audio gear is specifically made for professional settings and live performance settings. What we’re looking for is high-level recording capabilities, multi-track and multi-channel recording, high-quality fidelity, and other unique features not found within our budget or mid-level options.
If you plan on recording multiple instruments or tracks of vocals in a single performance, you’re going to need to step up your audio interface. Where a stock Zoom H6 could record four audio channels at once, a typical rock band could need six or more channels recorded. This is where we get into the dedicated audio interface territory. A dedicated audio interface will be built out with features and specifications geared toward multi-track live performances — such as gain, EQ options, internal recording, and much more. These interfaces will connect directly to your streaming PC and may have additional software (similar to the ATEM Mini) that can take their recording capabilities even further.

The Zoom LiveTrak L-8 can handle up to eight channels simultaneously. Image courtesy of Zoom.
Our first recommendation would be the Zoom LiveTrak L-8 — a digital mixer and interface with the capability of handling up to eight channels simultaneously. This interface is ideal for small bands, giving you complete control over each input at a moment’s notice. How this improves over a portable recorder is its capability to mix the inputs on the fly, balancing the direct output of instruments and vocals. Options that may be hidden away within menus on a handheld recorder are available via dedicated buttons or knobs. With the use of the monitor out connections, you’ll also be able to provide monitor audio to the performers as well, so they know exactly how they’re sounding while they’re performing.
While the live-mixed feed directly from the interface might be sufficient in quality for a live stream, the L-8 also allows recording each channel to an SD card for later mixing/mastering. You’ll be able to take the live performance home and further tweak it to get the exact sound the performers want. The live session could be mixed with your preferred program and later released as stand-alone music tracks.
If you’re needing more than eight inputs, you could opt for the Behringer XR18. This USB audio interface is a bit beefier, but supports up to eighteen channels of forty-bit floating-point recording. This mixer does differ from the smaller Zoom L-8 in more than just raw inputs. The XR18 is controlled wirelessly via iPad or Android tablets, making it fully tweakable from across a room. You’ll be able to dial in your exact EQ settings, reverb, delay, and other effects from a tablet, while the console does the heavy lifting with its built-in audio processor. This audio interface will be able to handle just about anything you throw at it and carry you through just about any professional production stream.
The professional-level options are meant to get you streaming and be as stable as possible. These features do come with a price tag, but will make a more fluid and secure streaming environment. Behind the camera will look and feel just as professional as what’s being displayed on screen.
Feel free to mix and match our recommendations to suit your needs and budget. As live streaming becomes a more popular performance avenue for artists, you can bet we’ll see more and more new stream-dedicated gear, software, features, and platforms pop up. You can also bet we’ll have a whole new list of recommendations for you when it happens.
Keep reading! Here are a few more articles related to live streaming and vlogging:
- Capturing Cinematic Shots of Yourself, By Yourself
- A Complete Guide to Streaming Video Games on Twitch
- 11 Practical Filmmaking Pro Tips on How to Film Yourself
- Five of the Best and Most Affordable Cameras for Vlogging
- Easily Draw and Annotate on Videos and Live Streams in Real Time
Cover image via LightField Studios.

