
Before and After: An Elegant Powder Room for an Unbelievable $1K Price Tag
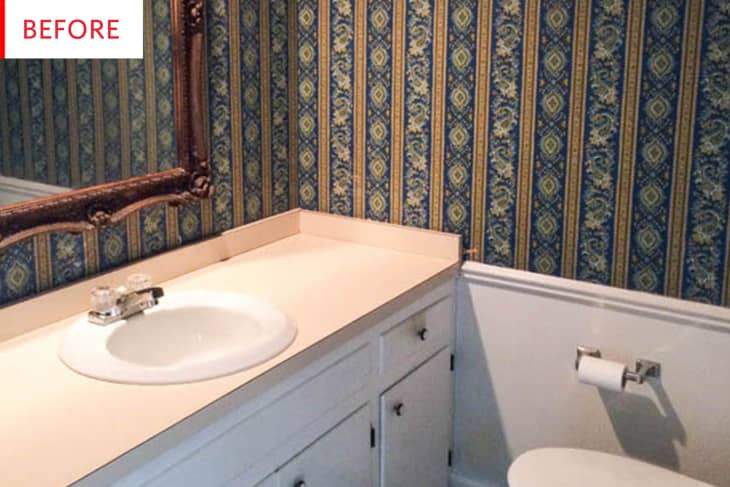
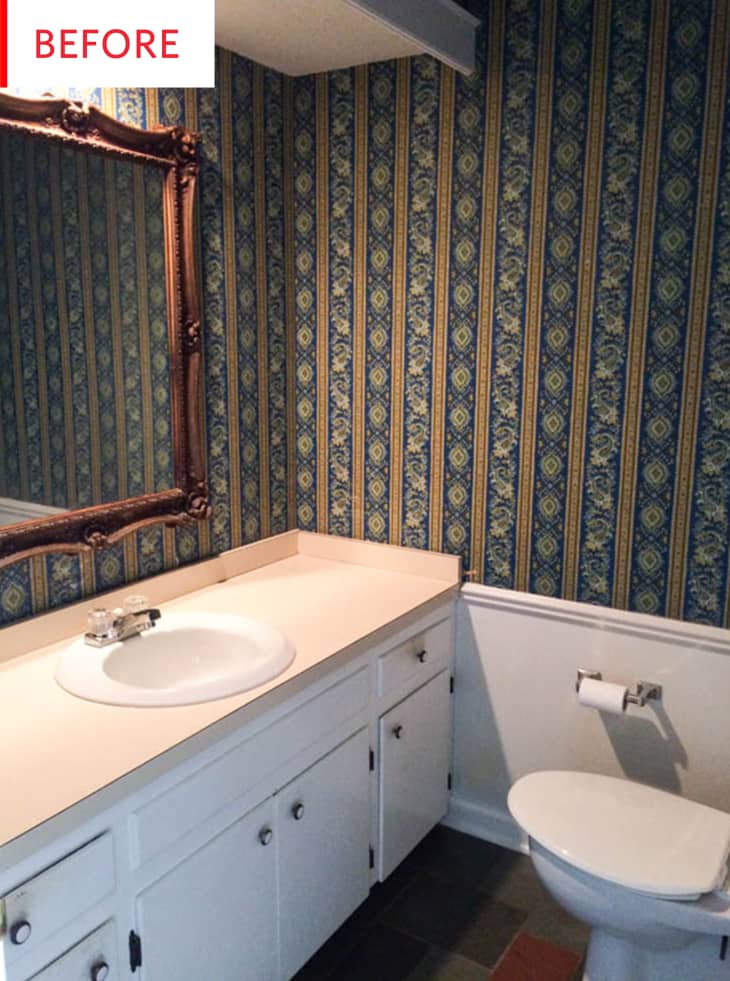
It seems like we’ve seen a thousand iterations of this powder room (minus the grand mirror): taupe linoleum counter, bulky vanity, dated wallpaper, standard fixtures. What can be done to make it less predictable and more special? A paint job, perhaps, or a countertop upgrade?
Before we get to the bathroom as it looks today—and please stick around, because this is my favorite one in recent memory—let’s learn a bit more about the bathroom before:
Our first floor powder room started with old, chalky tile (that I could never quite get clean), damaged wallpaper, and a yellowed, excessively large vanity that dwarfed the room. The time during the renovation wasn’t too invasive because this bathroom had become so unpleasant for me, I was already walking upstairs to use different one, even when it was still functional!
There was a mustiness in this space that I knew would just not quit until we gutted the thing. The wallpaper actually gave me pause because I found myself a little bit liking it. But in the name of thoroughness I wanted a cleared slate. I saved a portion to frame somewhere in our house and as a way to remember our home’s history.
Mustiness and a never-quite-cleanable quality are the scourges of bathrooms: not quite drastic enough problems to make a renovation absolutely necessary, but bad enough to make the room depressing and a total downer. It’s always nice to see such a bathroom get a refreshing makeover. Also—love the notion of framing a bit of the wallpaper.
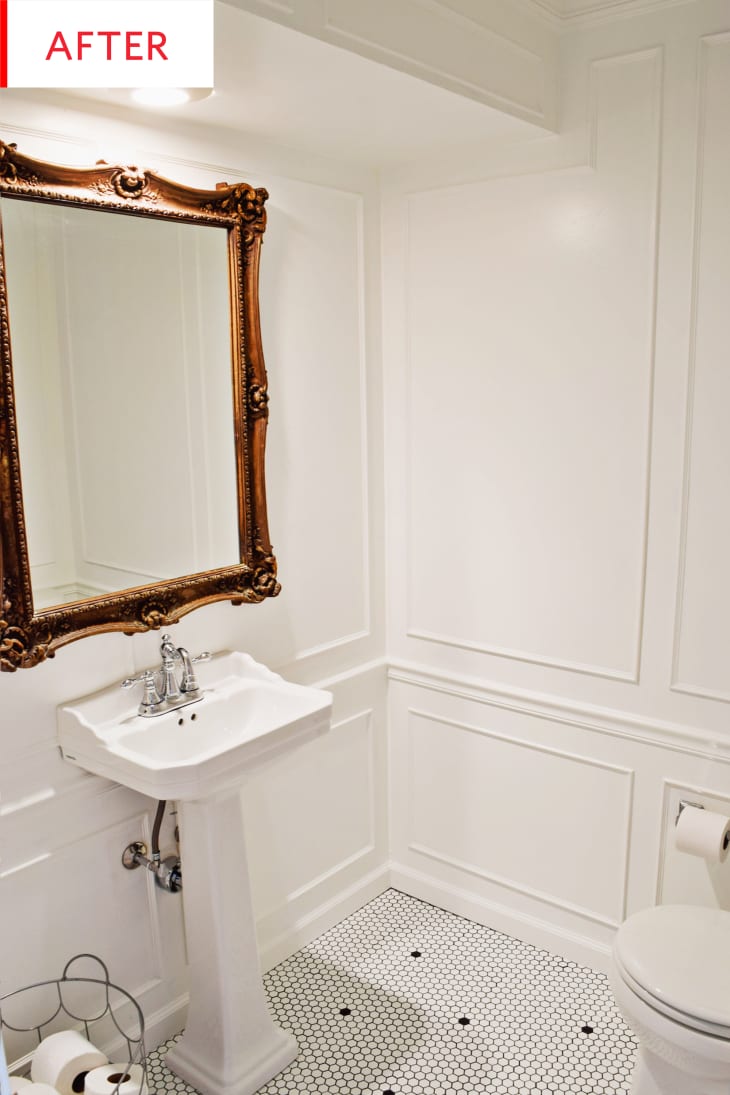
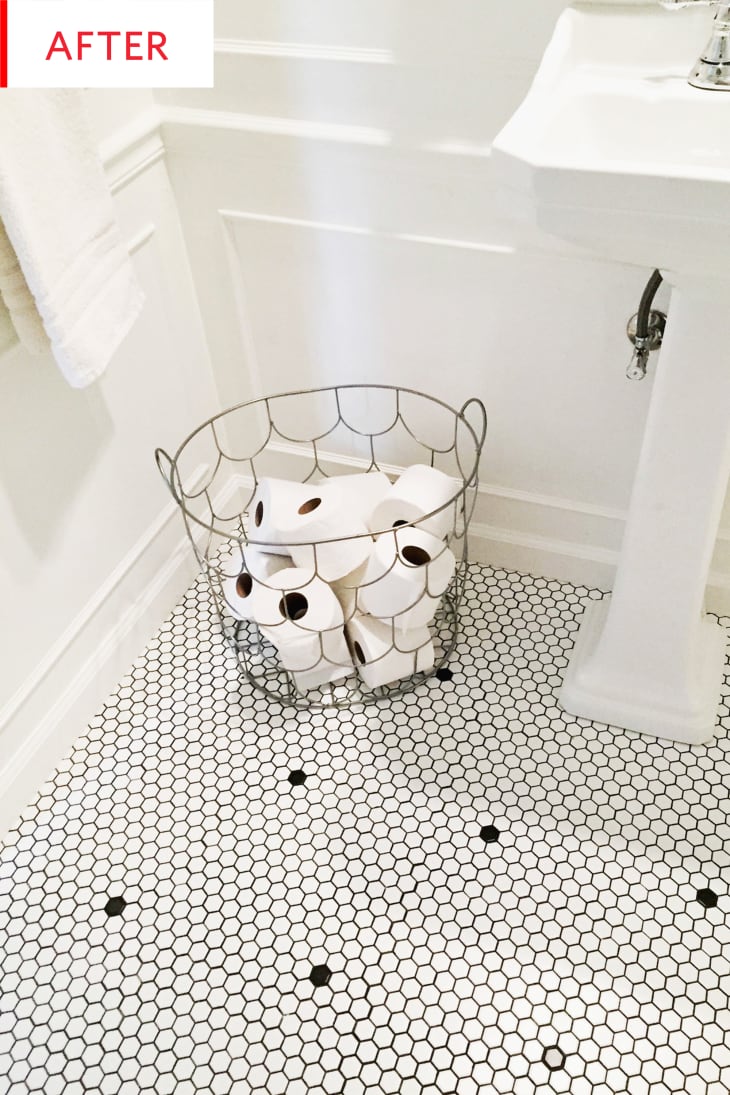
This is so glorious! It’s regal and formal yet simple and approachable. This renovation was designed and executed by Rachel Schultz of On Homemaking, who had the vision to completely transform the room (and the bravery to learn plumbing). Yes, it’s another quite white bathroom (which I’m on record as loving), but the intriguing lines and textures that the paneling, tiles, and stately sink add to the room keep things interesting. I love that the graceful millwork and the ornate mirror don’t compete for attention but rather enhance each other’s presence. It’s also nice to see the humble hex tile given a place in such a grand bathroom; its honeycomb beauty is certainly worthy of the finest decor.
I was so pleased to find a pedestal sink and faucet for such a good price – $100 for the sink and $70 for the faucet. They have unique details and a touch of an art deco vibe that I am always drawn to. This room simply does not need anywhere near the amount of storage from a full vanity and without it, people have actually thought we moved walls, the room feels so much bigger.
The millwork is the same wall treatment we have done elsewhere in our home which is beautiful and stately and brings continuity to the house. This room’s strength is the architectural details: millwork, hex tile, statement mirror, cool faucet. When styling it out, I kept in mind not over-decorating. Instead I want those structural elements to do the talking.
I think my very favorite thing about our room is that the mirror is the same vintage one that was in the “before.” I could not believe the previous owners left it for us! I’ve moved it all over my house and love it in so many places, but I think it is in here to stay. The mirror is the exact same, but with everything else in the room completely different is comes to life in an entirely different way.
Pre-renovation, the mirror seemed a bit fussy, but now it feels modern and even somewhat edgy. Rachel was wise to keep the accessories so simple: the mirror, millwork, and tile truly are the stars, so the only additional things needed are practical ones.
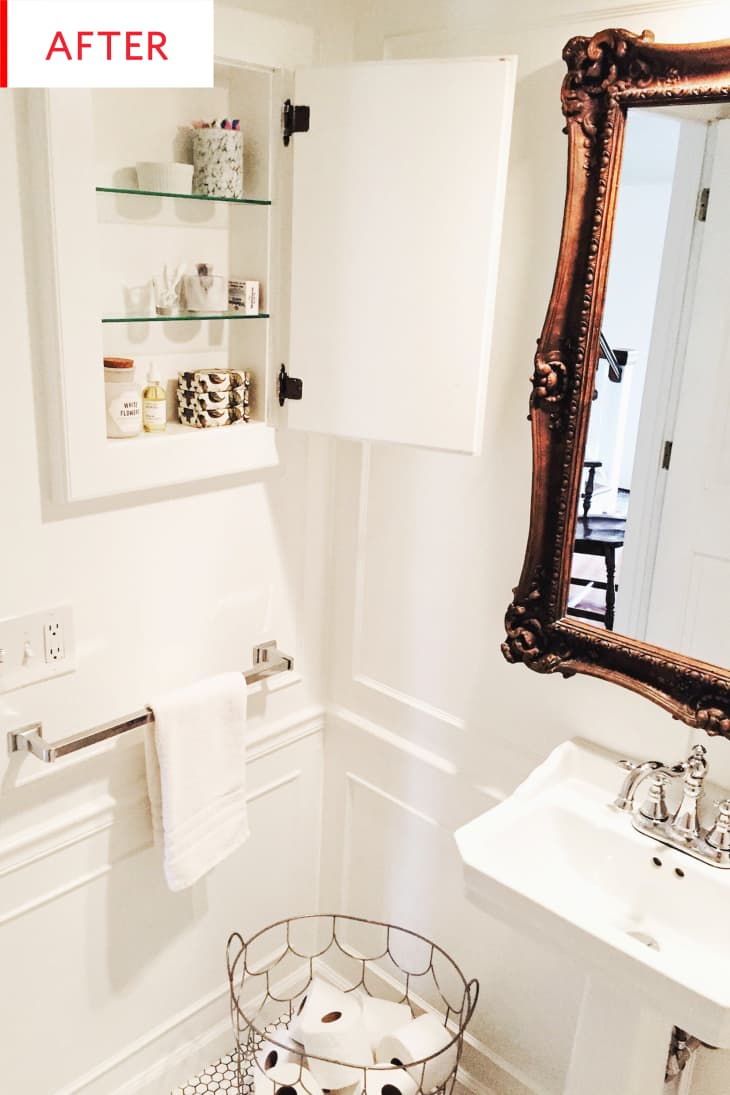
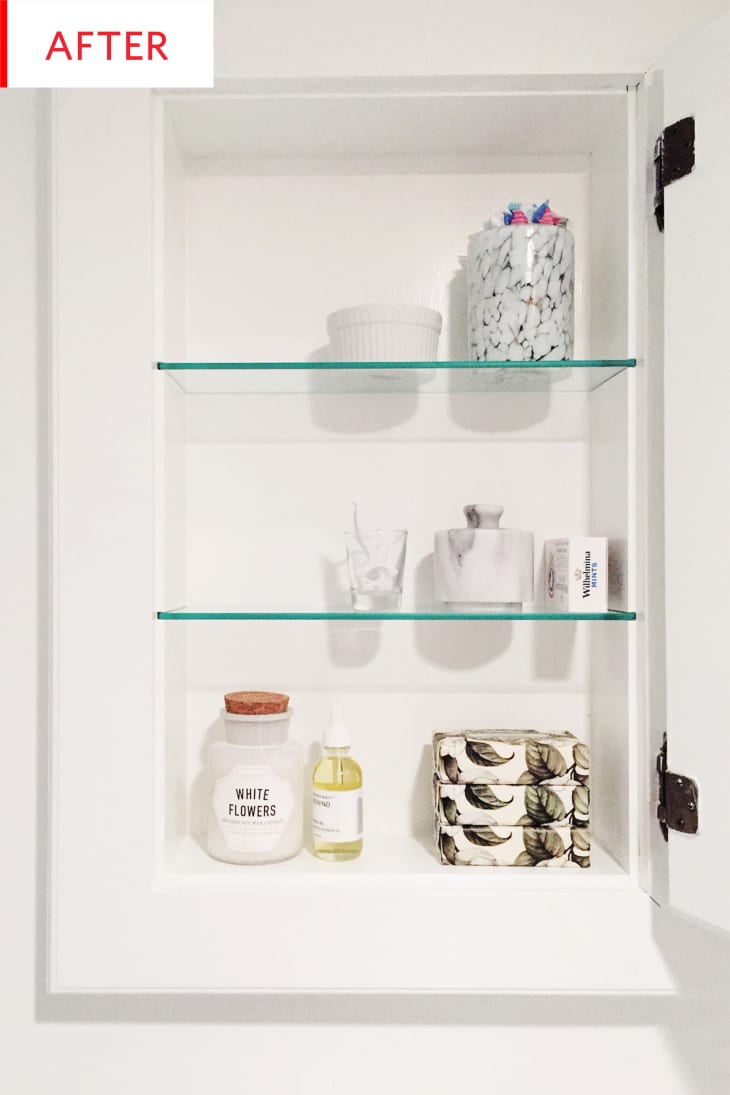
I almost laughed when I saw the dreamily styled medicine cabinet, but then I remembered the point Rachel made above: this is not a full bath, so the storage needs are fairly minimal. (For example: my powder room cabinet holds toilet paper, cleaning spray, sunscreen, and an extra hand towel, with plenty of space left over. In general, there’s no need for a full vanity worth of storage in a half-bath so it’s the perfect opportunity to install the graceful pedestal sink of your dreams.
Also, rolls of toilet paper have such a graphic, streamlined design, and I fully support keeping them out in the open, whether stacked neatly or tossed in a basket. It looks great and it makes life a lot less stressful for your guest. (Bonus points if you also have tampons available in a pretty glass jar.)
This is the first bathroom we have ever tackled and a half bath was a smart one to do first to get a handle on what it’s like. We feel completely empowered and inspired to do the remaining bathrooms in our home.
Tile choices feel like one of the biggest decisions in our whole house because it is expensive and hard to change. The biggest takeaway we learned here (other than a lot about how plumbing works!) is to go slow and that agonizing over decisions is awful, but worth it to really think through what you will most be happy with.
One more thing—mixed metals: they’re essential! This room has three different metals and you can totally get away with it. Not even getting away with it—it’s ideal. I don’t generally like rooms with only one metal. It feels heavy and dated, kind of in the way I think rooms are better with not just one wood tone. In here we have mostly polished chrome, bronze in the big statement mirror, and black for the medicine cabinet knob (to connect to the black in the tile). And with this room being all neutral colors, the multiple metals (with the architecture) keep it interesting.
Rachel’s mixed-metals theory is spot-on, I think. The contrast between the bronze mirror and chrome faucet is powerful and makes each element pop. Using a variety of metals also means that adding or replacing things in the future will be much easier, because you won’t have to try to match the rest of the metals exactly. You could also always match things up in the future if desired simply by swapping out the mirror and basket for chrome versions.
I love that one little black-bordered tile almost as much as I love a thorough “Before and After” budget breakdown:
We broke ground in September 2017 and finished in January 2018. Five months is not an accurate representation of how long this really took, however. Most of that time was waiting for a custom tile I wanted to try, but did not end up using. Active work for the project was about six weeks.
Tile and tiling materials: $175
Toilet: $120
Pedestal sink: $100
Faucet: $75
Mirror: Free
Millwork and crown moulding: $150
Paint: $45
Accessories: $100
Total: $965
One of the biggest ways we kept costs down was doing everything ourselves. Also we used an in-stock hex tile readily available at our local big box store. We had never tiled before and our sister showed us how.
Everyone double-check to see what your sisters’ secret superpowers might be—tiling is an impressive one—and if they happen to be willing to give a little tutorial.
Congratulations to Rachel on a job extremely well done and on having a lovely powder room to be enjoyed rather than avoided.
Once the room was finished in use again, I remembered how convenient and pleasant a little first floor powder room can be—for guests, and us during the day.
Thank you, Rachel and On Homemaking!