One of the most popular requests in our end-year reader-satisfaction survey was more PHP 7 content. In this quick guide, we’ll cover two ways to bring a PHP 7 server online on DigitalOcean – a popular VPS provider.
We’ll use two approaches, the latter of which will be applicable to any Ubuntu installation whereas the former will only work on DigitalOcean. If you don’t have a DigitalOcean account but would like to follow along, feel free to grab two free months via this ref code.

PHP 7 Locally
If you’d like to develop with PHP 7 locally, use our Homestead Improved – it’s already running PHP 7 by default. What’s more, it’s almost the exact same setup you’ll end up with by using Laravel Forge below.
Laravel Forge
Laravel Forge is a commercial service for deploying and provisioning servers running PHP. It’s a common misconception that everything bearing the Laravel name is immediately related to Laravel and requires it, but this is not true. Laravel is just a brand at this point, one that encompasses many tools – much like one can use Zend Studio or Zend Server without using the Zend Framework. As such, Forge can, at the moment, be used to set up servers for DigitalOcean, AWS or Linode. Like we said in the introduction to this post, we’ll be using DigitalOcean.
Once you sign up for Forge (there’s a 5-day trial) and set up your account, head on over to the server creation page.
Note that while 5 days may seem low, it’s enough for testing out a deployment or two. This doesn’t mean your server will be killed after 5 days – it merely means you won’t be able to manage it from Forge or make new ones after the trial expires. The trial actually does provide you with a full service. Unfortunately, it also requires a credit card – one can hope they’ll remove this requirement later on to ease onboarding of new users.
If you’re following along just for the sake of this experiment, select the lowest-tier server. Modify other settings as you see fit.
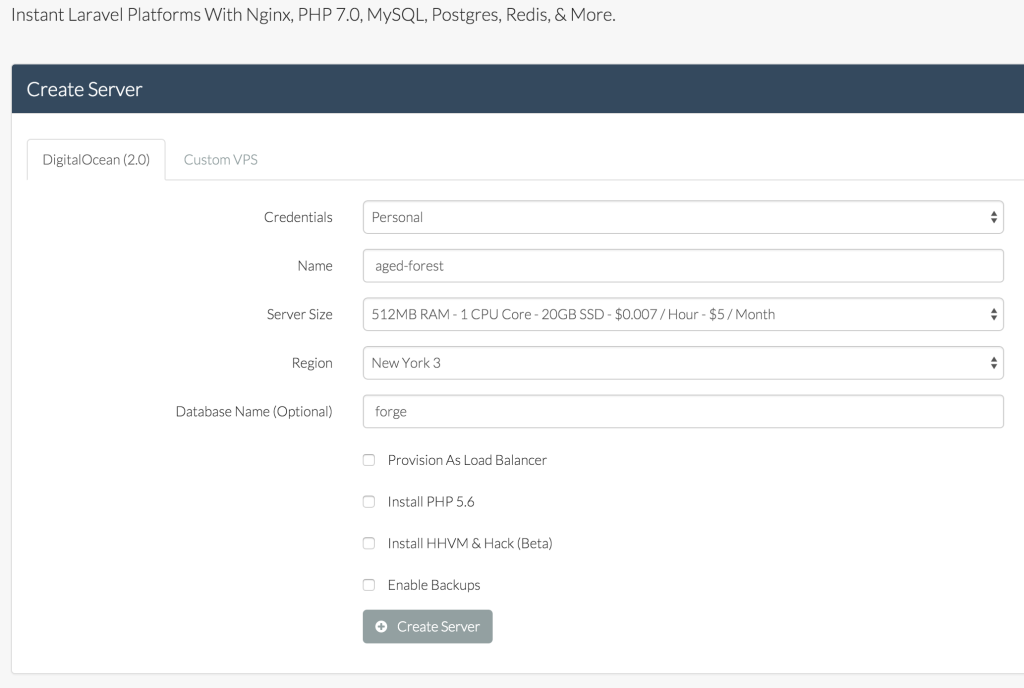
Leave all the checkboxes unchecked – the first one is only needed with high-load applications. The HHVM one is for people who like to live on the bleeding edge and experiment with alternative runtimes. Enable Backup is a DigitalOcean specific option which increases the price of the droplet by 20% and takes weekly snapshots of the Droplet so it can be easily restored if something goes awry.
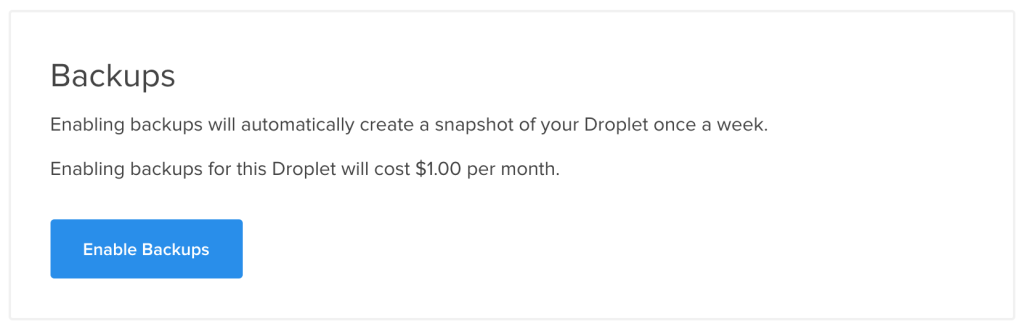
I do not recommend setting this option – it needlessly makes things more expensive, and weekly backups in a world as agile as ours aren’t that valuable – opting for a custom daily backup option instead would likely be a better idea. This is something which should definitely be pointed out in the server creation screen, as it has the potential to become an unanticipated cost. Besides, if needed, it can be activated post-creation on the droplet’s configuration screen in DigitalOcean’s control panel.
Once the Create Server button is clicked, the provisioning and creation process will begin. It might take a while.

As soon as the server is provisioned, we can configure it via an interface reminiscent of tools like PuPHPet.
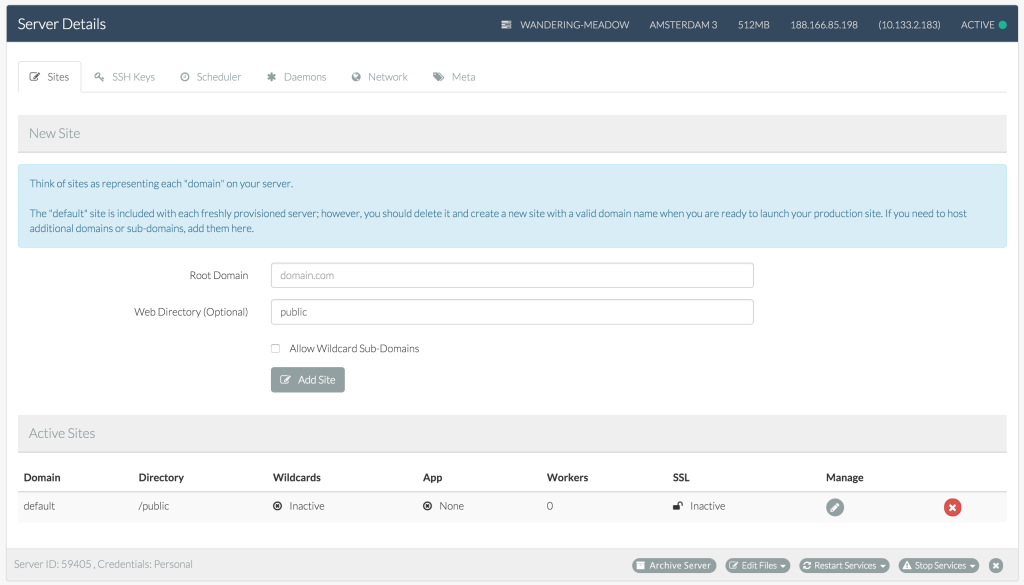
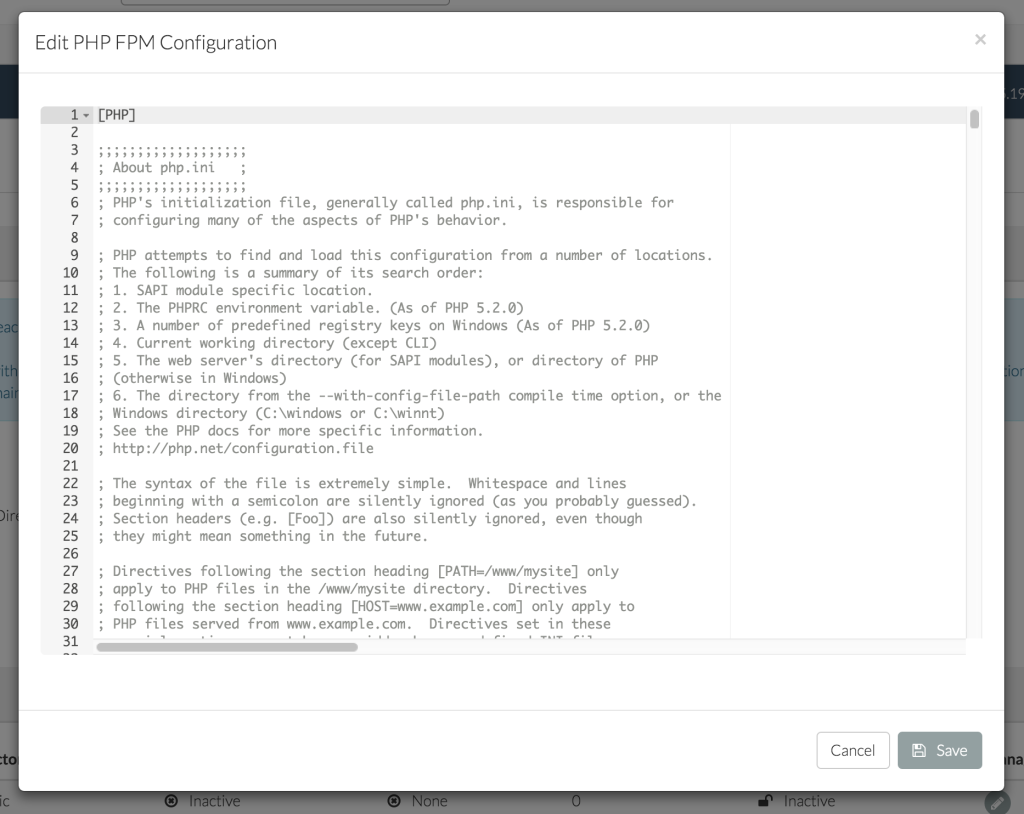
At this point, Forge provides some incredibly practical features, arguably justifying its price in one fell swoop. From GUIs for editing PHP configuration…
… to private network setups between servers (so it’s easy to add a separate server as a database only, or one for queues, for example), SSH key upload interfaces, daemons for keeping services alive, etc. Feel free to study them all at your own leisure.
For deploying, I’ve got a small Diffbot account dashboard I’m developing as I learn VueJS, and it seems like the perfect thing to try out. You can clone / fork it here.
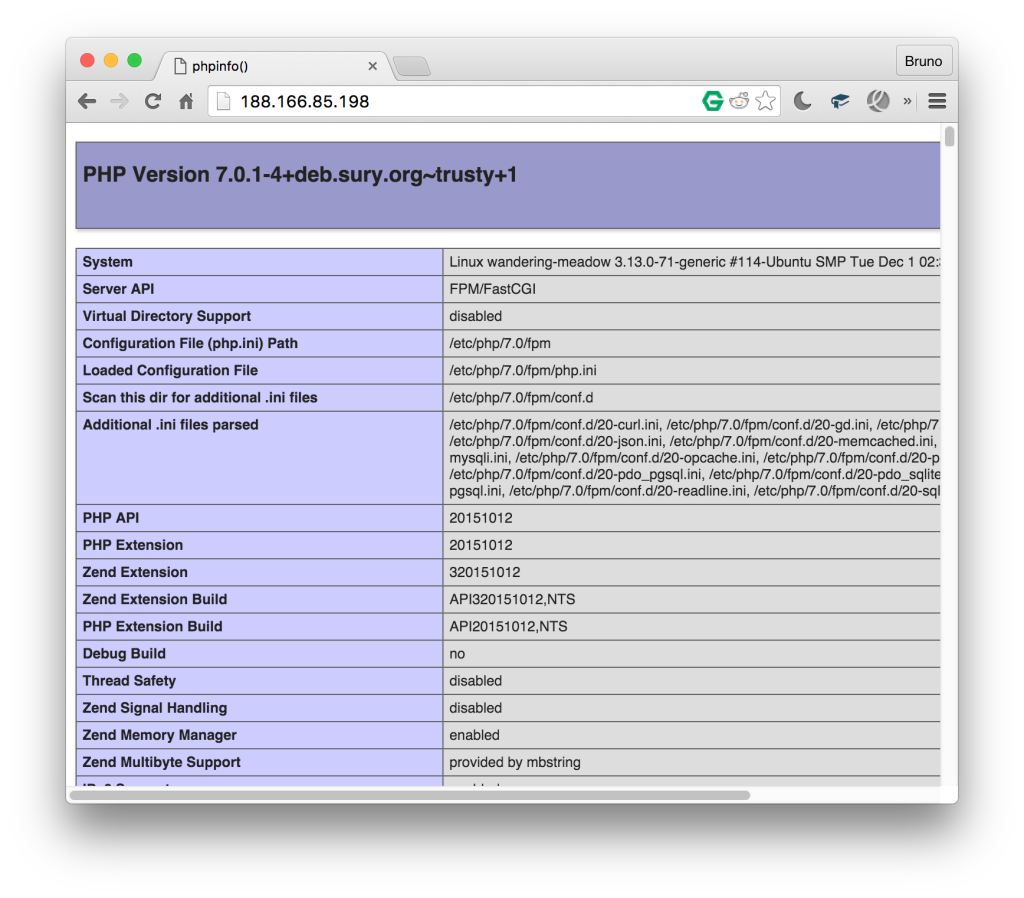
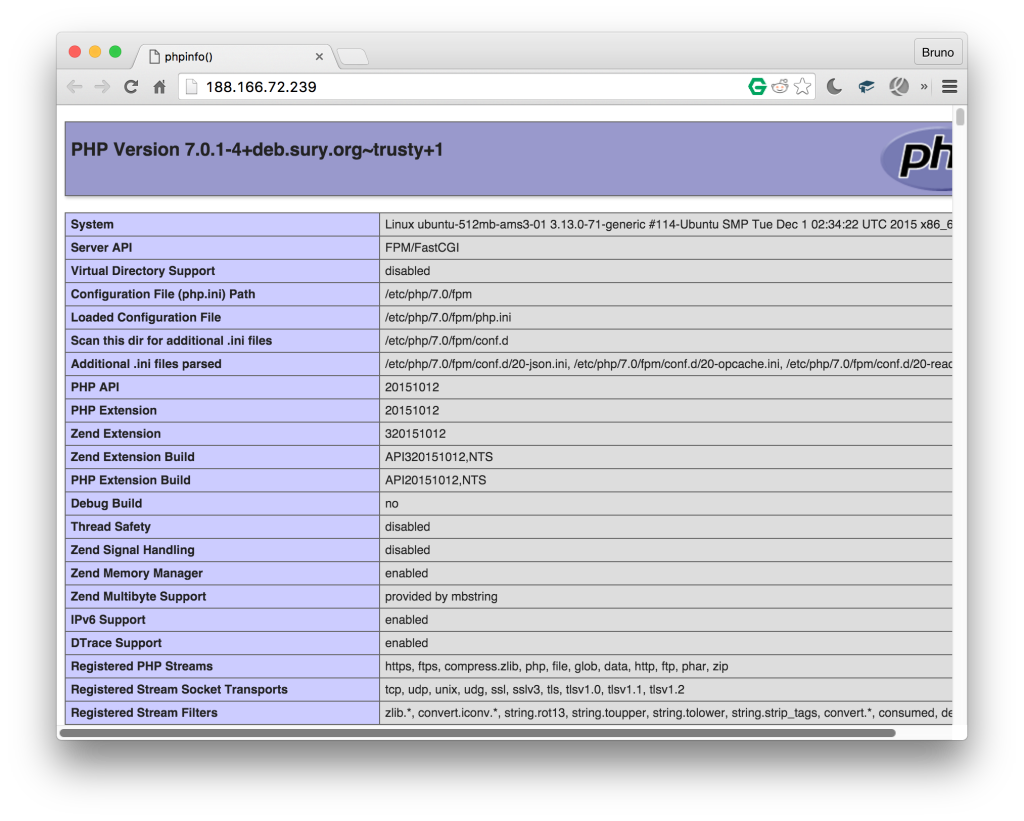
Let’s try it out. First, let’s make sure our server is up and running and serving PHP 7 content. We can do this by visiting the server’s IP address in the browser:
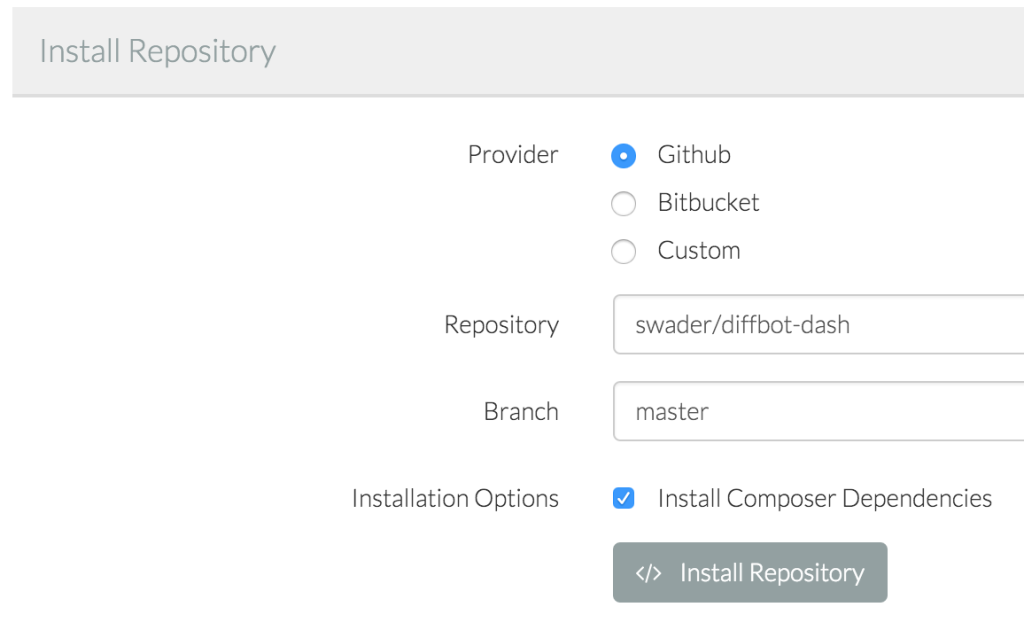
All good! Now, let’s add a new site. Without setting up a dedicated domain, let’s just use the IP and modify the default site added by forge by clicking the modify button. The very next screen will let us bind a Github repo to the app we’re creating – this is where the aforementioned Dash repo comes in.
This type of binding will also let us set up auto-deployment (Quick Deploy, selectable on the next screen) which will re-deploy our app whenever a push to the repo is made. Before we deploy, we need to modify the deploy script slightly by removing the line mentioning artisan – we’re not using a Laravel app, so this would cause an error during deployment. Now we can hit “Deploy Now”.
Unfortunately, there is no way of knowing if the deployment was successful – only errors are shown at the top of the screen – but a refresh of the IP in the browser reveals that everything is just fine.
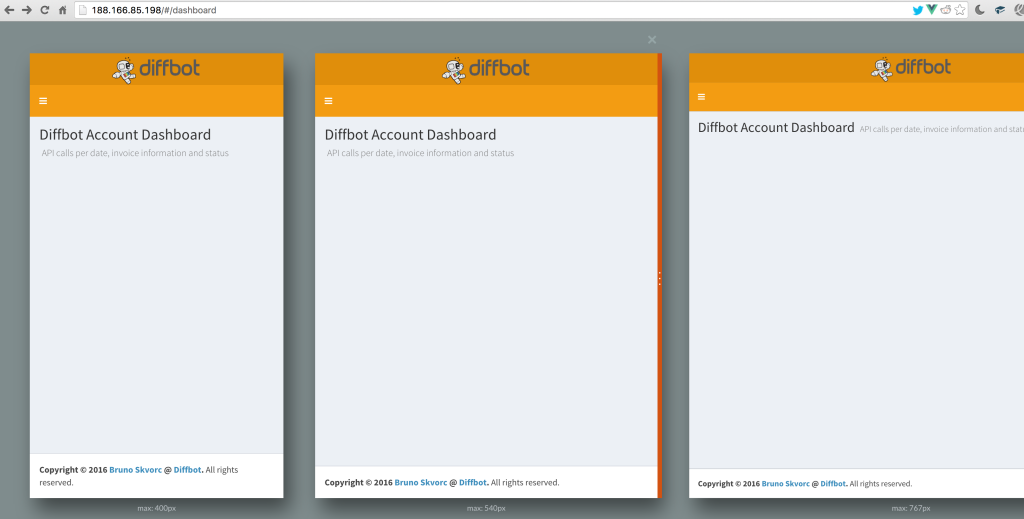
With Quick Deploy activated, any change we push will immediately be reflected on our app. Like we said, though, it’s a shame we aren’t notified of new successful deployments in any way. That’s it – it’s that simple to set up a basic app with Forge. Now let’s do the same thing manually – feel free to delete the server from the main Forge screen – it’ll conserve your account credits.
Manual Installation
First, we manually create a new droplet at https://cloud.digitalocean.com/droplets/new. Same settings as in Forge – Ubuntu 14.04, closest region, lowest tier server ($5). All checkboxes can remain unchecked. Once the droplet has been created, there are several steps to go through. First and foremost, the server should be secured and additional tweaks performed. These steps are not necessary when creating the server with Forge.
Then, we begin by installing the software which will power our app:
sudo apt-get update
sudo apt-get install git nginx
After this, our server will be live and accessible via its IP address. Now let’s install PHP 7.
sudo add-apt-repository ppa:ondrej/php-7.0
sudo apt-get update
sudo apt-get install php7.0-fpm
Now, we need to modify the vhost setup for Nginx’s default site.
sudo vim /etc/nginx/sites-available/default
Once we activate insert mode with i, we change the following:
- under
index, we addindex.phpso that the line now looks like this:index index.php index.html index.htm;` - under the “PHP” block, we uncomment some lines and edit the
.sockone, so that the block now looks like this:# pass the PHP scripts to FastCGI server listening on 127.0.0.1:9000 location ~ \.php$ { fastcgi_split_path_info ^(.+\.php)(/.+)$; # NOTE: You should have "cgi.fix_pathinfo = 0;" in php.ini # With php5-cgi alone: # fastcgi_pass 127.0.0.1:9000; # With php5-fpm: fastcgi_pass unix:/var/run/php/php7.0-fpm.sock; fastcgi_index index.php; include fastcgi_params; }
We exit insert mode with esc, then save and exit with :x. Finally, we restart the server with:
sudo service nginx restart
If we now add a phpinfo file into the location of this default server, we’ll see all is good:
sudo vim /usr/share/nginx/html/index.php
… and the file’s contents:
<?php

phpinfo();
Now that PHP 7 is operational, let’s change the root location of the default server to /var/www/dash/public. Generally, we would be making a new configuration file with a custom root location for every app we deploy, but that would require a custom domain, too – something we don’t have prepared at this point.
Then, it’s just a matter of making the folder in question and cloning the app directly into it:
mkdir /var/www
git clone https://github.com/swader/diffbot-dash dash
sudo service nginx restart
Once this is done, the app should work just like with Forge – with one exception. Future pushes to the repo would have to be pulled to the server manually. Third party continuous deployment is outside the scope of this tutorial, but we’ve covered it before with tools like Deploybot.
Another difference from the Forge approach is the fact that we’ve only installed the bare minimum of software here – no MySQL, no Postgre, not even NodeJS and its hellish offspring, NPM. Everything is very, very manual – full fine-grained control, but admittedly not everyone’s cup of tea.
You might be thinking that manual deployment almost seems simpler and cheaper than Forge and, in a way, you’d be right – for an app as simple as the one we’ve been dealing with, Forge is probably overkill. But when things get complicated, when you have to maintain several applications per server or deploy bigger, more advanced applications with database migrations, backups, and more – Forge’s advantages become apparent.
Conclusion
In this tutorial, we hosted our application on a PHP 7 server running on a DigitalOcean droplet using Laravel Forge, a popular server deployment service. We also deployed using the old school method of manual installation. The latter can be easily applied to any server running Ubuntu – so go forth and 7-ize!
For the sake of brevity, we skipped advanced steps like automated testing and deploy hooks, or database setups. If that’s something you’d be interested in, let us know in the comments below and we’ll publish a followup expanding on the two approaches above by deploying a more enterprisey application.
Do you use Laravel Forge? Or do you prefer to deploy another way? Let us know in the comments!
Frequently Asked Questions about Setting Up PHP 7 Servers with Laravel Forge and DigitalOcean
How do I set up a new server on Laravel Forge?
Setting up a new server on Laravel Forge is a straightforward process. First, you need to log in to your Laravel Forge account. If you don’t have one, you can create it by visiting the Laravel Forge website. Once logged in, click on the ‘Create Server’ button. You will be prompted to choose your preferred service provider, such as DigitalOcean, AWS, or Linode. After selecting your provider, you will need to fill in the necessary details like server size, region, and server name. Once you’ve filled in all the details, click on ‘Create Server’. Laravel Forge will then proceed to install PHP, MySQL, Nginx, and other necessary software on your server.
How do I deploy my Laravel application using Laravel Forge?
Deploying your Laravel application using Laravel Forge is quite simple. First, you need to add your repository in the ‘Site Details’ section of your server. You can do this by clicking on the ‘Git Repository’ field and entering your repository details. Once you’ve added your repository, you can click on the ‘Deploy Now’ button to deploy your application. Laravel Forge will pull the latest code from your repository and run any necessary build scripts. You can also set up automatic deployments so that your application is automatically updated whenever you push new code to your repository.
How do I connect my DigitalOcean account to Laravel Forge?
To connect your DigitalOcean account to Laravel Forge, you need to provide your DigitalOcean API key. You can find this key in the API section of your DigitalOcean account. Once you have your API key, go to the ‘Server Providers’ section in Laravel Forge and click on the ‘Add Credentials’ button. Enter your API key in the provided field and click ‘Add’. Laravel Forge will then be able to create and manage servers on your DigitalOcean account.
How do I manage my database using Laravel Forge?
Laravel Forge provides a simple interface for managing your database. You can access this interface by clicking on the ‘Database’ tab in your server’s dashboard. From here, you can create new databases, manage existing ones, and even run SQL queries. Laravel Forge also provides a database backup feature, which allows you to create and download backups of your database.
How do I troubleshoot deployment issues in Laravel Forge?
If you’re having trouble deploying your application in Laravel Forge, you can check the deployment log for any error messages. The deployment log can be accessed by clicking on the ‘Deploy Log’ button in the ‘Site Details’ section of your server. This log contains detailed information about each deployment, including any errors that occurred during the process. If you’re still having trouble, you can also reach out to the Laravel Forge support team for assistance.
How do I set up SSL certificates in Laravel Forge?
Laravel Forge makes it easy to set up SSL certificates for your sites. You can do this by clicking on the ‘SSL’ tab in the ‘Site Details’ section of your server. From here, you can choose to install a free Let’s Encrypt certificate or provide your own certificate. Once you’ve chosen your certificate, click on the ‘Install’ button and Laravel Forge will handle the rest.
How do I schedule tasks in Laravel Forge?
Laravel Forge allows you to schedule tasks that run at specified intervals. You can do this by clicking on the ‘Scheduler’ tab in your server’s dashboard. From here, you can add a new task, specify the command to run, and set the frequency at which the task should run. Once you’ve set up your task, Laravel Forge will automatically run it at the specified intervals.
How do I monitor my server’s performance in Laravel Forge?
Laravel Forge provides a ‘Metrics’ feature that allows you to monitor your server’s performance. You can access this feature by clicking on the ‘Metrics’ tab in your server’s dashboard. From here, you can view various metrics such as CPU usage, memory usage, and disk usage. This can help you identify any performance issues and take necessary action.
How do I update PHP versions in Laravel Forge?
Laravel Forge allows you to easily update your PHP version. You can do this by clicking on the ‘PHP’ tab in your server’s dashboard. From here, you can select the PHP version you want to use and click on the ‘Update’ button. Laravel Forge will then update your server’s PHP version.
How do I manage environment variables in Laravel Forge?
Laravel Forge provides an ‘Environment’ feature that allows you to manage your environment variables. You can access this feature by clicking on the ‘Environment’ tab in your server’s dashboard. From here, you can add, edit, or delete environment variables. Once you’ve made your changes, click on the ‘Update’ button and Laravel Forge will update your environment variables.
 Bruno Skvorc
Bruno is a blockchain developer and technical educator at the Web3 Foundation, the foundation that's building the next generation of the free people's internet. He runs two newsletters you should subscribe to if you're interested in Web3.0: Dot Leap covers ecosystem and tech development of Web3, and NFT Review covers the evolution of the non-fungible token (digital collectibles) ecosystem inside this emerging new web. His current passion project is RMRK.app, the most advanced NFT system in the world, which allows NFTs to own other NFTs, NFTs to react to emotion, NFTs to be governed democratically, and NFTs to be multiple things at once.