Creating Design Specifications in Photoshop Using SpecKing
Editor’s note: SpecKing is no longer in service.
Imagine you’re a web designer, preparing to pass your Photoshop designs (PSD) to web developers who’ll turn them into coded websites. It’s crucial to mark your designs with precise specifications like size, margins, and font details. This ensures that the PSD files can be perfectly converted into web format by the developers.
Yet, this task can become extremely challenging and time-consuming, especially when dealing with numerous layers, texts, and elements. SpecKing, a Photoshop plugin, revolutionizes this process by enabling you to quickly measure and label your designs with just a click.
How to Install SpecKing
First off, SpecKing needs at least Photoshop CS5 to work. To install, simply double-click the SpecKing.zxp file and follow the prompts. After installation, launch Photoshop, navigate to the Window > Extensions menu, and select SpecKing. You’ll find the SpecKing panel conveniently located on the sidebar.

How to Install SpecKing
Remember, SpecKing needs Photoshop CS5 or newer to operate. Begin by double-clicking the SpecKing.zxp file and proceed with the setup. Once installed, launch Photoshop, head to the Window > Extensions menu, and choose SpecKing to access its panel from the sidebar.
Measuring Element Sizes
SpecKing simplifies the process of measuring the dimensions of layers, groups of layers, and selected areas. Simply select the desired layer and click the Measure Size button to apply.
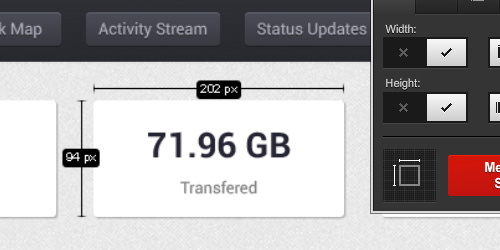
To modify label colors, set your preferred background and foreground colors in the toolbox before hitting the Measure Size button.

Labels typically appear outside the layer. However, SpecKing offers flexibility by allowing labels to be positioned centrally within the layer, as shown here.
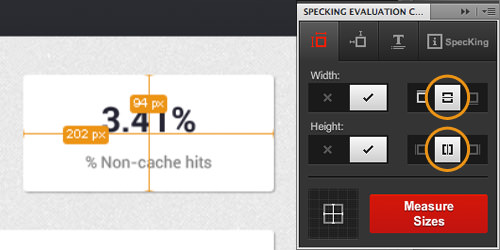
Boost your efficiency by selecting multiple layers at once, enabling you to apply specification labels to them all with just one click.
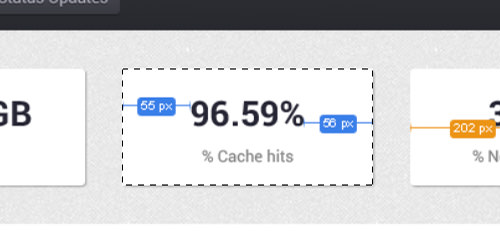
Measuring Distances
SpecKing also excels in measuring distances. Simply select a layer, navigate to the second tab of the SpecKing Panel, and hit the Measure Distance button.

By default, distances are measured in relation to the entire document. To measure distances relative to a specific selection, make your selection around the desired layers as illustrated below:
Text Specifications
SpecKing can reveal detailed text specifications – such as font family, size, color, and line height – allowing developers to easily adopt these styles without the need to individually inspect each text layer in the Text Panel.
To display text specifications, choose the text layer, proceed to the third tab on the SpecKing Panel, and click on Get Text Property.
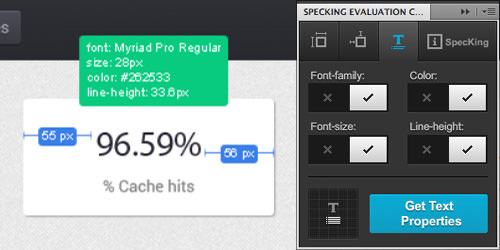
The text specifications are instantly available.
With SpecKing, generating design specifications becomes effortless, streamlining the project for greater accuracy and speed.