

Introduction: Router Planer


I love it when tools do double-duty in my shop. It saves me money from buying an additional tool, but more importantly it saves space in my one car garage turned workshop. Double-duty was the thinking behind my drill press drum sander, and it's why I use a router planer.
A planer is a tool that shaves off a fraction of material from wood to make a flat surface. It's a great tool to have in any shop, and makes quick work working out warped wood into workable wood. However, they are expensive, and take up precious work space. Making your own planer from a router is easy, and it works with any router you have. Once the router sled is made you can use it for all kinds of projects, and converting the router into a planer any time you need it takes less than a minute. here's what you'll need:
- Any router
- Straight router bit (or just get a set that has one in it)
- Hole saw
- Countersink drill bit
- Hot glue
- Spirit level

Why a router instead of a planer?
There's a few great reasons to reach for the router for your next planing project over using the planer. Aside from cost, planers are designed to cut along the grain and not against it. Planers have cutting knives on a rotating drum positioned above the wood, making cuts parallel to the grain as the material is passed through. This means planers are great for long boards, but not good for end grain. Inserting end grain in a planer means the knives have to cut perpendicular to the wood, which is much harder and results in poor results and dull knives.
For end grain using a router turns the cutting angle to perpendicular to the grain, since the cutting approach is from the side of the material and not the top.
Though you can use the router planer on long boards (as the cuts will still not be against end grain), if you're doing lots of planing of regular planks then you'd be better off investing in a thickness planer or handheld power planer.
Enough talk, let's make!
Step 1: Remove Router Base Plate

Almost every hand router will have a removable base plate. Router plates are usually held on by screws that are countersunk into the plate.

Unscrew all the fasteners and the plate should be easily removed. The new sled we'll make will attach where the base plate was, and we'll use the mounting openings as an attachment point.

Step 2: Make Router Sled

The router sled needs to be very straight and stiff, this is to prevent any bowing in the wood which can make low spots when planing. Plywood is a great choice for a sled as the cross lamination of the wood grain mean that it's dimensionally stable, and there's usually plenty of scrap plywood around.
The router sled needs to be wide enough to slide on the rails without falling off, so pick a scrap of wood that is wider than you need and trim it to size after you've made the sled.
 |  |
Remove the base of the router and place in the center of the plywood. Use a pencil to scribe the interior opening for the router, and the connection holes, onto the plywood. For clarity, I went over the markings again in marker to make them visible.
 |  |
Use an appropriately sized hole saw to remove the router opening and then drill openings for the mounting hardware, countersinking them on one side.

The openings should match the existing base plate removed earlier.
Step 3: Attach Sled to Router

Using the screws from the base plate that was removed, attach the plywood sled onto the router base.

The countersunk openings will allow the mounting screws to sit under the bottom plane of the sled, keeping them out of the way when the sled is moving around.
Insert the router into the base and check to make sure there are no collisions for the full range of the router.

Step 4: Select Router Bit

To make a nice flat top you'll need a router bit that has makes a flat bottomed profile. I bought an inexpensive router bit set that has a few options for bits that have a flat bottom.
Smaller diameter bits will cut faster but you'll need to take more passes, whereas larger diameter bits cut more material but you'll need to go slower. I prefer taking a little longer and using a large diameter bit, this one is ¾".
Step 5: Rails on Workbench, or on Work?
The sled rides on parallel rails to create a flat surface that is planar with the top of the rails. There are two common methods of attaching rails, on the workbench or the work itself.
Workbench
If you have a small, or somewhat flat piece already, attaching rails to the workbench is a great option. Assuming your workbench has a flat surface, the parallel rails will be already set to a level surface and require no additional work. The downside is that this method only works for pieces with a lower profile that can sit on your workbench, and under the rails.
On The Work
If you have a larger piece that cannot sit on your bench then you can attach rails directly to the work. This requires a little more work to get both rails parallel, and at the same level, but is great for pieces like a table top that would be very difficult to make rails for if it were on a work table.
Below, we will explore both options.
Step 6: Rails on Flat Workbench

The router sled will ride on rails over the piece to be planed down. The rail heights need to be parallel, in line with the work, and taller than the highest part of the work so the sled can glide over.
Hot glue is used to hold down the rails and work, which makes a sturdy lateral bond that is easily broken when lifted upwards. This is perfect for our needs.

Small dabs of hot glue were attached along the bottom of the rails and they were adhered directly to the workbench. There needs to be room on either side of the work that is going to be planed to allow for chips to go when planing. Missing this step will result in your planing area getting clogged, or spitting chips all over the place (which will happen anyway - this is just makes it much worse). I usually leave about a finger's width on either side.

The rails need to be taller than the highest point of the piece you want to plane. Use straight, flat, and square stock to make the rails. This will make your planing life much easier than using warped wood, which will yield an inconsistent result.
Above, the two rails are taller than the work to be planed down, allowing the router sled to pass over top without obstruction. The rails will need to be moved away from the work to allow for chip collection, this image is just for illustrative purposes.
Step 7: Rails on the Work

Mounting rails to the work itself takes a few more steps, but follows the same principle.
Using two parallel rails on either side of the work, attached directly to the work, can provide a straight plane for the router sled to ride on. Mount one rail on the side of your work using a single screw, ensuring the rail top is higher than the tallest area of the surface you intend to plane.

Use a spirit level to set the rail perpendicular to the ground. Then attach securely with a second screw to securely hold in place.

With one rail attached, affix the second rail on the opposite side of the work. Getting the tops of both rails at the same height can be a little complicated, so best to have a second pair of hands help out.

Without the benefit of a level workbench to reference, the rails need to be parallel and co-planar to each other, but also perpendicular to the ground. Start by getting the second rail in approximately the right height, then, as with the first rail, sink one screw into the second rail to hold in place.
Transverse the work with the router sled, resting one side on the established rail and the other on the new rail. Place a spirit level on the router sled. Rotate the second rail around the screw until the rail is parallel to the first rail, then remove the first screw and slide the rail up or down until level. Check the rail level once more before sinking screws to secure the rail.
Step 8: Check Rail Width

With the rails established (either on the workbench on on the work-piece), the sled needs to be able to slide from one side to the other without falling off the rails.
Before starting any planing, and without turning the router on, slide the router across the rails and check that the sled is long enough to transverse the rails and there's no obvious obstructions to gliding the sled across and down the rails.
Step 9: Set Router Height

A router can take out a lot of material in a single pass. To avoid bogging down the router, which can produce a violent kickback, retract the router upwards until only about ⅛" of the bit is exposed below the sled.

A general rule when working with router bits is make cuts that are half the diameter of the router bit. I like to err on the side of caution and do even less than this, especially when the material being cut is not sheet stock like plywood or MDF. Shallower passes allow much more control, and avoid chip out of fragile pieces of the work.

Step 10: Make Passes

Once the height is set, place the sled on the rails but positioned off the work. Turn on the router and slowly approach the work. When the bit is over the piece to be planed make slow and deliberate lateral movements across the piece to start removing material.

Due to inconsistent heights, there will be areas where the router bit is not connecting with the material. This is fine, just continue the movements down the rails, back and forth, until the blade starts to make connection.
Go slow.
Once you've made a pass turn the router off and set the depth about ⅛" lower, then start the process again making another pass. Continue this technique of making multiple shallow passes and eventually all the material will be trimmed down to a consistent height, stopping when you've achieved the desired height.
Step 11: Chip Out

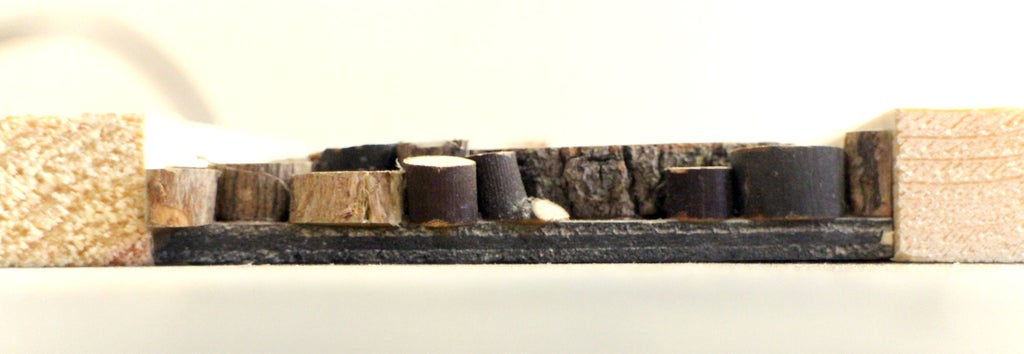
With small or fragile pieces it's especially important to go slow and make shallow passes, this drastically reduces chip out. Chip out is caused by the router bit biting into the material and pulling instead of cutting. This is commonly seen on edges of the work, for the small branches shown above in my wood coasters almost the entire surface was edge material due to the small diameter of the branches - I had to go extra slow for this.
Take your time.
Step 12: Finished

This technique is great for trimming down end grain, and can be optimized for loads of applications. Here are a few projects where I've used a router planer with fantastic results
 Sliced Wood Coasters |  Magnetic Knife Rack |
 Log Table |  Scrap Ends Table |
When you're done, unscrew the router sled from the router and replace the stock base plate. Save the sled or modify it to make it suit the needs of your next project.

Have you made a project with a router planer? I want to see it!
Happy Making :)


