- Creating a New Laravel 5.5 Project
- Rendering Mailables to the Browser
- Custom Email Themes
- Exception Helper Functions
- Introducing the migrate:fresh Command
- JSON Error Stack Traces
- Automatic Package Discovery
- Changes to the vendor:publish Command
- Variety of Front End Presets
- Whoops is Back!
- Custom Exception Report Method
- Model Factory Generators
- Validation Data Return
- Custom Validation Rules
- DD and Dump Coming to Collections
- Pivot Table Casting in Many to Many Relationships
- Custom Blade::if() Directives
- Autoregistering of New Artisan Commands in the Kernel
- Introducing Laravel Horizon
- New database migration trait
- Conclusion
- Frequently Asked Questions about Laravel 5.5 Features
Laravel 5.5 will require PHP 7.0+. For the features this modern PHP version brings, please see our recap.
Laravel 5.5 will also be the next LTS (Long Term Support) release. This means bugfixes for two years and three years of security updates. That was also the case with Laravel 5.1, but its two-year window of bug fixes is coming to an end this year. Without further ado, let’s see what this new version has to offer.
Creating a New Laravel 5.5 Project
Table of Contents
- Creating a New Laravel 5.5 Project
- Rendering Mailables to the Browser
- Custom Email Themes
- Exception Helper Functions
- Introducing the migrate:fresh Command
- JSON Error Stack Traces
- Automatic Package Discovery
- Changes to the vendor:publish Command
- Variety of Front End Presets
- Whoops is Back!
- Custom Exception Report Method
- Model Factory Generators
- Validation Data Return
- Custom Validation Rules
- DD and Dump Coming to Collections
- Pivot Table Casting in Many to Many Relationships
- Custom Blade::if() Directives
- Autoregistering of New Artisan Commands in the Kernel
- New Routing Methods
- Introducing Laravel Horizon
- New database migration trait
- Conclusion
- Comments
Since the release has not yet officially happened, we can install the dev release version by running the command:
laravel new laravel55 --dev
cd laravel55
php artisan key:generate
If you prefer not to use the Laravel installer, you can also take the Composer approach:
composer create-project --prefer-dist --stability=dev laravel/laravel:dev-master
cd laravel
php artisan key:generate
Once we visit the homepage of the newly set up app, we should be greeted with a welcome page similar to what we used to have in previous Laravel versions.
Rendering Mailables to the Browser
I feel this is something that will come in very handy. In the previous Laravel versions, we had to send actual emails or use an email client like Mailtrap to test email layouts, and this wasn’t a fun task. This won’t be the case any more, as with Laravel 5.5 it’s possible to render the email layout to the browser directly.
A quick walkthrough on how to achieve this: let’s create a new mailable as well as the email template for our current project:
php artisan make:mail Welcome --markdown=emails.welcome
I prefer the markdown approach since we will get a template with some content already. Let’s open our web.php file and create a test route to checkout the email layout:
Route::get('/email', function () {
    return new App\Mail\Welcome();
});
routes/web.php
By visiting the route /email we should be able to preview the email template:
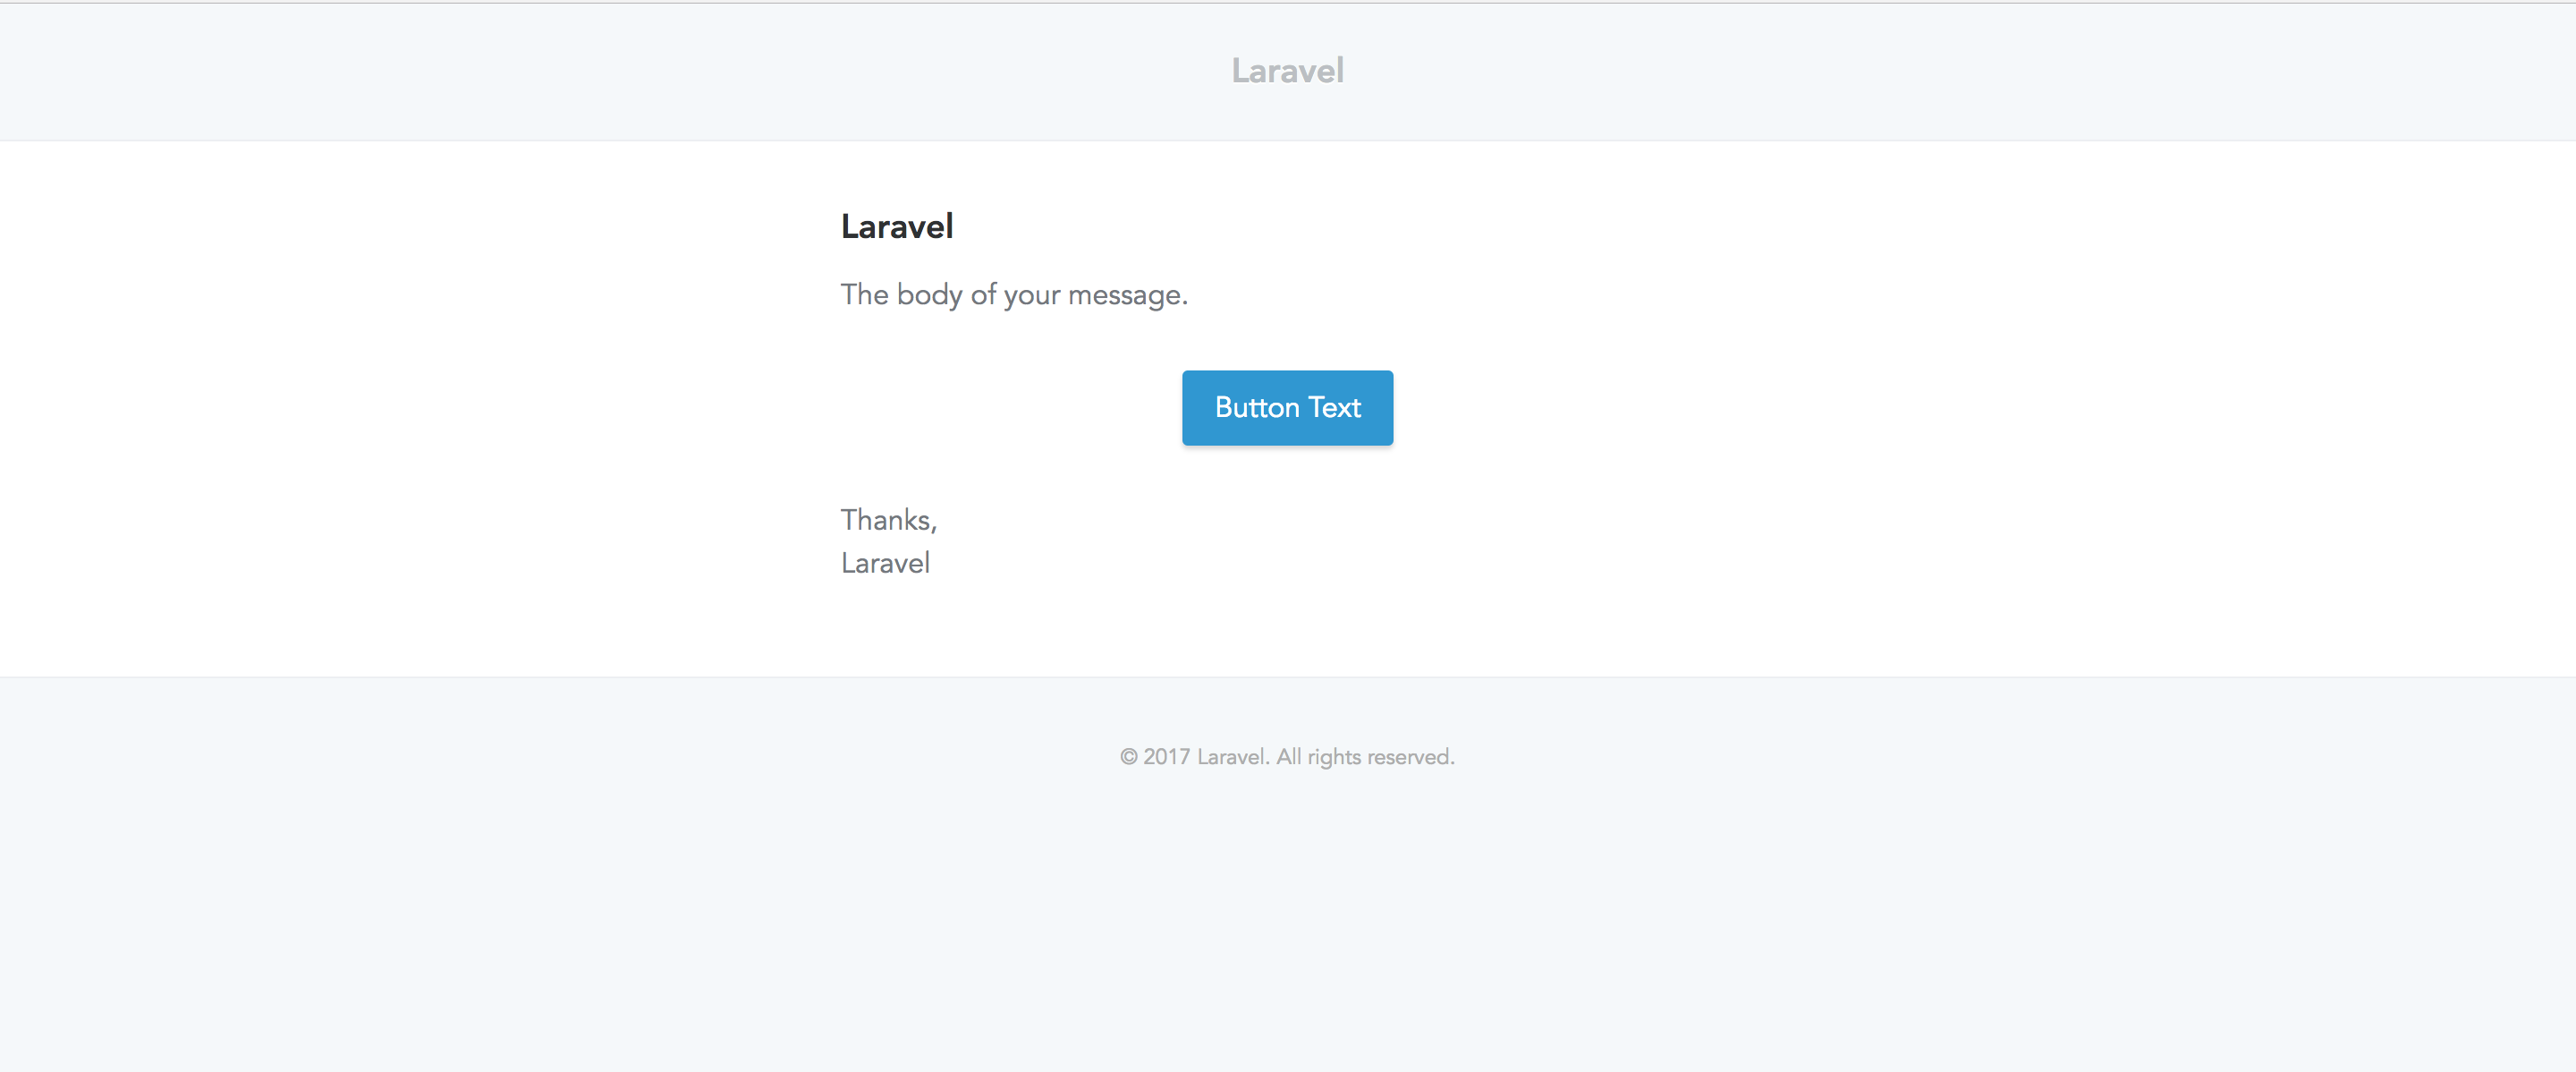
What’s actually going on under the hood is that with Laravel 5.5, the Mailable class implements the Renderable contract which has a render() method. This is the implementation of the render() method inside lluminate/Mail/Mailable.php:
public function render()
{
    Container::getInstance()->call([$this, 'build']);

    return Container::getInstance()->make('mailer')->render(
        $this->buildView(), $this->buildViewData()
    );
}
lluminate/Mail/Mailable.php
This is the method that makes it possible to get a view. Had we tried returning an instance of a class that does not implement the Renderable contract within our routes, we’d get an UnexpectedValueException thrown.
Custom Email Themes
When using Markdown for emails, Laravel will provide a default theme. However, some people may prefer having some custom styling in their email templates for branding purposes.
To use a custom theme for a particular mailable, we first create a custom .css file containing the styles we want:
touch resources/views/vendor/mail/html/themes/custom.css
We then then specify this filename as a property in the Mailable class:
class Welcome extends Mailable
{
    protected $theme = 'custom';
    [...]
}
app/Mail/Welcome.php
This way, the email layout will be based on the styles we defined in the custom.css file. The good thing with this approach is that we can have different themes for different mailables.
Exception Helper Functions
Laravel 5.5 comes with two exception helper functions which will help us write more expressive code. The two helpers are the throw_if and throw_unless methods. Both take three arguments with the third argument being optional.
Let’s look at the different implementations of these exceptions:
$number = 2;
throw_if($number !== 3, new NotThreeException('Number is not three'));
// or
throw_if($number !== 3, NotThreeException::class, 'Number is not three');
With the throw_if helper, an exception will be thrown if the first argument evaluates to true.
Implementing the throw_unless helper is no different from what we did above, the only difference being that an exception will only be thrown if the first argument evaluates to false:
$number = 2;
throw_unless($number === 3, new NotThreeException('Number is not three'));
// or
throw_unless($number === 3, NotThreeException::class, 'Number is not three');
Not the best example, but serves our demonstration purposes.
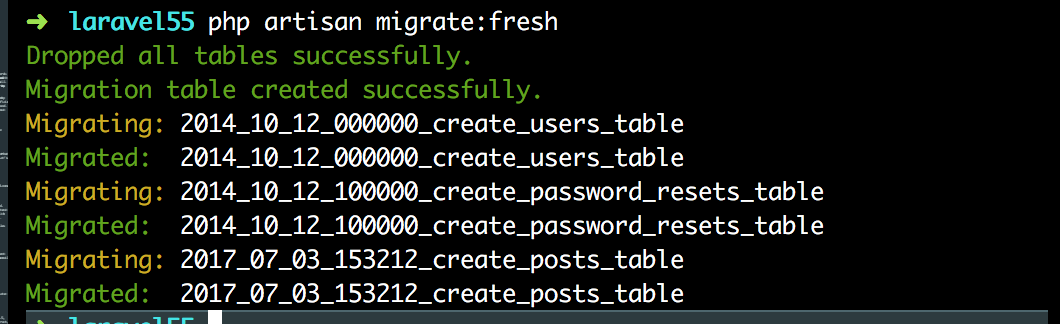
Introducing the migrate:fresh Command
You’ve probably found yourself in a situation that required you to rebuild the database. With previous Laravel versions, we achieved this by running the php artisan migrate:refresh command. The migrate:refresh command rolls back all migrations based on what is specified in the down method for each migration file then runs the migrations again:
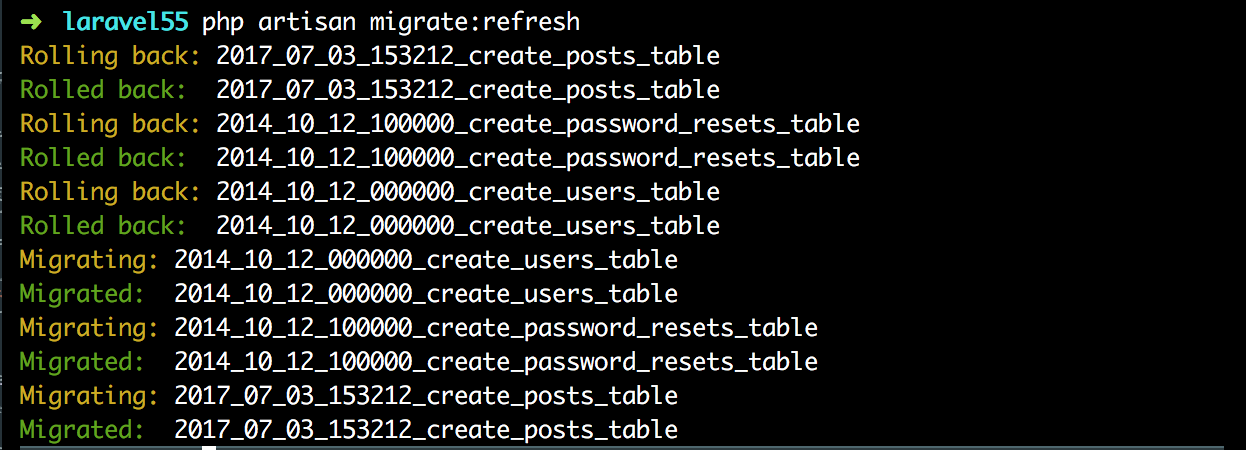
But you’ve probably run into issues with this command a couple of times, especially when working with foreign key constraints or say you have a down() method in one of your migrations that has not been well defined. When that happens, we resort to dropping the table raising issues manually most of the time – (could be from the CLI or some GUI). That’s where migrate:fresh comes to our rescue. This command drops all the tables, then runs the existing migrations again:
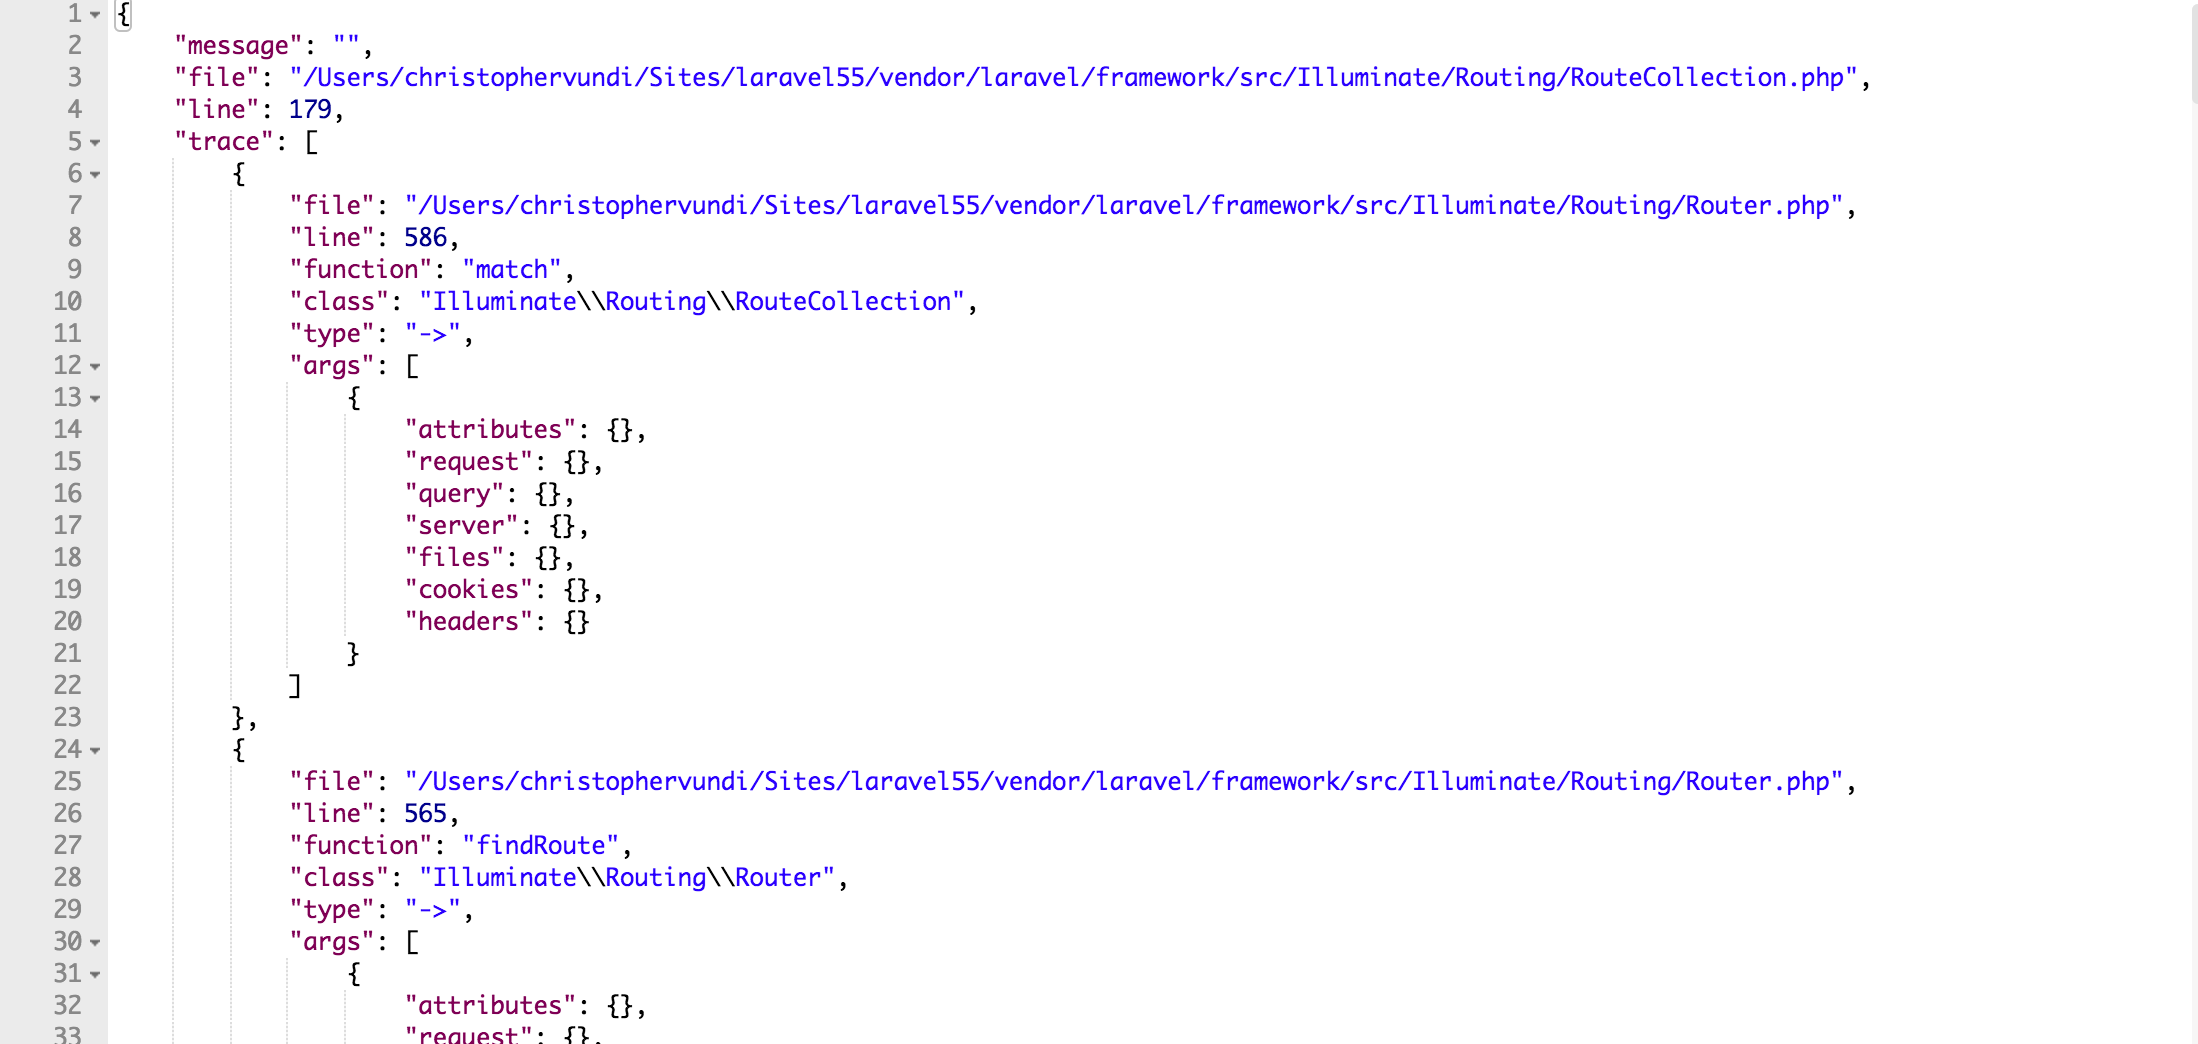
JSON Error Stack Traces
Not a really big change but then in previous Laravel versions, we’d see HTML markup from an API client such as Postman every time we got an error while building out APIs. In Laravel 5.5, we get a JSON stack trace rather than HTML markup if an error occurs which looks neater and easier to follow:
Automatic Package Discovery
These are the steps we follow in order to use a third party package in our Laravel projects.
- Install the package
- Register the package’s service provider
- Register facades if any
As you can see, it could be simpler. Now it is.
With automatic package discovery, we’ll just require a package and start using it on the fly. Note, however, this only happens if the package provider has configured the package for autodiscovery.
Looking at the Laravel Debugbar package which has already been updated for package autodiscovery, we see that there is an extra section inside the composer.json file:
"extra": {
    "laravel": {
        "providers": [
            "Foo\\Bar\\ServiceProvider"
        ],
        "aliases": {
            "Bar": "Foo\\Bar\\Facade"
        }
    }
}
Package providers will have to update the composer.json file with an extra section, then specify the providers and any aliases for the package.
Another good thing with automatic package discovery is that things won’t break after removing a dependency. Normally, even after uninstalling a package we still have the package’s service providers and facades hanging around in the config/app.php file and this may raise issues in some cases.
With package autodiscovery, when a package is removed via Composer, then everything related to the package is also removed.
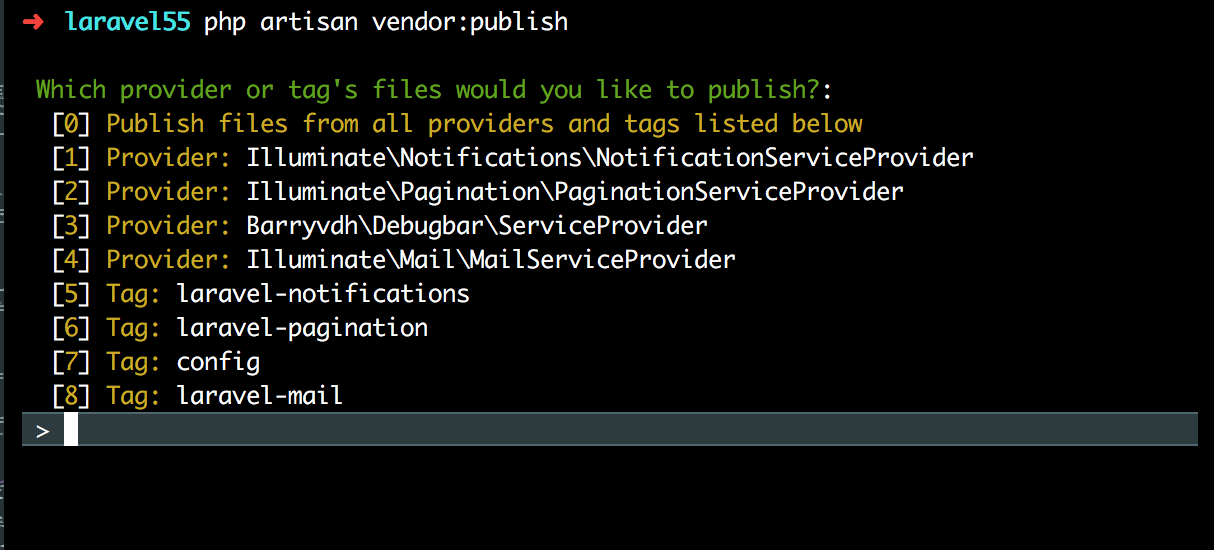
Changes to the vendor:publish Command
In previous Laravel versions, running the vendor:publish command would publish all resources from packages and some from the framework itself. Some of the resources published include migrations, views, and configs.
With Laravel 5.5, we have to be a bit more explicit on what we want to be published when running this command. If we run php artisan vendor:publish without passing any flags, we’ll be prompted to pick a provider or tag making it easier to only publish what we want. See screenshot below:
We can bypass the prompt by specifying the --all or --provider flag when running the publish command:
php artisan vendor:publish --all
Variety of Front End Presets
In Laravel 5.3 and 5.4, we had some Vue and Bootstrap scaffolding by default to help us with the front-end bit. In this new version, React has been included in the mix. It’s not there by default though.
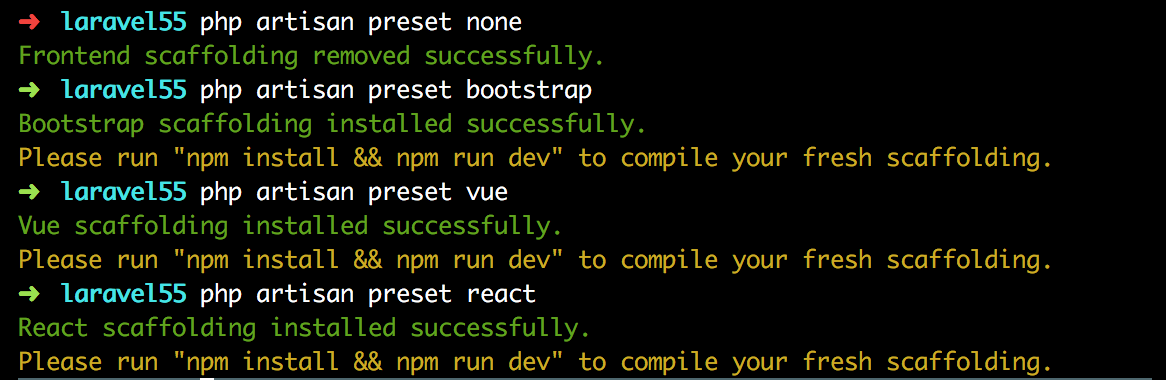
There is a new artisan command to manage the front-end presets. This means we’ll only have the scaffolding for the preset we want to work with. But then not everyone wants to use the default front-end presets – i.e. Vue, Bootstrap and React – and might opt for something else, maybe a different front-end framework. And Laravel has already taken that into consideration:
php artisan preset none
The above command will remove any existing front-end scaffolding. Had we wanted to use React for our front-end, the command below would get us some React scaffolding:
php artisan preset react
Below is a screenshot of this new command in action:
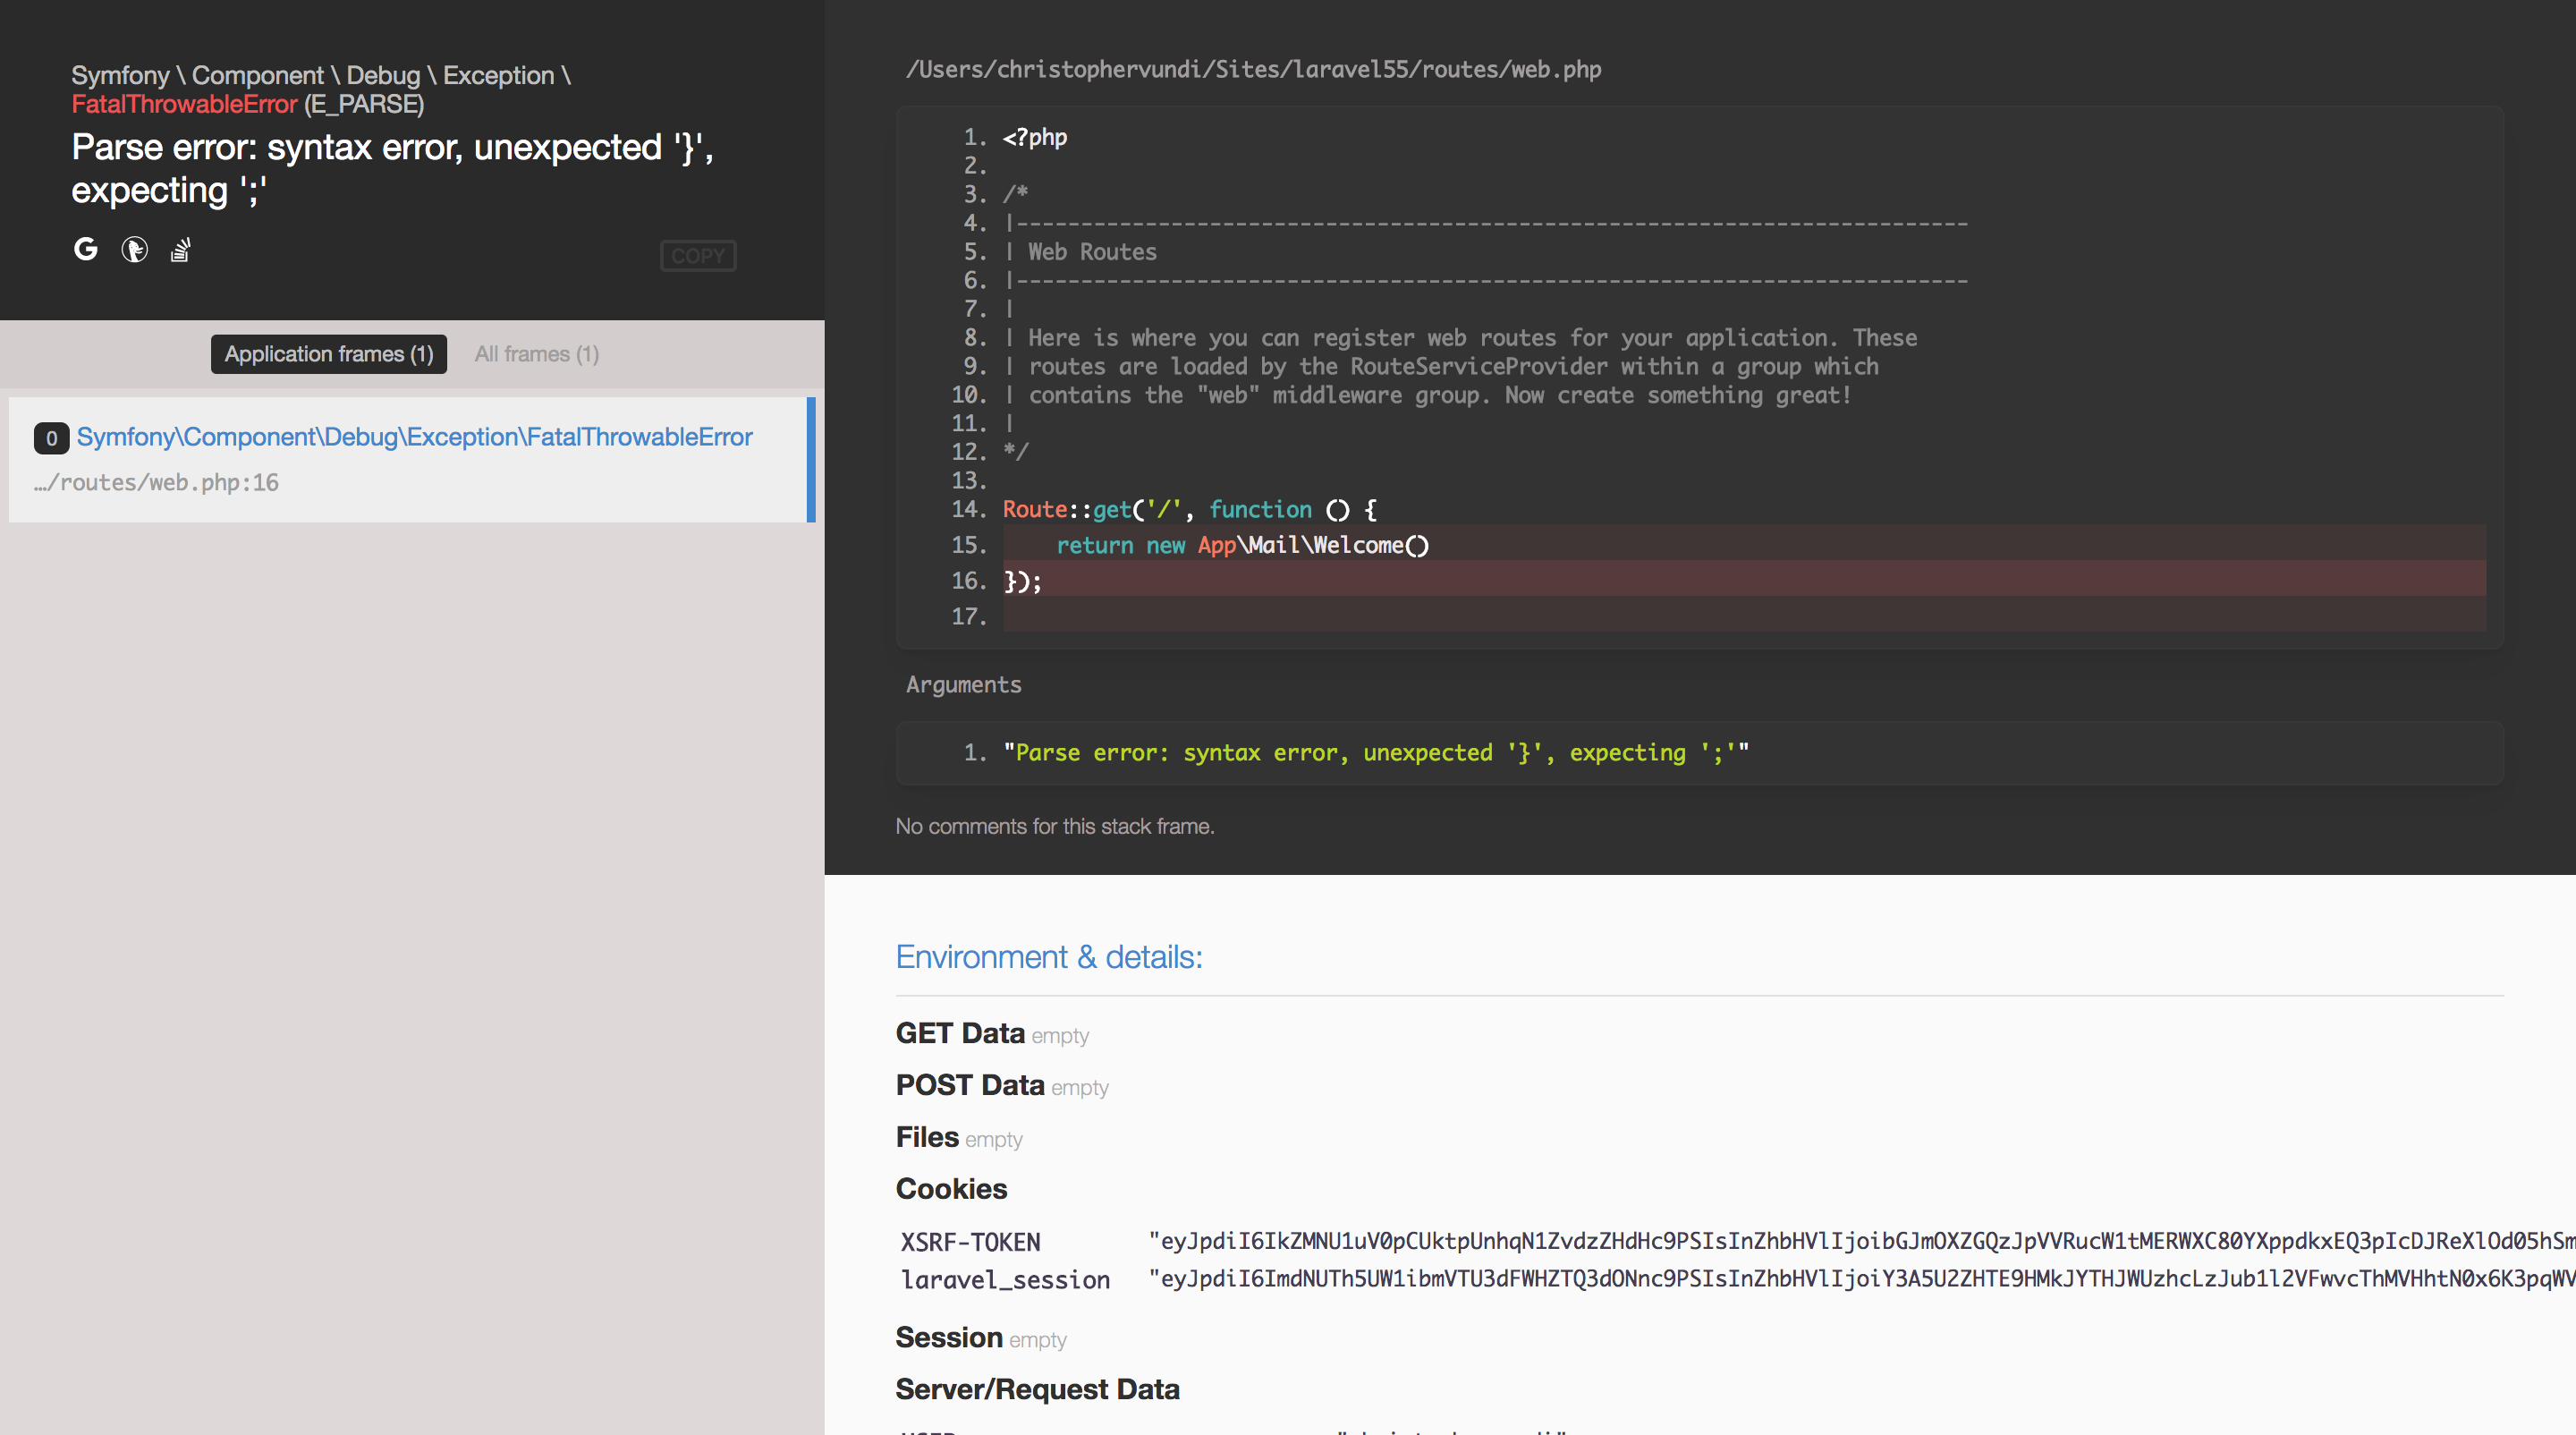
Whoops is Back!
Laravel 5.5 has brought Whoops! back, changing the way errors are displayed. With Whoops!, every time we have an error in development, we’ll be able to see the line of code that resulted in the error in the form of a screenshot as well as the error message.
In my opinion, error messages look better with this new handler and the fact that we get a screenshot with the line of code that resulted in the error makes debugging even easier:
Whoops error example:
Another cool thing is that Whoops comes with the ability to open referenced files directly in your IDE or editor. This feature only works in case your PHP-source files are locally accessible to the machine on which the editor is installed. To achieve this, head over to app/Exceptions/Handler.php and add this snippet:
[...]
use Illuminate\Filesystem\Filesystem;
use Illuminate\Support\Arr;
use Whoops\Handler\PrettyPageHandler;
[...]
class Handler extends ExceptionHandler
{
[...]
    protected function whoopsHandler()
    {
        return tap(new PrettyPageHandler, function ($handler) {
            $files = new Filesystem;
            $handler->setEditor('sublime');
            $handler->handleUnconditionally(true);
            $handler->setApplicationPaths(
                array_flip(Arr::except(
                    array_flip($files->directories(base_path())), [base_path('vendor')]
                ))
            );
        });
    }
}
app\Exceptions\Handler.php
The above snippet overrides the whoopsHandler() method from the base class by adding the line: $handler->setEditor('sublime'), which causes the link to open in Sublime Text. In case you are using a different editor, visit this link to see the list of supported editors and also how to add your own editor. Mac users, don’t forget to download the sublime URL protocol for this to work.
Custom Exception Report Method
For previous Laravel versions, if we wanted to handle custom exceptions thrown in a specific way, then we had to place our logic inside the report method of the Handler.php file. Below is an example:
[...]
public function report(Exception $exception)
{
    if ($exception instanceof CustomException) {
        // Do something
    }

    if ($exception instanceof MyOtherException) {
        // Do something
    }

    if ($exception instanceof MyOtherCustomException) {
        // Do something
    }

    return parent::report($exception);
}
[...]
app/Exceptions/Handler.php
Say we have about 50 custom exceptions – you can tell things are going to get ugly.
In Laravel 5.5, it’s possible to specify what happens when a custom exception is thrown by creating a report() method inside that exception:
[...]
class CustomException extends \Exception
{
    public function report()
    {
        // send email
    }
}

[...]
app/Exceptions/CustomException.php
Model Factory Generators
Laravel 5.5 has introduced a new command to create a model factory. Model factories come in handy when we want to generate fake data or a new instance of an object when writing tests.
To generate a factory for a particular class, we run the command:
php artisan make:factory Post
If we now navigate to database/factories, we’ll see a PostFactory class:
[...]
$factory->define(App\Post::class, function (Faker $faker) {
    return [
        //
    ];
});
database/factories/PostFactory.php
I find this approach more elegant due to the separation of concerns. In previous Laravel versions, all factories went inside the app/factories/ModelFactory.php file.
Validation Data Return
It’s now possible to get data from the validator and pass it to the create method. In previous Laravel versions this is how we went about creating new objects:
public function store()
{
    $this->validate(request(), [
        'title' => 'required',
        'body' => 'required'
    ]);

    // return Post::create(request()->only(['title', 'body'])); or
    return Post::create(request()->all());
}
Laravel 5.5 will now let us create objects directly from the validated data:
public function store()
{
    $post = $this->validate(request(), [
        'title' => 'required',
        'body' => 'required'
    ]);

    return Post::create($post);
}
It’s also possible to call validate on a request instance directly in Laravel 5.5:
public function store()
{
    $post = request()->validate([
        'title' => 'required',
        'body' => 'required'
    ]);

    return Post::create($post);
}
Note, however, we need to be careful when creating objects with this approach since any attribute that is left out from the validate method will not have a value. To counter this, we pass in all the attributes we want for the object to be created inside the validate method even if the values passed don’t need any validation:
$post = request()->validate([
        'title' => 'required',
        'body' => 'required',
        'notRequiredField' => '',
    ]);

return Post::create($post);
With that, the field will automatically get added to the allowed request data, but not be restricted by any validation rules.
Custom Validation Rules
This was still possible in previous Laravel versions by using the Validator::extend method. However, things were not centralized. We had the rule go inside the AppServiceProvider file, then the message inside the resources/lang/en/validation.php file. See Laravel documentation on how to achieve this in Laravel 5.4.
In Laravel 5.5 we have a new artisan command to define custom validation. This command will generate a new class implementing the Rule contract. Let’s generate a new rule to see what’s inside this generated file:
php artisan make:rule CustomRule
If we look inside app/Rules/CustomRule.php, we see two methods i.e. the passes method and the message method. The passes method takes two arguments i.e. the attribute and the value, and returns a boolean. In case you are confused, the $attribute is the field to be validated while the $value is the actual value being passed to that attribute.
As an example, let’s say we didn’t want our app to take a certain name, then we’d have our Rule looking like this:
class CustomRule implements Rule
{
    [...]
    public function passes($attribute, $value)
    {
        return $value !== 'unwantedname';
    }

    public function message()
    {
        return 'You cannot use that as your username';
    }
    [...]
}
app/Rules/CustomRule.php
Then using the new rule to validate our username attribute:
use App\Rules\CustomRule;

request()->validate([
    'username' => [
        'required',
        new CustomRule()
    ],
    'anotherfield' => 'required|min:5'
]);
app/Rules/CustomRule.php
See Taylor Otwell’s post which goes into depth on how to define custom validation in this new Laravel Version.
DD and Dump Coming to Collections
Collections now have a dump() method as well as a dd() method. In previous Laravel versions, when debugging collections we’d assign a variable to a collection then keep dumping the variable as we altered the collection. This won’t be the case anymore in Laravel 5.5 as we can now call dd() or dump() directly on a collection making debugging a lot easier.
Assuming we had a collection of posts which went through a series of transformations and we wanted to inspect the collection at each step, then this will do:
 $posts = Post::all();

 $posts
    ->dump()
    ->sorBy('title')
    ->dump()
    ->pluck('title')
    ->dump();
And the output:
Collection {#284 ▼
    #items: array:3 [▼
        0 => Post {#285 ▶}
        1 => Post {#286 ▶}
        2 => Post {#287 ▶}
    ]
}

Collection {#272 ▼
    #items: array:3 [▼
        0 => Post {#285 ▶}
        2 => Post {#287 ▶}
        1 => Post {#286 ▶}
    ]
}

Collection {#268 ▼
    #items: array:3 [▼
        0 => "Aida Bosco"
        1 => "Madge Leuschke"
        2 => "Miss Bulah Armstrong Jr."
    ]
}
This makes it easy to inspect the contents of the collection at each step. Note, however, that there’s a difference between calling dump() and dd() on a collection. dump() outputs the results at that moment and then continues processing while dd() stops the process immediately and dumps out the results (dd stands for dump and die). Had we called dd() on the collection at every step, then we’d only get the results at the very first point when we called dd() on the collection. Consider this:
 $posts = Post::all();

 $posts
    ->dump()
    ->sorBy('title')
    ->dd()
    ->pluck('title')
    ->dump();
The output will be different:
Collection {#284 ▼
    #items: array:3 [▼
        0 => Post {#285 ▶}
        1 => Post {#286 ▶}
        2 => Post {#287 ▶}
    ]
}

array:3 [▼
    0 => Post {#285 ▶}
    2 => Post {#287 ▶}
    1 => Post {#286 ▶}
]
Pivot Table Casting in Many to Many Relationships
Normally, it’s possible to declare a casts property on a Model which defines how an attribute should be saved or read. Let’s say we have a Post model and among the fields, we want one field to be serialized as JSON during reading and writing, then the code snippet below will help us achieve that:
class Post extends Model
{
    [...]
    protected $casts = [
        'somefield' => 'array',
    ];
    [...]
}
They even made it possible to cast custom pivots in many-to-many relationships in Laravel 5.4, but this was limited to just reading data. Had we wanted to perform write operations on the data, we first had to cast the attribute values manually before finally saving. This won’t be the case anymore as the $casts property on the Eloquent\Model and Eloquent\Relations\Pivot classes will behave the same making the attach, sync and save methods available to pivot models.
Custom Blade::if() Directives
Long repetitive checks within blade templates can make our templates ugly. The good news is that it’s now possible to abstract repetitive checks out of templates, leaving our templates looking cleaner and more readable. Checks like:
@if (auth()->check() && auth()->user()->isSubscribed())
    <p>Subscribed</p>
@else
    <p>Not Subscribed</p>
@endif
Can be substituted for:
@subscribed
    <p>Subscribed</p>
@else
    <p>Not Subscribed</p>
@endsubscribed
The logic for creating a custom blade directive goes inside the boot method of the AppServiceProvider class:
[...]
use Illuminate\Support\Facades\Blade;

class AppServiceProvider extends ServiceProvider
{
    [...]
    public function boot()
    {
        Blade::if('subscribed', function () {
            return auth()->check() && auth()->user()->isSubscribed();
        });
    }
    [...]
}
app/Providers/AppServiceProvider.php
Some checks may require an argument be passed to some method. In that case, we pass in an argument to our closure when coming up with a custom blade directive.
@if (auth()->check() && auth()->user()->isFollowing($user->id))
Using the above conditional as an example, we see that we need the $user->id passed to the isFollowing() method. To create a custom blade directive which takes in the $user->id as an argument:
Blade::if('following', function (User $user) {
    return auth()->check() && auth()->user()->isFollowing($user->id)
});
Then to use this new directive in our templates:
@following($user)
    <p>Following</p>
@else
    <p>Not Following</p>
@endfollowing
Autoregistering of New Artisan Commands in the Kernel
We usually run the command php artisam make:command command-name to create new artisan commands. After that, we declare our signature inside the class with the command then head over to the kernel and manually register the command.
Registering new commands in the Kernel won’t be a requirement anymore. Inside the app/Console/kernel.php file, we have a new method which looks within the command directory and turns all file paths into a namespaced path:
[...]
protected function commands()
{
    $this->load(__DIR__.'Commands');

    require base_path('routes/console.php');
}
[...]
Assuming we referenced a command which has not yet been registered in the kernel, the commands() method will resolve the command automatically.
New Routing Methods
Not really a big feature but we now have two extra routing methods:
Route::view('/welcome', 'welcome');
Route::redirect('home', 'dashboard');
The first route will map the welcome view to the /welcome path while the second will redirect any requests made to /home to the /dashboard.
Introducing Laravel Horizon
This is a new Laravel package which provides a dashboard and code-driven configuration system for Laravel Redis queues:
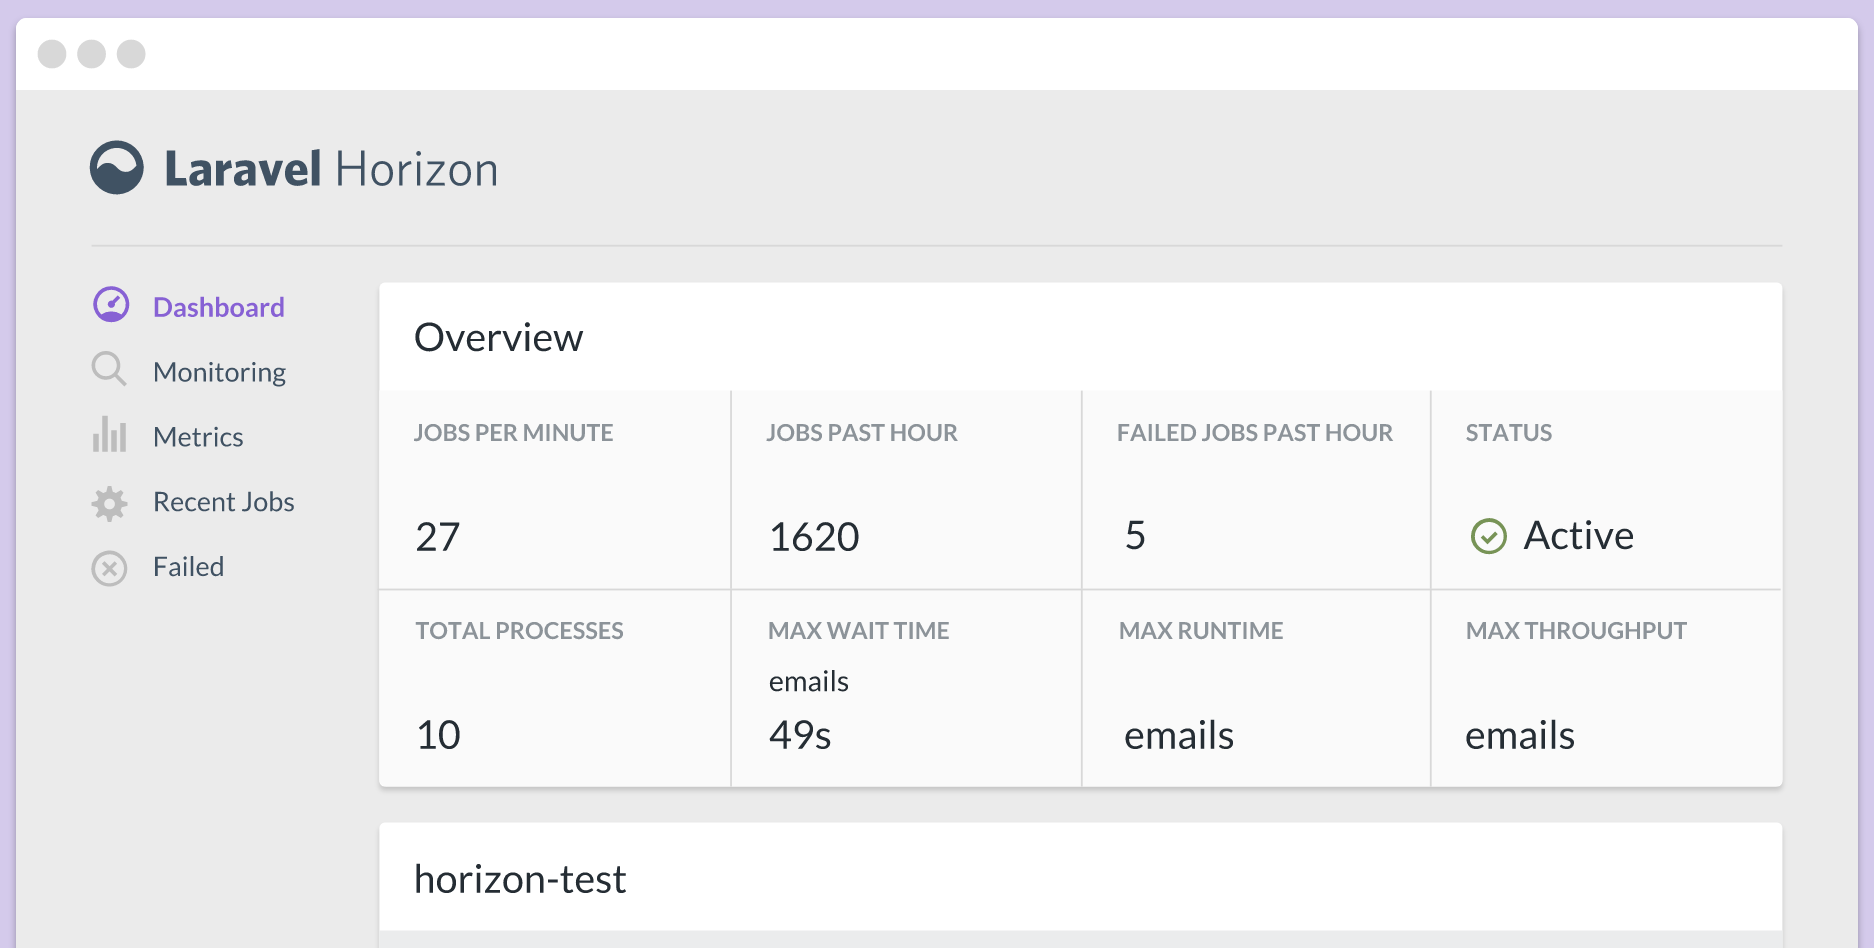
Horizon provides real-time insight into queue workloads, recent jobs, failed jobs, job retries, throughput and runtime metrics, and process counts.
Some of the features that come with Horizon include:
- High-level analytics for jobs – Things like jobs per minute and jobs in the past hour
- Job and queue specific analytics
- Tags and monitoring – It’s possible to add tags to jobs and also monitor certain tags
- Recent jobs – We can get information about the most recent jobs
- Queue Balancing Strategies – Horizon can automatically balance your queue worker processes across your queues depending on the workload of those queues
See Taylor Otwell’s post which goes into depth on how to configure Horizon and all the features Horizon is packed with. We’ll have a dedicated Horizon post as well, so stay tuned.
New database migration trait
This is the RefreshDatabase trait. Some might wonder if we really need this, but the move behind coming up with this makes sense. Initially we had the DatabaseMigrations and DatabaseTransactions traits.
Using the DatabaseMigrations trait in our tests makes sure that migrations are run before and after each test, while the DatabaseTransactions trait ensures that the database is restored to its initial state after each test is run.
The RefreshDatabase trait will tap both capabilities by migrating the database once at the start of our tests and then running every test after that with transactions. The advantage of this is that we don’t have to re-migrate the database for each test, meaning faster tests.
Conclusion
As you can see, we have a lot of exciting new stuff. However, the official release has not yet happened, so we have to wait for the upgrade guide to be published.
More features are still being rolled out so keep a keen eye on this post as we keep it up to date. Leave your thoughts and suggestions in the comments section below, and don’t forget to share this post with fellow Laravel enthusiasts!
Frequently Asked Questions about Laravel 5.5 Features
What are the new features introduced in Laravel 5.5?
Laravel 5.5, the next major release of Laravel, was officially released on August 30, 2017. This release introduces several new features, including:
1. Automatic Package Discovery: This feature automatically detects and installs packages that you want to use in your project, eliminating the need to manually add them to your config/app.php file.
2. Dump and Die (DD) function: Laravel 5.5 introduces a new global dd function, which stands for Dump and Die. This function dumps the argument given to it and ends the script.
3. Custom Validation Rule Objects: Laravel 5.5 allows you to create custom validation rules as objects, making it easier to organize and reuse them.
4. New Frontend Presets: Laravel 5.5 introduces new frontend presets, including React.js, which can be easily scaffolded using the artisan preset command.
5. Exception Helper Functions: Laravel 5.5 introduces new exception helper functions, which allow you to throw exceptions more conveniently.
How does the Automatic Package Discovery feature work in Laravel 5.5?
The Automatic Package Discovery feature in Laravel 5.5 simplifies the process of installing and managing Laravel packages. When you install a new package via composer, Laravel automatically detects the package and registers its service providers and facades, eliminating the need for manual configuration. This feature is enabled by default for all Laravel 5.5 applications.
What is the purpose of the Dump and Die (DD) function in Laravel 5.5?
The Dump and Die (DD) function is a global helper function introduced in Laravel 5.5. It’s used for debugging purposes. When called, it dumps the argument given to it and stops the execution of the script. This is particularly useful when you want to inspect the contents of a variable at a certain point in your code without letting the script run further.
How can I create Custom Validation Rule Objects in Laravel 5.5?
In Laravel 5.5, you can create custom validation rules as objects. This allows for better organization and reusability of your validation rules. To create a custom validation rule object, you can use the make:rule Artisan command, which will generate a rule object in the app/Rules directory. You can then define the validation logic in the passes method and the validation error message in the message method of the rule object.
What are the new Frontend Presets introduced in Laravel 5.5?
Laravel 5.5 introduces new frontend presets, including React.js. These presets allow you to easily scaffold a new frontend framework for your application. You can use the artisan preset command to scaffold a new frontend preset. For example, to scaffold React.js, you would run the command php artisan preset react.
How do the new Exception Helper Functions work in Laravel 5.5?
Laravel 5.5 introduces new exception helper functions that allow you to throw exceptions more conveniently. These functions include throw_if and throw_unless. The throw_if function throws an exception if a given condition is true, while the throw_unless function throws an exception if a given condition is false. Both functions take three arguments: the condition, the exception to throw, and an optional message for the exception.
How does Laravel 5.5 improve error handling?
Laravel 5.5 introduces a new feature called “Whoops” for better error handling. Whoops is a beautiful and flexible error handler framework that helps you debug your code with less hassle. It provides a clean, professional look to your error pages, making it easier to understand what went wrong.
What is the purpose of the renderable method in Laravel 5.5?
The renderable method in Laravel 5.5 allows you to associate a render method with an exception. This means you can control the HTTP response that should be sent when the exception is thrown. This is particularly useful for handling API exceptions, where you might want to return a JSON response with a specific structure.
How does Laravel 5.5 handle failed jobs in queues?
Laravel 5.5 introduces a new feature for handling failed jobs in queues. If a queued job fails to run successfully, Laravel 5.5 will automatically insert the job into a failed_jobs database table. You can then inspect this table to understand why the job failed and retry the failed job at a later time.
What is the purpose of the migrate:fresh command in Laravel 5.5?
The migrate:fresh command in Laravel 5.5 is a new artisan command that drops all tables from the database and then runs the migrate command. This is useful when you want to rebuild your database from scratch during development.
 Christopher Vundi
Chris is a software developer at Andela. He has worked with both Rails and Laravel and blogs to share a few tips. Chris also loves traveling.