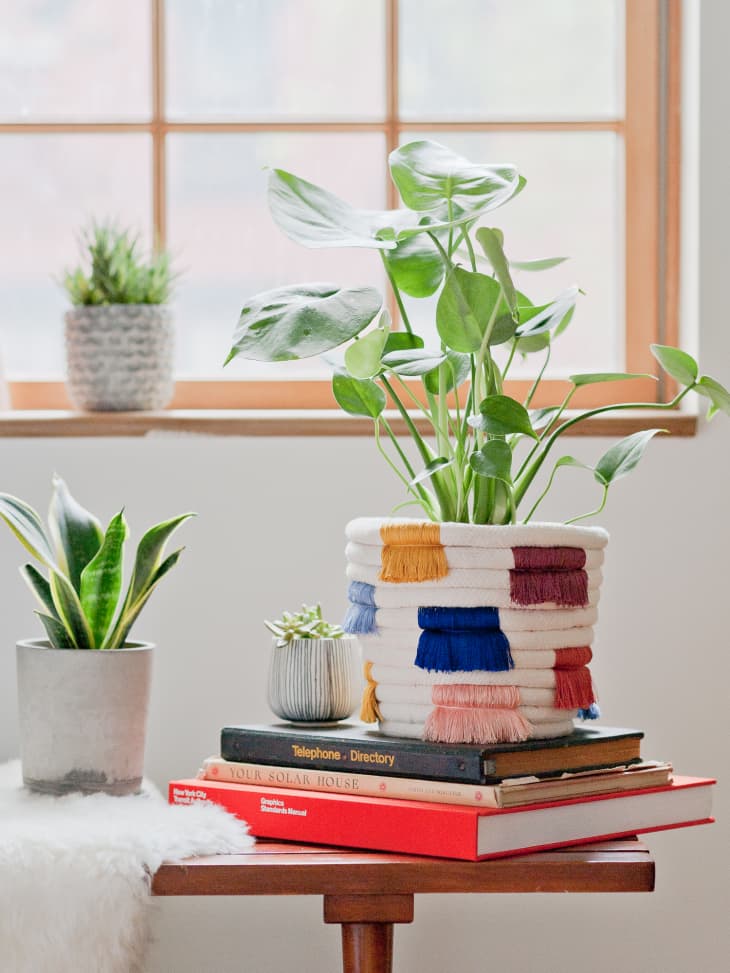
Plant Love: Colorful DIY Boho Fringe Planter Makeover
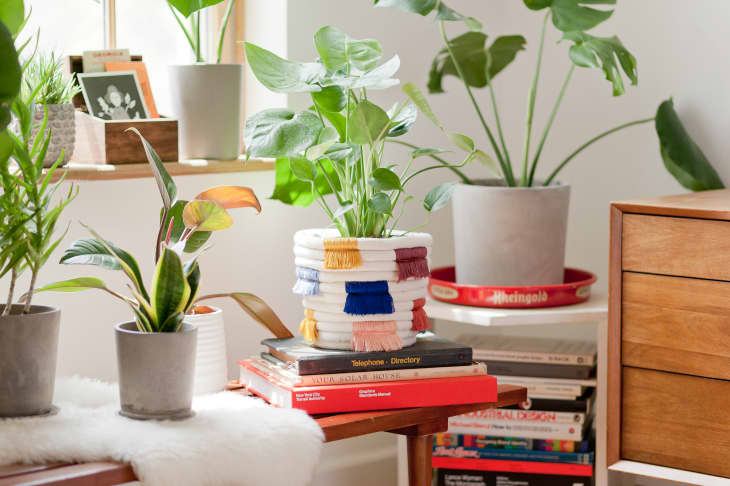
Plant ladies – and gentlemen – unite! Every houseplant is unique, so shouldn’t their planters be unique, too? With some simple supplies, a spare hour or two, and an itch for creating cool color combos, you can easily craft a playful new look for all of your plants. The coiled cotton piping offers the ultimate neutral base for all of your favorite embroidery floss hues, and it makes this DIY perfect for pairing with all things textured, natural and bright. Could this be the beginning of a beautiful “fringe-ship”? I’ll let you decide…

What You Need
- Medium to large plastic planter or similar container
- 15-30 yards / 13-27 m of ½ in. to ¾ in. cotton piping (amount needed will vary based on container size)
- 20+ skeins of embroidery floss (at least 2 of each color)
- Glue gun
- Glue sticks
- Washi tape
- Comb
- Scissors
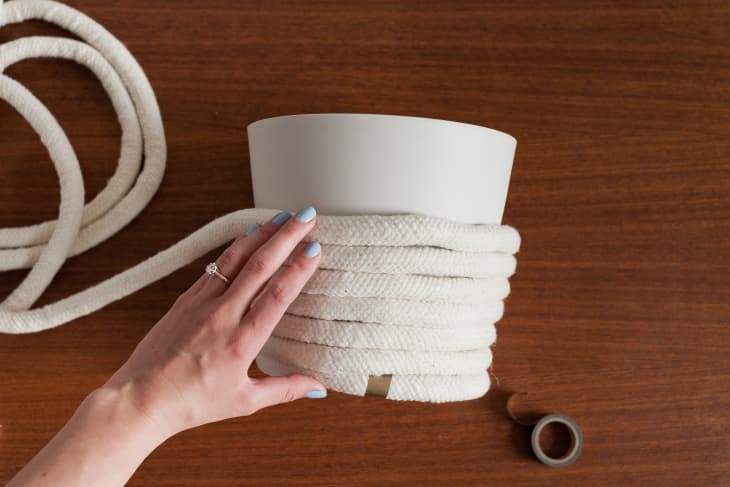
Step 1. Measure your cotton piping
Coil the cotton piping – bottom to top – until the entire container is covered. Use the washi tape as a temporary anchor on the bottom of the container to hold the coil loosely in place. Cut the cotton piping at the top, leaving an extra foot or two of material just in case. (See below)
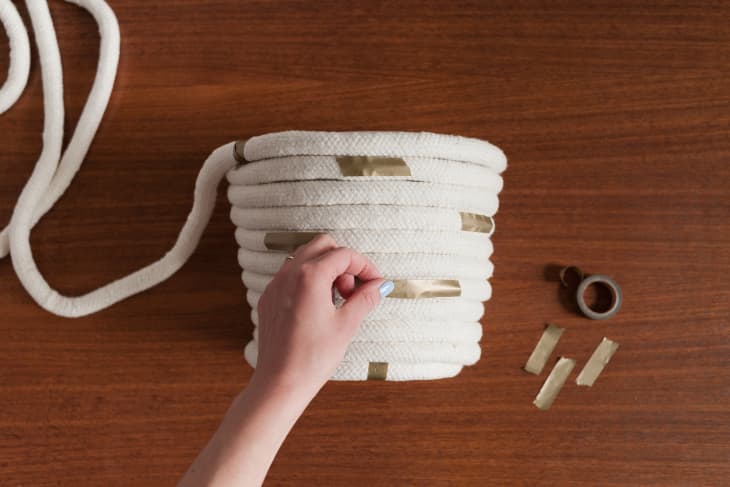
Step 2. Plan out your design
After covering the container, cut and place 2-3 inch pieces of washi tape organically on the piping to indicate where to place the fringe. Uncoil when you’re done, but remember which end is the bottom. Tip: During this step, you can also plan out where each of your colors will go, or keep things totally random.
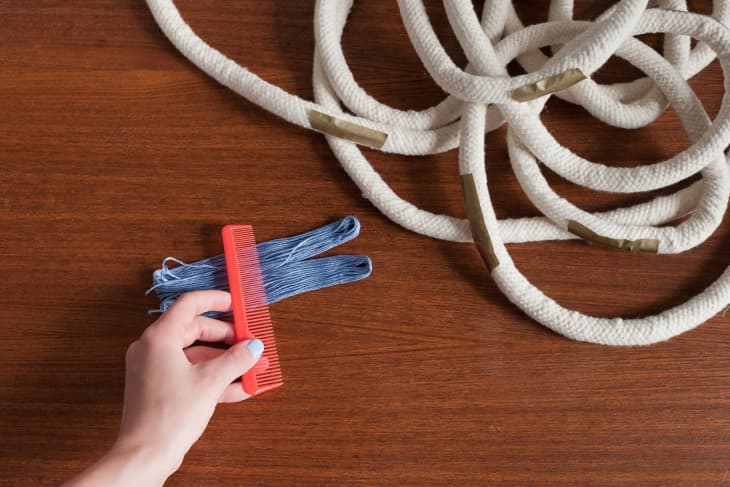
Step 3. Prep the fringe
Select two skeins of the same colored embroidery floss. Remove the paper packaging but do not unravel. Lay the skeins side-by-side, and lightly comb to flatten and straighten the looped floss. Tip: Reserve 2-3 feet (more for larger planters) of each color if you want to be able to define your fringe at the end.
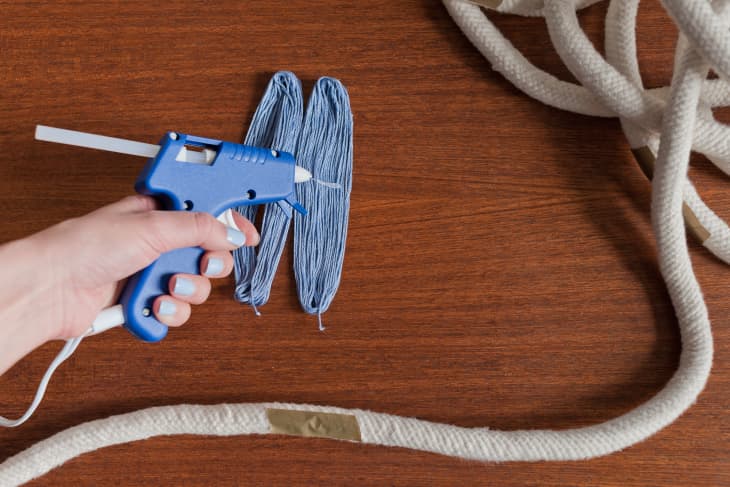
Step 4. Glue the fringe
Heat your glue gun. Once the floss is completely flat, apply hot glue in a thin line across the middle.
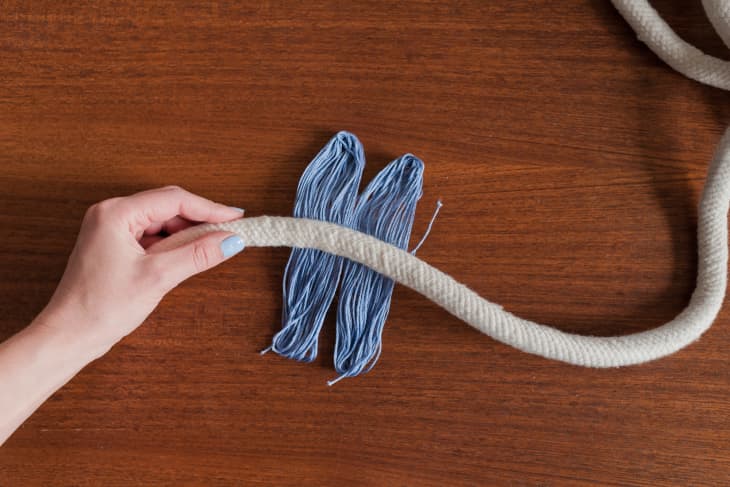
Step 5: Attach the cotton piping
Starting with the first taped-off area on your piping, and while the glue is still hot, remove tape and place piping over hot-glued fringe. Press gently to ensure all of the floss is attached and laying flat.
Step 6: Flip the fringe
Flip the fringe around the piping so that the ends align.

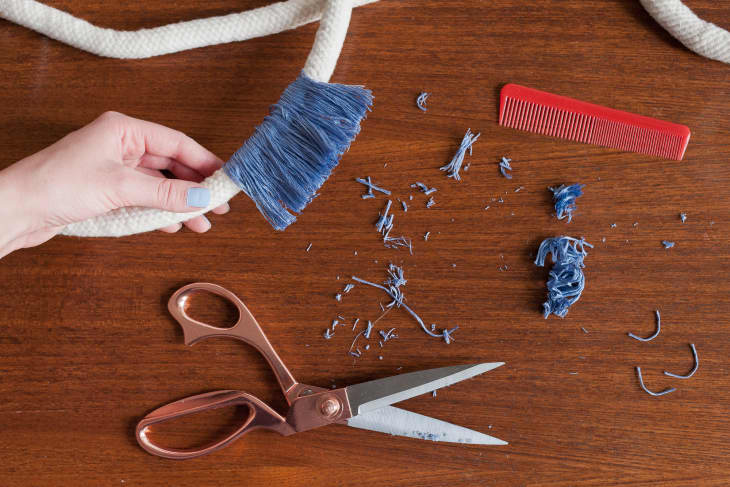
Step 7: Cut the fringe
Use the comb and scissors to evenly cut the looped ends of the embroidery floss. Don’t worry about perfection – you’ll be able to trim more neatly at the end. Continue steps 3-7 until all of the taped-off areas of the piping are replaced with embroidery floss fringe in a variety of colors.
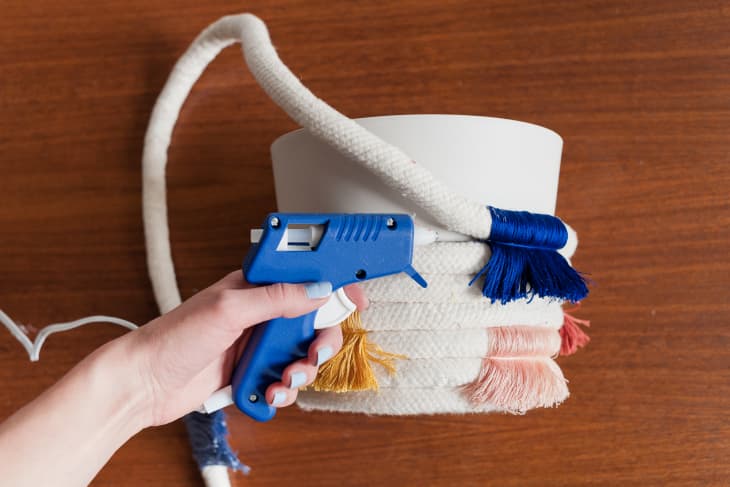
Step 8: Wrap and secure cotton piping
Once all of the taped-off areas are replaced with fringe, begin coiling (again, from bottom to top) and securing piping with hot glue until you reach the top. Strategically choose an area to end the coil, as this will become the back of the planter.
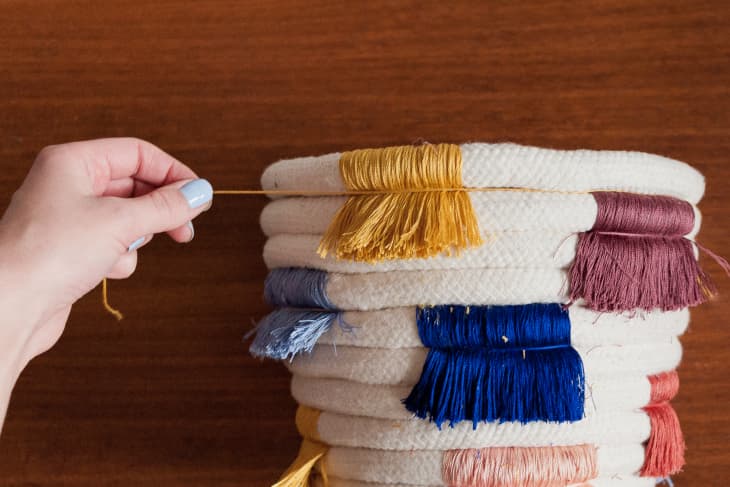
Step 9: “Define” the fringe
Wrap leftover embroidery floss over each individual section of fringe and around the planter, making sure the floss sits between the coils to camouflage it. Pull tightly to further define your fringe, and tie off in the area designated as the back of the planter. Tip: You can also try to hide your ties behind other fringe to minimize appearance.
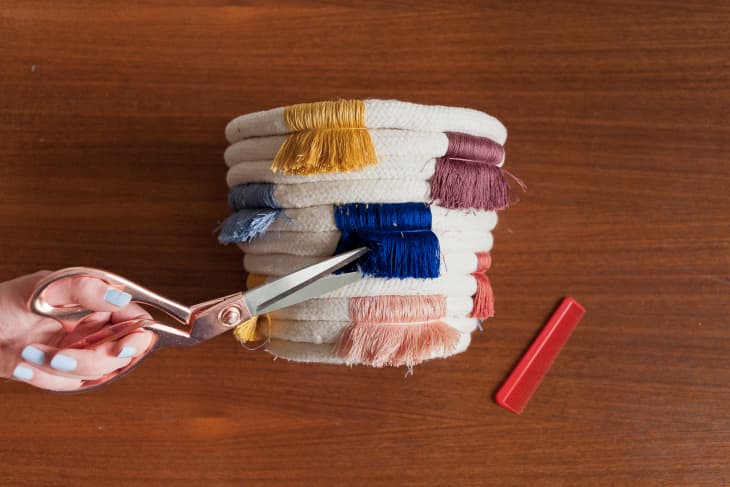
Step 10: Trim
With everything secured and in place, use the comb and scissors to trim the edges of your fringe to your desired length.
Grab your favorite plant and enjoy your new creation!