 Your Privacy Choices
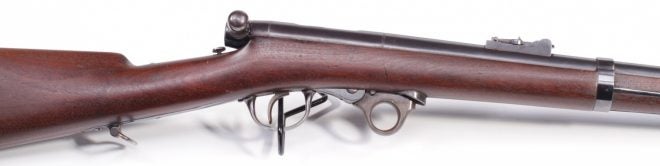
There’s probably a simple reason why the 900 some-odd Green Underhammer bolt action rifles bought by the U.S. Ordnance Department in the late 1850s/early 1860s weren’t very popular: dumb grunts like me couldn’t figure them out.
Okay, maybe that’s not entirely fair, but bear with me here. The powder. Goes in front. Of the bullet.
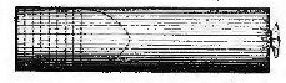
Greene Underhammer Rifle Cartridge
It’s okay, I made that face too. In fact, the riddle is pretty simple. Tolerances weren’t good enough to seal the breech in those days, so U.S. Army Lt. Col. J. Durrell Greene designed for a lead seal. In effect, each shot requires two bullets. Here’s how it works:

Greene Underhammer Bolt Action Rifle, bolt open – Institute of Military Technology collection
We begin by pulling the bolt to the rear in the normal way, then we place a .53 caliber bullet -just a bullet- into the chamber.
Greene Underhammer Bolt Action Rifle, plunger driven half-way forward – Institute of Military Technology collection
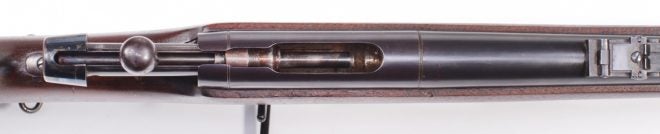
We drive the plunger forward, but note how the bolt stays to the rear. At this point, we’re driving a bullet -just a bullet- into the firing position. We’ll then pull the plunger back all the way to the rear again and insert a complete paper cartridge.

Greene Underhammer Bolt Action Rifle, bolt forward ready to close/lock – Institute of Military Technology collection
Now we drive the entire bolt assembly forward. The projectile bullet is in the front, the cartridge is inserted with a bullet in its rear. The idea here is that the rear bullet (inside the cartridge) will act as a seal. Note that in this position the bolt lug is visible.

Greene Underhammer Bolt Action Rifle, bolt locked, hammer cocked – Institute of Military Technology collection
Now we’ll pull the underhammer down and place a “hat cap” primer onto the nipple. For the uninitiated, underhammers were popular in the 1850s as they provided the shooter with fewer powder burns to the face.
Now pay attention, this is where it gets complicated and I’m all out of pictures.
Next:
- Fire the rifle, *BANG*
- Unlock the bolt upward by pushing the button on the tang, then push FORWARD on the plunger, moving the “seal” bullet into the firing position.
- Pull BACK on the plunger bringing the bolt all the way to the rear.
- Load a new cartridge (with a bullet in the back).
- Push the bolt assembly forward and lock it down.
- Pull the underhammer down and affix a primer.
- Fire again *BANG*
- Repeat.
Simple enough for a dumb grunt, right?
Reportedly, 3000 Greenes were delivered to Russia though none are known