How to Make a DIY Softbox from a Bicycle Wheel and Some Fabric
Need something fun to build this weekend? This step-by-step tutorial will show you how to turn an old bicycle wheel and some fabric into a simple DIY softbox that you can use for photography or, just as a cool studio accent light.
The build was dreamt up by Rob Thomas of pricklysauce, and it’s a bit more involved than your basic DIY project. But as long as you don’t mind a touch of soldering and an hour or two spent destroying an old bike wheel, the results are definitely worth it.
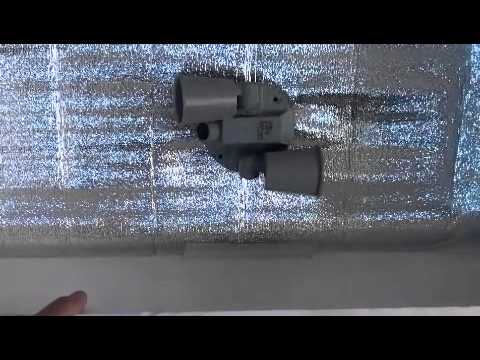
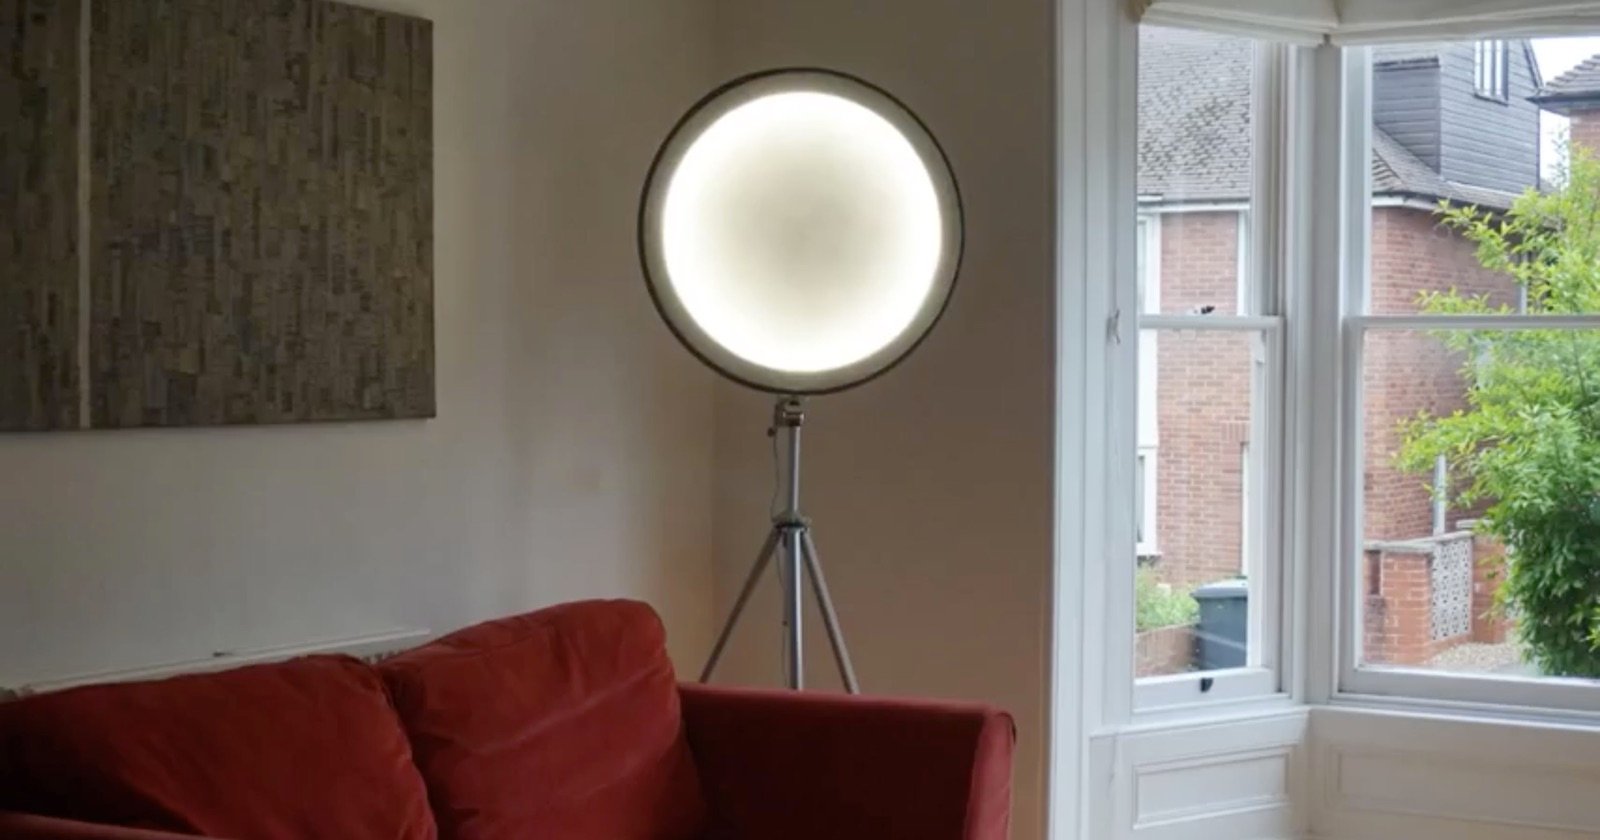
The final product will look something like this:
You can see the whole process in the video above, or follow along on Instructables for more details, but the basic steps are as follows:
Step 1
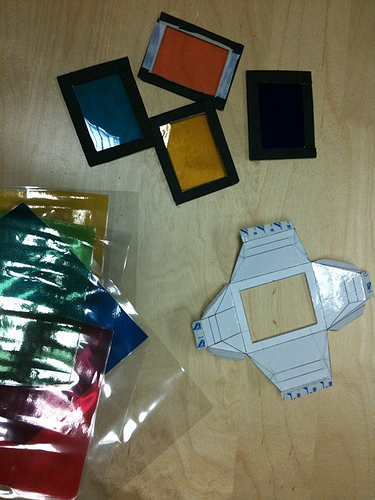
Grab an old 26-inch road bike wheel tire, 750mm x 750mm of stretchy white lycra, some white cotton thread, Stretch needles for sewing stretchy materials, a 1300mm length of elastic cord, 2 number A1 sheets of mounting card (one black, one white), a sheet of tin foil, and spray mount glue.
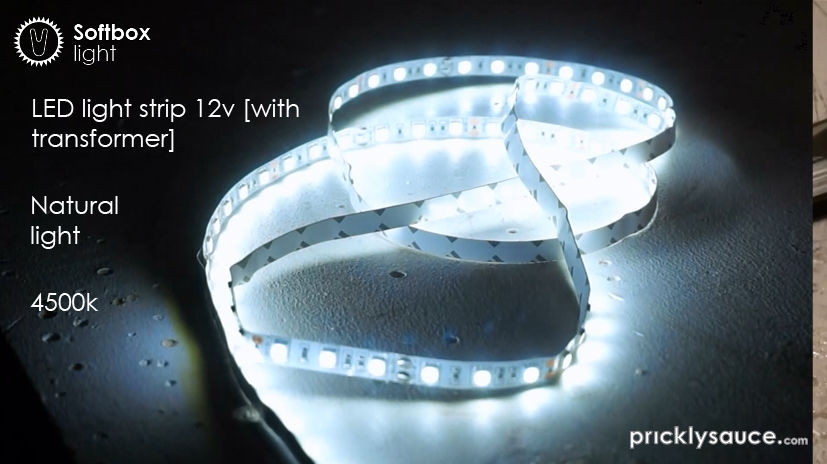
For the light/electronics part of the build, you’ll also need a strip of LED lights + transformer (natural light 4500k 12v), some wire to extend the lead if necessary, solder, a tripod mount screw, and some Evo Stick Strong Stuff glue.
Step 2
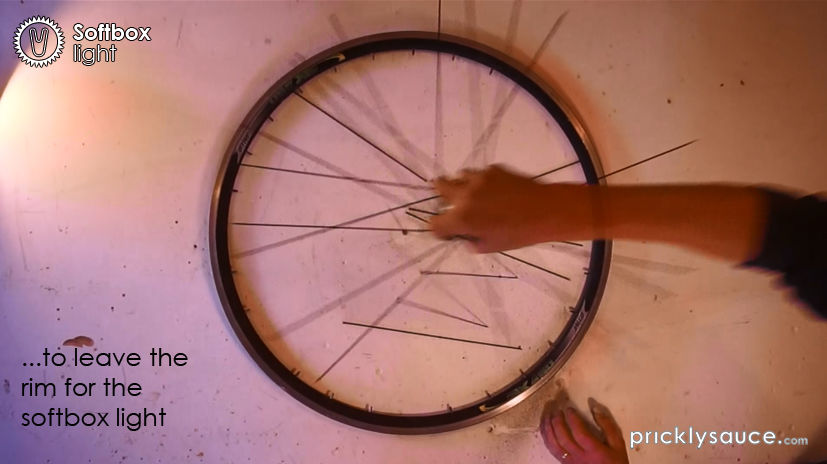
Prep the wheel by removing all of the spokes and the hub.
Step 3
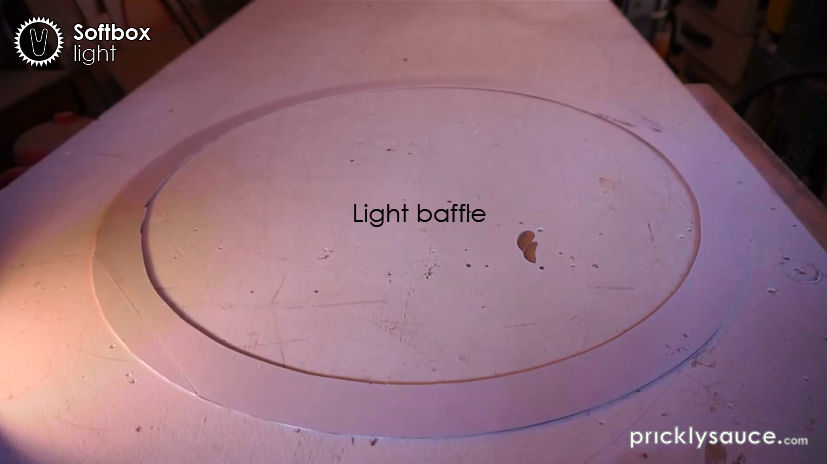
Mark the wheel’s circumference on the white and black card. Cut both of them out and set the black piece aside. Take the white piece, mark a line about 40mm into the circle, and cut again to make a ‘baffle’. The baffle will look like this:
Step 4
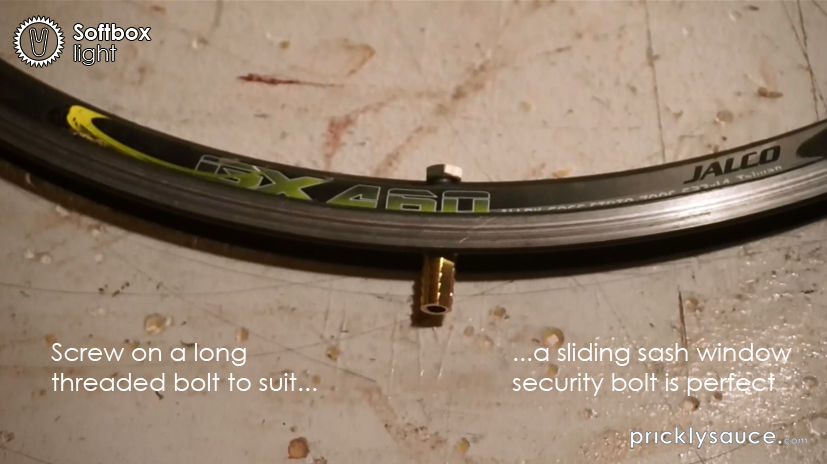
Remove the tire, and insert a long threaded bolt through the valve hole. Then attach a tripod screw (a sliding security window bolt is the same thread) to the end of the bolt. This will be your mounting point.
Step 5
Attach the sticky side of the LED strip to the inside of the wheel, poking the LED light connector wires through a spoke hole near the attachment bolt. Cut to length.

Step 6
Use spray glue to stick crumpled up tin foil to one side of the black card you cut into a circle earlier. This will form the back of your light, and you want a reflective surface inside to help amplify the LED edge.
Step 7
Use the stronger glue to stick the backing card to one side, and the light baffle to the other. At this point, you should have a tire with LED lights on the inside, a reflective backing on one side, and a light baffle on the other.
Step 8
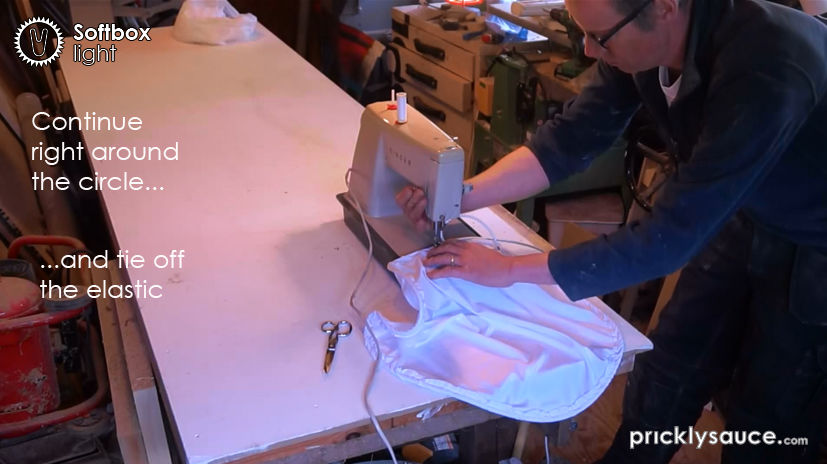
Cut out a circle of your stretchy white fabric, and sew the elastic band around the edge of that circle. This creates a fabric diffuser you can stretch over the front side of your light.
Step 9
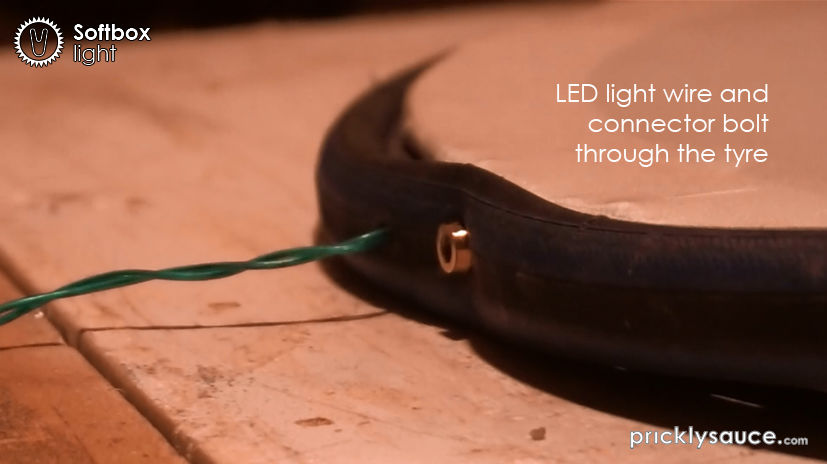
Solder your wire onto the LED connection wires, and then stretch the fabric over the front end of the light. Next, punch two holes in your tire, one for the attachment screw and another for the LED wire to pass through, and put the tire back onto the bike wheel.
The final piece should look like this:
And that’s it! the LED wire connects to your transformer, which you can plug in and switch on. And thanks to the attachment bolt, you can mount the light to anything that accepts the standard 1/4″-20 tripod screw.
If you want to build this for yourself, definitely check out the video walkthrough at the top and reference the more detailed step-by-step breakdown on Instructables. We have to say, for a DIY build, this particular softbox looks really slick.
Image credits: All photos by Rob Thomas/pricklysauce and used under creative commons license.