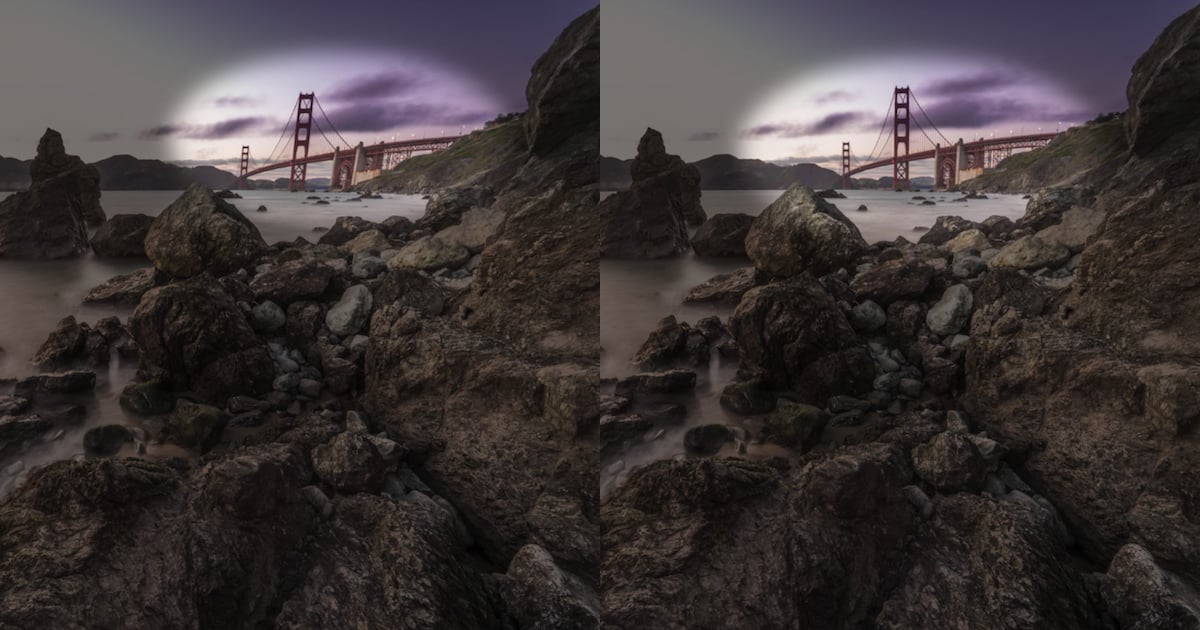
How to Add ‘Dynamic Contrast’ to Your Images Using Only Photoshop
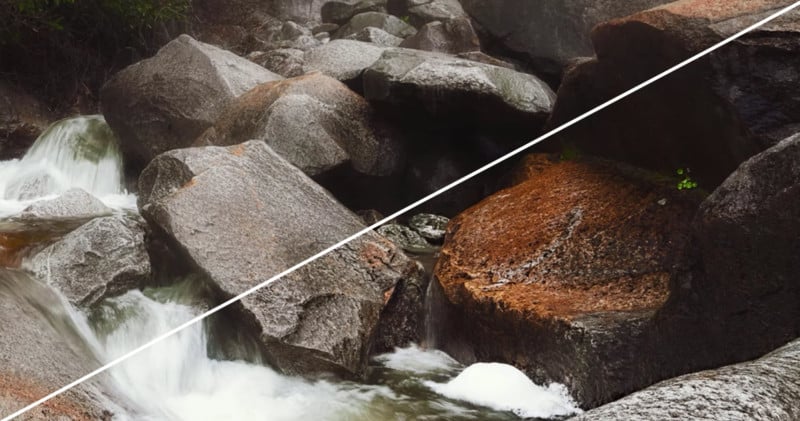
You don’t need ON1 Effects 10 or Topaz Clarity to get that “Dynamic Contrast” pop in your landscape images. This short tutorial shows you how to create the effect from start to finish using only Photoshop.
The step-by-step walkthrough comes from Blake Rudis at f64 Academy, and it’s a pretty straightforward process that gets you really dramatic results. It’s not a look everybody will be crazy about, but if you’ve always wanted to get it, it’s good to know you don’t have to pay for special plugins or programs you don’t already use all the time.
If you don’t want to try and do this yourself, Rudis created a set of actions that will do everything for you. They’re available for free here. If you do want to learn how to create this look yourself, however, read on.
The whole process, at its most basic, is just applying an Unshap Mask to a High Pass filter. But of course, dialing in the look take a few more steps than that.
Here’s the step-by-step straight from the description below the YouTube video:
1. Duplicate the Background Layer
2. Make a High Pass on the Background layer set to something rather high anywhere from 8-25 (depending on the resolution of your photo, higher for high-resolution images)
3. Desaturate the HighPass Layer by pressing Command or Ctrl+SHIFT+U
4. Run an Unsharp Mask on the High Pass Layer
5. Adjust the Threshold, Radius, and Amount to Taste
6. Using Blend Modes, Opacity and Blend If to adjust the effect.
7. Use a clipping mask Curves Adjustment Layer to modify the effect even further.
And that’s it! Check out the video up top to see exactly how its done or download the actions on f64 academy to save yourself some time.