It was not that long ago that Christopher Pitt wrote an excellent article about writing and running PHP code on an iPad. After reading it, I thought to myself “It would be really cool to do the same on Android”: being able to write and edit code on the fly, for example while traveling, and not having to take the laptop everywhere. So I’ve decided to do some research and see what I could come up with.

For this article, you can use any type of Android device. I’ve done it on my phone, but an Android tablet with a Bluetooth keyboard would probably be the ideal setup.
There are a couple of different shell apps for Android. For this tutorial we will use one called Termux.
Termux combines both a powerful terminal emulation and an extensive Linux package collection. It is also completely free and easy to use.
After installing Termux from the Play Store, the first thing to do is to run the apt update command. As per the documentation: “This command needs to be run initially directly after installation and regularly afterwards to receive updates.”
Now for the fun part. The first two commands I want to talk about are the apt list and apt list --installed commands. The first one will list all the available packages for Termux. We can see that it has support for a lot of different programming languages, text editors and has some useful utility packages like zip, tar and so on. The second command will list all the installed packages. As we can see Termux already comes with some packages like apt and bash pre-installed.
My goal when testing Termux was to see if I could assemble a proper* PHP development environment, so I started by installing a text editor. I prefer Vim, but there are some more options available, like Emacs and Nano. Vim has a bit of a learning curve to it, but it gets very comfortable when you get past the basics of it. You can get Vim with the apt install vim command.
If you want to learn more about vim, there’s this very good article or, alternatively, after installing it, type vimtutor to use the built-in tutorial.
If you are testing this on your Android phone, running vim will bring the first set of problems. How can I hit the Escape button? Termux has a large list of shortcuts that be used to simulate the buttons that are not available on the Android keyboards:
| Command | Key |
|---|---|
| Volume Up+E | Escape key |
| Volume Up+T | Tab key |
| Volume Up+1 | F1 (and Volume Up+2 → F2, etc) |
| Volume Up+0 | F10 |
| Volume Up+B | Alt+B, back a word when using readline |
| Volume Up+F | Alt+F, forward a word when using readline |
| Volume Up+X | Alt+X |
| Volume Up+W | Up arrow key |
| Volume Up+A | Left arrow key |
| Volume Up+S | Down arrow key |
| Volume Up+D | Right arrow key |
| Volume Up+L | (the pipe character) |
| Volume Up+U | _ (underscore) |
| Volume Up+P | Page Up |
| Volume Up+N | Page Down |
| Volume Up+. | Ctrl+\ (SIGQUIT) |
| Volume Up+V | Show the volume control |
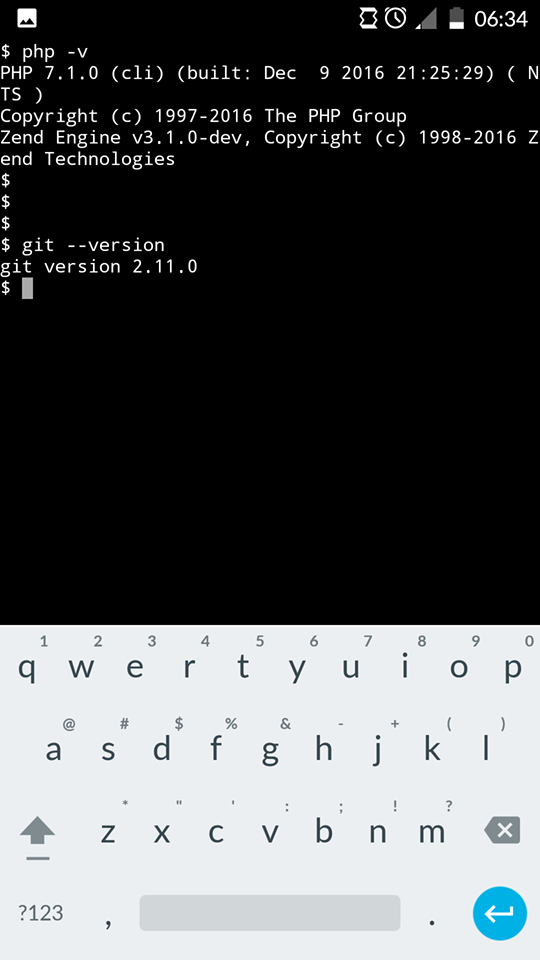
Now that we have our editor up and running, it’s time to install the packages we’ll need: PHP, Git and Composer.
apt install php
apt install git
This will install the latest PHP and Git packages.
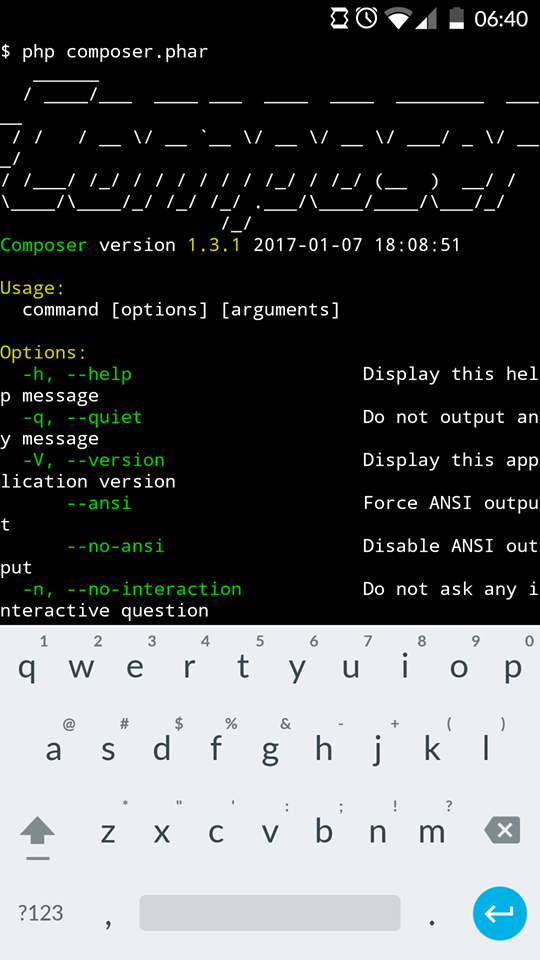
For Composer, we need to do a little bit of extra work. We need to go to the Composer download page and use the instructions for the command line installation:
php -r "copy('https://getcomposer.org/installer', 'composer-setup.php');"
php -r "if (hash_file('SHA384', 'composer-setup.php') === '55d6ead61b29c7bdee5cccfb50076874187bd9f21f65d8991d46ec5cc90518f447387fb9f76ebae1fbbacf329e583e30') { echo 'Installer verified'; } else { echo 'Installer corrupt'; unlink('composer-setup.php'); } echo PHP_EOL;"
php composer-setup.php
php -r "unlink('composer-setup.php');"
This will download the installer, verify it, run it and delete it. If everything went well, we should be able to run Composer from Termux.
Now that we have all of our tools installed, we should test if our PHP installation is running correctly. For that, let’s do a simple phpinfo() test. Let’s create a new folder and test our PHP installation.
mkdir test
cd test
echo "<?php phpinfo();" > index.php
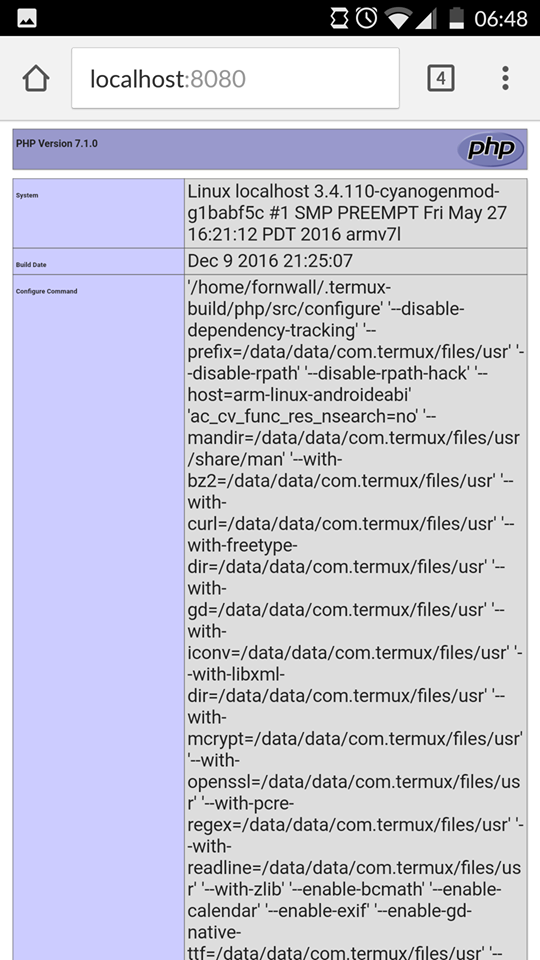
php -S localhost:8080
This will create a new folder and then create an index.php file with the phpinfo() command inside of it. I’m echoing it directly into the file, but you can use Vim to do it. Finally, we are using the PHP server to serve it to our localhost. When accessing localhost:8080 in our browser we should see something like this:
We now have Composer for dependency management, and git for version control. But I know what you’re thinking: “we just made a simple phpinfo test, what about the rest?”.
Can we Install Laravel on an Android device?
At this point we have everything we need to install and run Laravel on our Android device. To create a new Laravel project, we need to run the following command:
php composer.phar create-project --prefer-dist laravel/laravel new_project
This will create a new Laravel project in the new_project folder. The --prefer-dist option is well documented here. The installation will probably take a little while. After it’s complete, we can run our newly created project using Laravel’s own Artisan command line interface. Inside the new_project folder, we can run the command:
php artisan serve
Accessing the localhost:8000 URL in the browser should show us the Laravel home screen now.
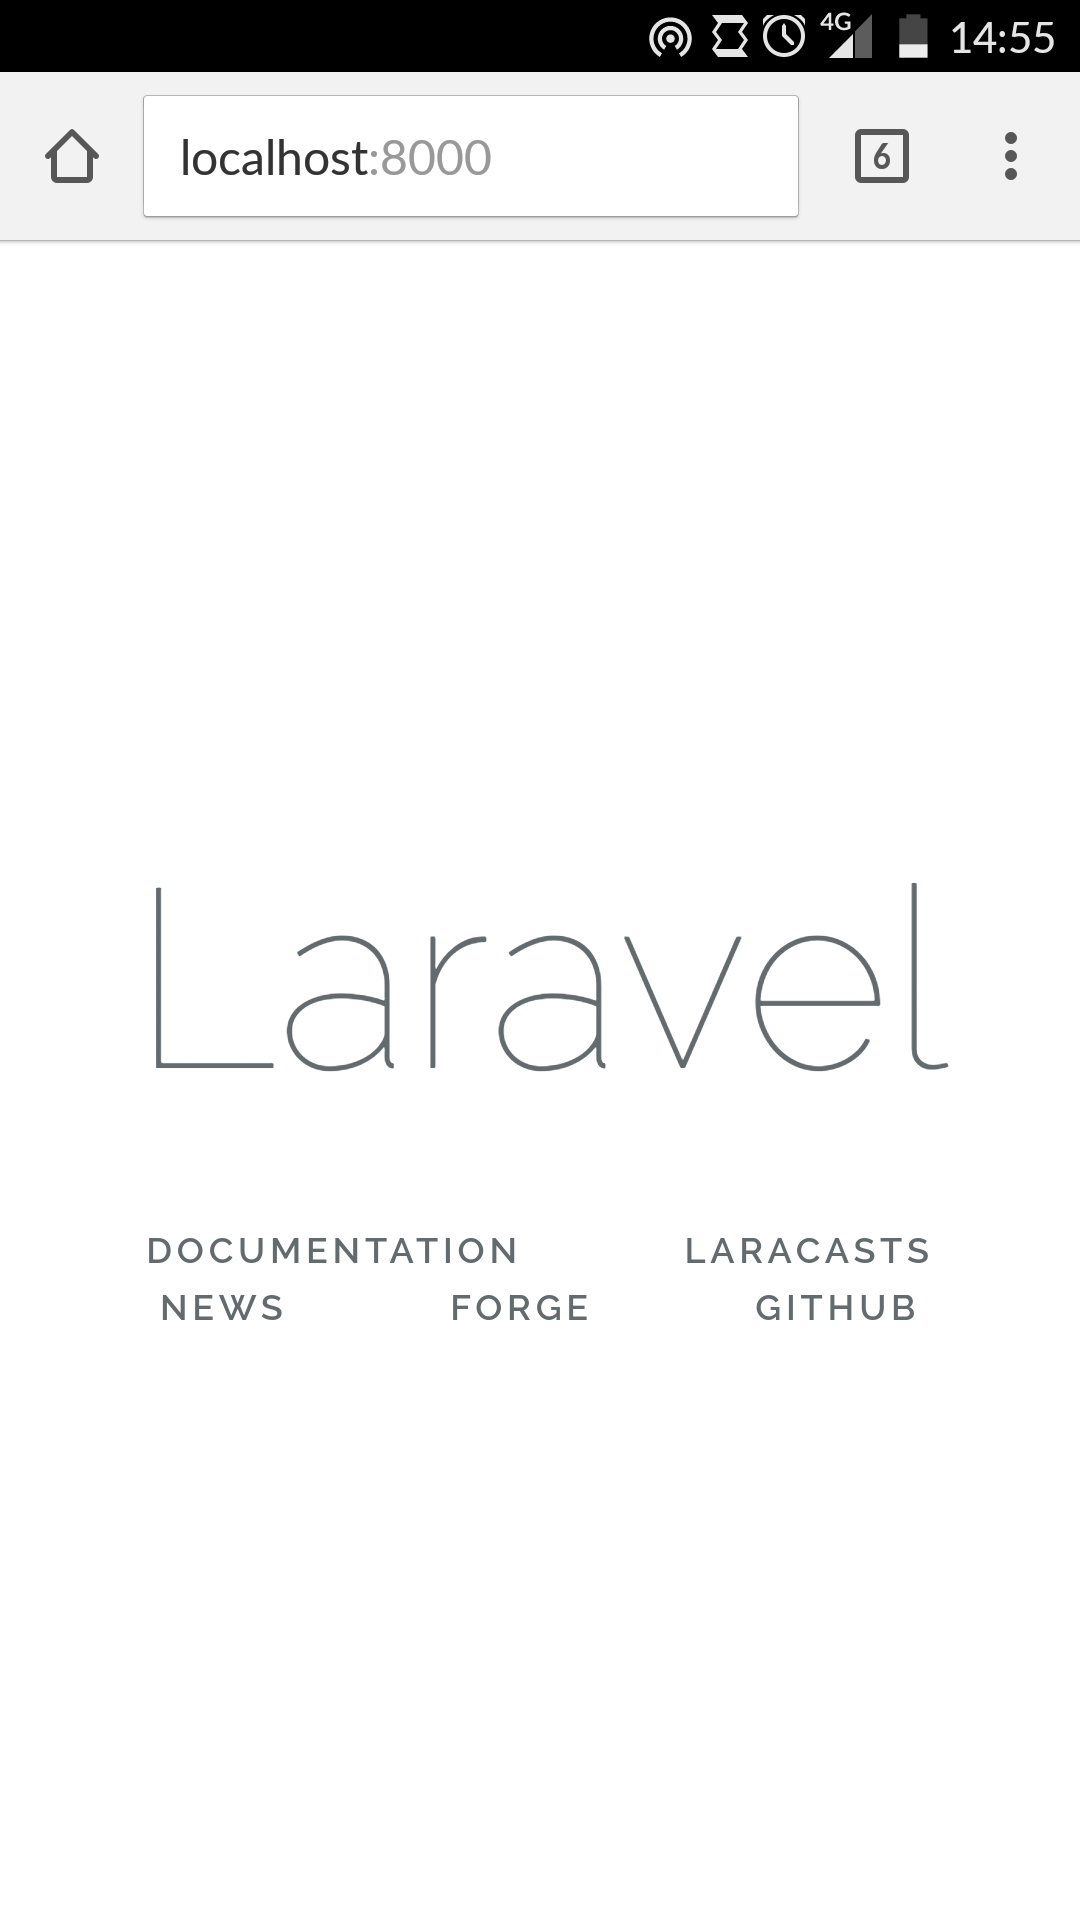
Success! Our Laravel installation is complete. We have successfully installed the tools we need to write and execute code. But no development environment is complete without a way of persisting data.
When it comes to Android devices, most of the time, memory and storage capacity are real issues. Because of that, Termux only offers sqlite as a way of persisting data. SQLite is a serverless, file-based database engine. It is lightweight and ideal for small amounts of data, as you can read here and in this beyond the basics post. First, we need to install it.
apt install sqlite
Next, we need to configure our Laravel project to use sqlite. In the root of our project we have a .env file. This is the environment configuration file and is the first file we need to edit. Use your editor of choice to edit the following lines:
DB_CONNECTION=sqlite
DB_HOST=127.0.0.1
DB_PORT=3306
DB_DATABASE=homestead
DB_USERNAME=homestead
DB_PASSWORD=secret

BROADCAST_DRIVER=log
CACHE_DRIVER=file
SESSION_DRIVER=file
QUEUE_DRIVER=sync
Then go to the config/database.php file and change the following line from:
'default' => env('DB_CONNECTION', 'mysql'),
to
'default' => env('DB_CONNECTION', 'sqlite'),
This will make sqlite the default connection from the connections array.
'connections' => [
        'sqlite' => [
            'driver' => 'sqlite',
            'database' => env('DB_DATABASE', database_path('database.sqlite')),
            'prefix' => '',
        ],
        'mysql' => [
            'driver' => 'mysql',
            'host' => env('DB_HOST', '127.0.0.1'),
            'port' => env('DB_PORT', '3306'),
            'database' => env('DB_DATABASE', 'forge'),
            'username' => env('DB_USERNAME', 'forge'),
            'password' => env('DB_PASSWORD', ''),
            'charset' => 'utf8mb4',
            'collation' => 'utf8mb4_unicode_ci',
            'prefix' => '',
            'strict' => true,
            'engine' => null,
        ],
        'pgsql' => [
            'driver' => 'pgsql',
            'host' => env('DB_HOST', '127.0.0.1'),
            'port' => env('DB_PORT', '5432'),
            'database' => env('DB_DATABASE', 'forge'),
            'username' => env('DB_USERNAME', 'forge'),
            'password' => env('DB_PASSWORD', ''),
            'charset' => 'utf8',
            'prefix' => '',
            'schema' => 'public',
            'sslmode' => 'prefer',
        ],
    ],
The database path points to a database.sqlite file. This file does not exist yet, so we need to create it.
touch database/database.sqlite
This is all the configuration we need to tell Laravel to use SQLite – we are now ready to test it. We’ll use Laravel’s pre-built authentication system. To create the scaffold we need to run the following command:
php artisan make:auth
After this, we will run the migrations to build our database schema. This will create the users and password_reset tables.
php artisan migrate
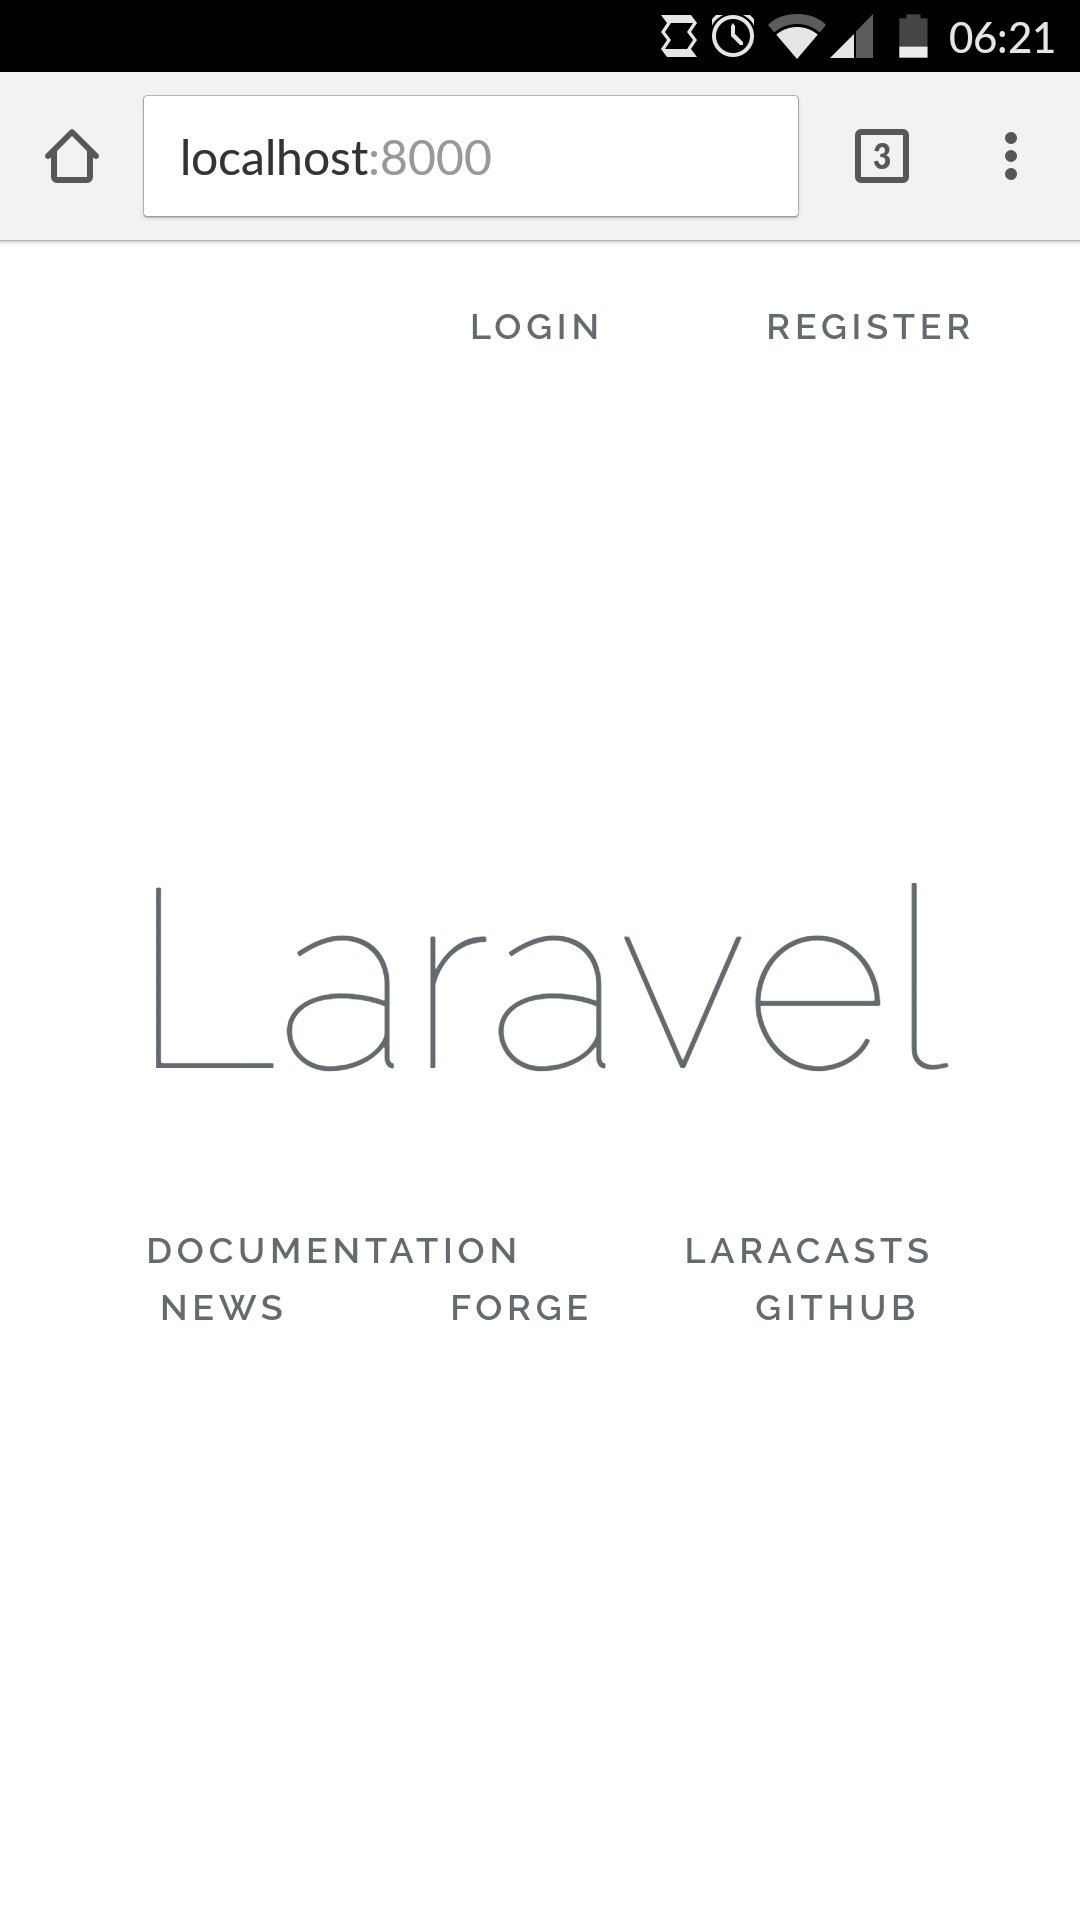
If we run php artisan serve again we’ll see that now we have the option to register and log in. Our authentication CRUD has been successfully created!
Conclusion
I did all this on my Android phone. This setup is great for small development tasks, as it has all the tools necessary for you to start developing on smaller devices, without the need to carry your laptop with you everywhere.
While not exactly the pinnacle of productivity, it could easily come in handy when an urgent fix needs to be done, or when you want to see how much PHP performance you can milk out of an Android device.
Give it a try and tells us what you think, and if you built something interesting in PHP on Android, sell us the concept and we’ll write about it!
*proper meaning proper for the context. An Android phone won’t have MySQL running, and won’t be able to run intricate test suites, especially e2e tests, but other things might just work well enough to get some work done.
Frequently Asked Questions (FAQs) about Laravel on Android Phone
How can I install Laravel on my Android phone?
Installing Laravel on your Android phone involves a few steps. First, you need to install Termux, an Android terminal emulator and Linux environment app. After installing Termux, you need to update and upgrade it using the commands ‘pkg update’ and ‘pkg upgrade’. Next, install PHP by typing ‘pkg install php’. Once PHP is installed, you can install Composer, a tool for dependency management in PHP. After installing Composer, you can now install Laravel using the command ‘composer global require laravel/installer’. Remember to set your PATH in order to find the Laravel installer.
How can I connect my Android app with Laravel API?
To connect your Android app with Laravel API, you need to create an API in Laravel first. This involves creating routes, controllers, and models. Once the API is created, you can use Retrofit, a type-safe HTTP client for Android and Java, to connect your Android app with the Laravel API. Retrofit simplifies the process of sending HTTP requests and handling responses.
How can I setup Laravel 8 on my Android phone?
Setting up Laravel 8 on your Android phone is similar to installing Laravel. You need to install Termux, update and upgrade it, install PHP, install Composer, and then install Laravel. However, Laravel 8 requires PHP 7.3 or above, so make sure your PHP version is up-to-date. After installing Laravel, you can create a new Laravel 8 project using the command ‘composer create-project –prefer-dist laravel/laravel blog’.
How can I run Laravel on my Android phone?
To run Laravel on your Android phone, you need to start the Laravel development server. You can do this by navigating to your Laravel project directory in Termux and typing ‘php artisan serve’. This will start the server and you can access your Laravel application by opening a web browser and navigating to the provided localhost URL.
How can I update Laravel on my Android phone?
Updating Laravel on your Android phone involves updating Composer and then updating Laravel. You can update Composer by typing ‘composer self-update’. After updating Composer, you can update Laravel by navigating to your Laravel project directory and typing ‘composer update’. This will update Laravel and all its dependencies to the latest version.
How can I troubleshoot Laravel installation issues on my Android phone?
If you encounter issues while installing Laravel on your Android phone, make sure you have the latest version of Termux and PHP. Also, check if Composer is installed correctly. If you still face issues, try uninstalling and reinstalling Termux, PHP, Composer, and Laravel.
How can I secure my Laravel API?
You can secure your Laravel API by implementing authentication and authorization. Laravel provides several ways to handle authentication, such as token-based authentication, OAuth, and Passport. You can also limit access to certain routes by using middleware.
How can I optimize my Laravel application for mobile devices?
Optimizing your Laravel application for mobile devices involves improving performance and reducing load times. You can do this by implementing caching, optimizing database queries, and using a CDN for static assets. Also, make sure your Laravel application is responsive and works well on different screen sizes.
How can I test my Laravel application on my Android phone?
You can test your Laravel application on your Android phone by running it on the Laravel development server and accessing it via a web browser. You can also use tools like Postman to test your Laravel API.
How can I deploy my Laravel application from my Android phone?
Deploying your Laravel application from your Android phone involves pushing your code to a Git repository and then pulling it on your server. You can also use deployment tools like Envoyer or Laravel Forge. However, deploying directly from your Android phone might be challenging and it’s usually recommended to deploy from a development machine.
 Claudio Ribeiro
Cláudio Ribeiro is a software developer, traveler, and writer from Lisbon. He's the author of the book An IDE Called Vim. When he is not developing some cool feature at Kununu he is probably backpacking somewhere in the world or messing with some obscure framework.