+ Producers, Synth Heads and Sci-Fi Nerds, our new course with synthwave pioneer, Com Truise: Mid-Fi Synthwave Slow-Motion Funk, is out now!
The beautiful, complex, and strange historical relationship between sound recording and music has changed a lot over the past century. Composition, performance, and audio capture, once relatively discrete disciplines, are now more often treated as one big, amorphous, creative process.
But even though recording and mixing tasks have been increasingly wrested away from specialists, these are still highly technical pursuits with many concurrent, steep learning curves. There are an alarming number of ways to trick ourselves into thinking we’re making our recordings better even if we’re actually — and inadvertently — screwing them up beyond repair.
The use of compression and limiting is one of the more treacherous minefields in the recording or mixing process. Because we’re manipulating average loudness, we can easily fall into the trap of thinking we’ve improved a signal when all we’ve actually done is make it louder (and worse).
Armed with a little bit of knowledge, though, we can at least understand what’s happening when we use a compressor and, hopefully, train our ears what to listen for. In experienced hands, compression can be a powerful tool to help you bring your productions to their fullest potential.
What is a compressor, anyway?
Let’s start here. A compressor, at its most basic, is a circuit designed to allow you to narrow the range between the loudest and quietest parts of a signal.
How is this accomplished? Well, there are many different technologies, each with their own quirks, but a few general principles are usually the same:
- A detector circuit senses the volume of the incoming signal
- A gain reduction device turns the volume down when the detector spots a loud bit
- An output amplifier turns the overall volume back up to compensate
This might seem straightforward enough, but we’ll be feeding our compressor all different kinds of signals and using it for a few different purposes. So we are going to need to learn how to give it the proper instructions to handle each situation.
We’re also going to have to understand the limitations of these highly imperfect, non-transparent machines so that we can either avoid or creatively exploit the artifacts and distortions they leave behind in the process.
What do all of these knobs do?
A few iconic compressors have only a single knob, whereas others give control over six or more parameters. Think of these controls as instructions we give our compressor to tell it how to behave.
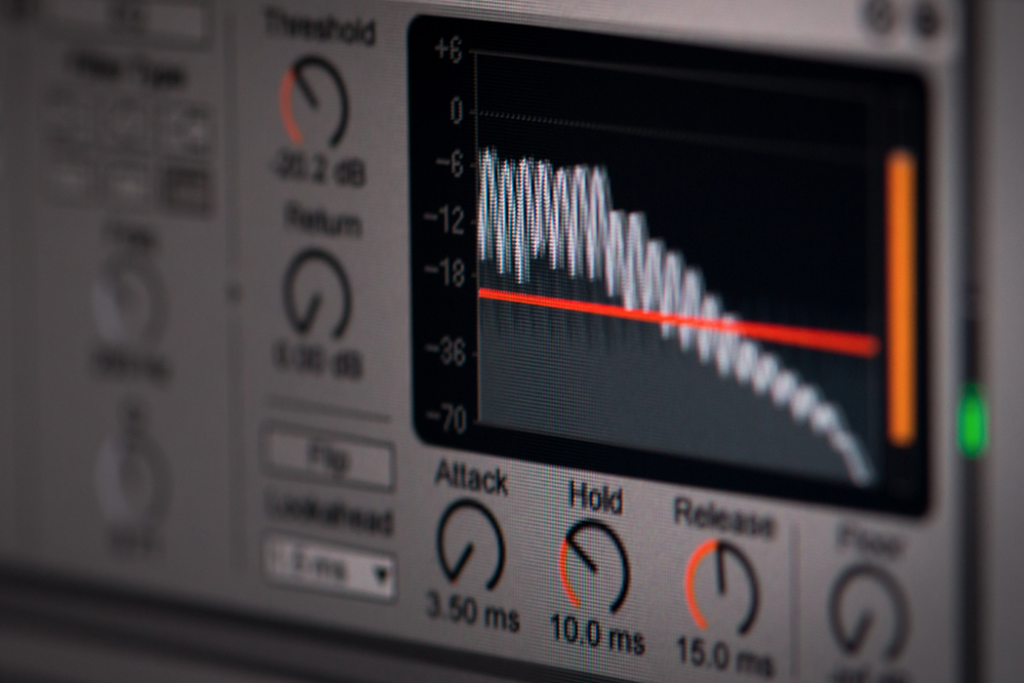
Let’s take a look at some of the most common controls and break down their functions, with a little help from GIFs featured in Soundfly’s Faders Up: Modern Mix Techniques course!
Threshold
Imagine the compressor as a sort of loudness enforcer who says, “As long as the level stays below this point, it’s within the rules and I won’t touch it. But if it crosses this line, I’m going to turn it down.” The threshold control is how we tell our compressor precisely where to draw this boundary. Obviously, this needs to be set differently depending on the input signal. If set too high, the entire signal will remain unaffected below the threshold. If set too low, undesired over-compression and distortion can occur.
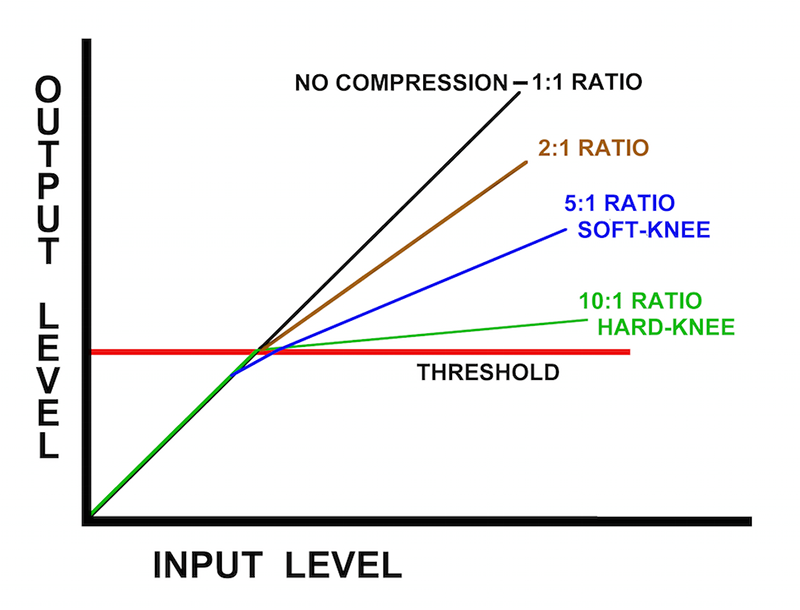
Ratio
The ratio determines, proportionally, how much the signal gets turned down once it crosses the threshold. A 4:1 ratio setting, for example, tells the enforcer, “If this signal tries to go 4 dB over the line, you only let it go 1 dB.” A signal 8 dB over the threshold would only be allowed to go 2 dB above, and so on and so forth.
A 1:1 ratio represents no compression at all. If we use a very high ratio — say, 100:1 — it’s tantamount to firing our enforcer and instead building a brick wall right at the threshold. Nothing is getting past that line. This makes our compressor act as a limiter.
Knee
A less-common control is knee, which allows you to dial in a variable ratio that compresses harder the further you pass the threshold. A “soft” knee is like an enforcer who shows some leniency to misdemeanor-level offenders who only put a toe over the line.
In this condition, a signal barely over the threshold might get a gentle low-ratio squeeze, while extremely loud bits might get a higher ratio that approaches limiting action. A “hard” knee, on the other hand, is strictly by the book — all signals that cross the line, no matter by how much, get the same specified ratio of pushback.
Attack
This control determines how quickly or lazily our automatic volume control turns itself down once the threshold is crossed. Faster attack times ask the compressor to turn the volume down very quickly, while slower attack times tell it to respond more gradually.

Some compressor plugins have a “look-ahead” function, which turns our enforcer into a psychic that can see into the future and anticipate the signal’s moves, allowing instantaneous attack times not possible in the analog domain.
Release
The release, or recovery time, determines the rate at which our automatic volume control turns itself back up once the signal falls back below the threshold. Set at a fast extreme, our enforcer lets up on its pushback rather suddenly as soon as the signal is back in bounds.
At the slow extreme, it takes awhile to gradually let up, even once the level is below the threshold. With slower release settings, you’ll often notice an audible crescendo or swell as the compressor slowly brings the level back up to normal.
Makeup Gain
Since our enforcer is only ever turning things down from their starting point, the overall average level of our signal will be reduced. What compensates for this is makeup gain, sometimes labeled “output.”
This is just a simple amplifier circuit at the end that allows us to turn up the overall level after squishing down the loudest bits.
+ Enjoy access to Soundfly’s suite of artist-led music learning content for only $12/month or $96/year with our new lower price membership. Join today!

The Real World
In the world of hardware compressors and the plugins that emulate them, many of the above controls are optional. Some units might have knobs that serve dual functions, or theoretically discrete controls that are incidentally somewhat interactive.
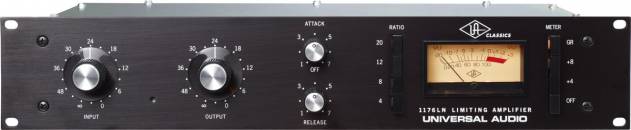
For example, on a UREI/Universal Audio 1176, selecting a higher ratio will also tend to raise the threshold a bit. Understanding these quirks is just part of the process of learning an individual device or plugin.
What can I even use this thing for?
Obviously, a compressor can be used for its original intended purpose; to even out a signal whose levels are overly dynamic (that is to say, it jumps around in volume too much). Compressors are often used (and abused) this way on entire mixes as well as individual tracks within an audio production.
For example, if a vocalist has poor mic technique, their high notes in full belt are likely to be much louder than their middle and lower register. A well-placed compressor can help rein in the exaggerated dynamics, but be aware that the attack and release settings can be crucial in this type of application!
Transient Modification Part 1: Pulling Out the Punch
Digging a bit deeper, compressors can also be used for shaping sonic character through modifying the transients, which are the loudest bits that typically happen at the very front of each note. We can use our compressor to either enhance or squish transients, depending on how the attack and release are set.
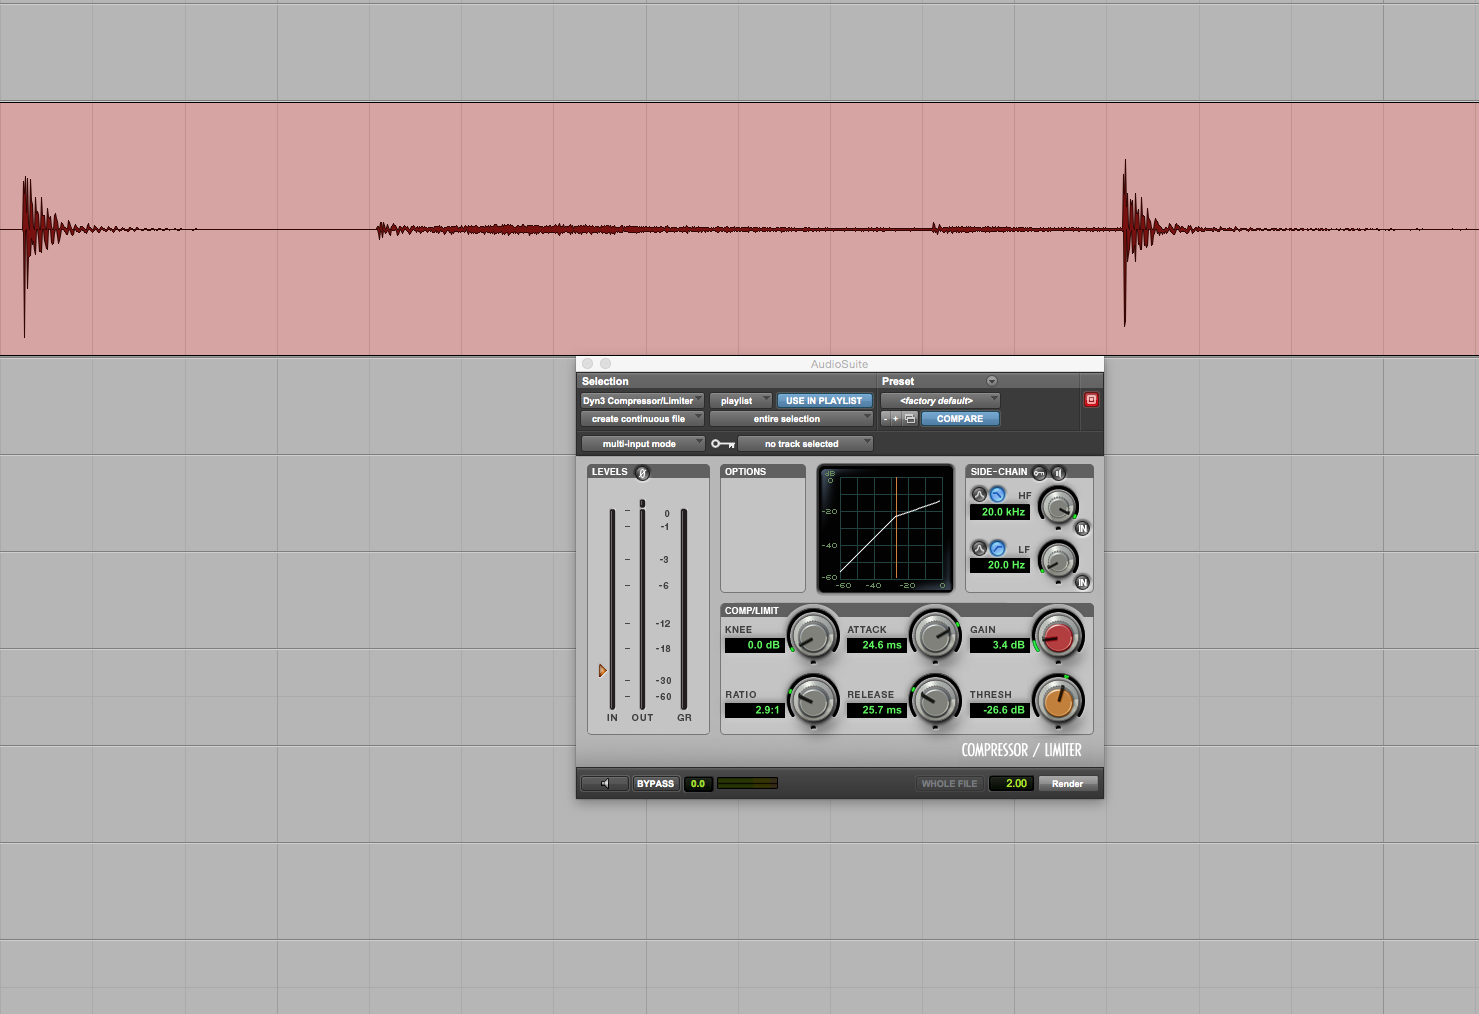
The following snare drum recording was made with an RCA 77D ribbon microphone and is quite fat sounding in character.
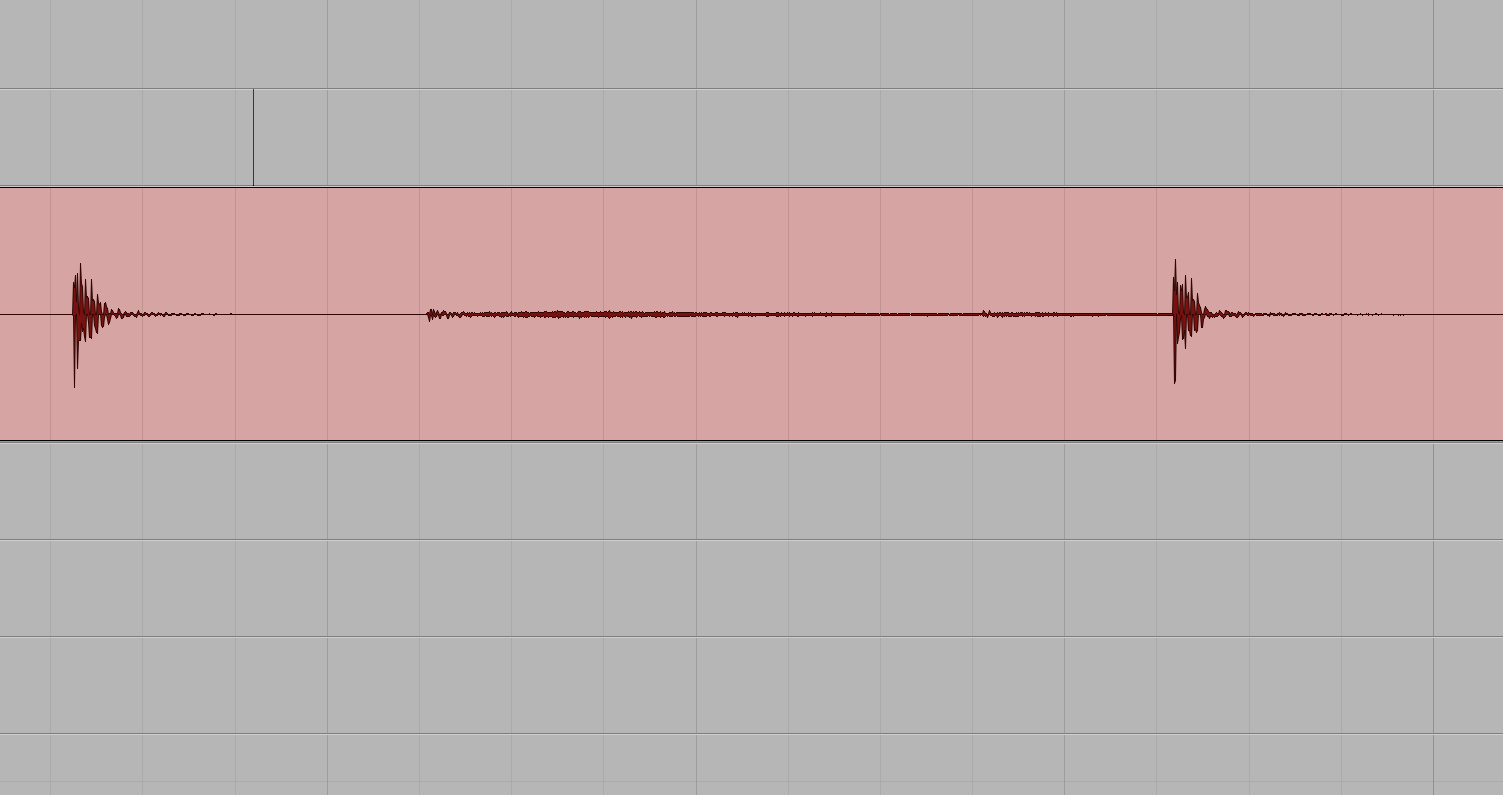
This was a deliberate choice for this particular piece of music, but if I were to decide later that I wanted it to be punchier, I might set a compressor as I have in the following example.
Because I’ve chosen a medium-slow attack, the loudest bit on the very front of the hit sneaks through before the compressor can react. When it finally kicks in, it clamps down on the remainder of the hit with the net effect that the very front of the hit is emphasized.
Since a snare drum hit is over quickly and followed by another, I’ll choose a somewhat fast release time. If my release time is too slow, the compressor might not have fully recovered before the next hit happens. This can actually dull the sound of the subsequent hit, which is exactly the opposite of what I want to accomplish.
Once I’ve altered the transient-to-sustain ratio, I can add makeup gain so that the body of the snare drum hit is approximately the same in volume. Once I do this, the net effect is that the transient crack is emphasized and enhanced while the apparent loudness of the drum hit remains the same.
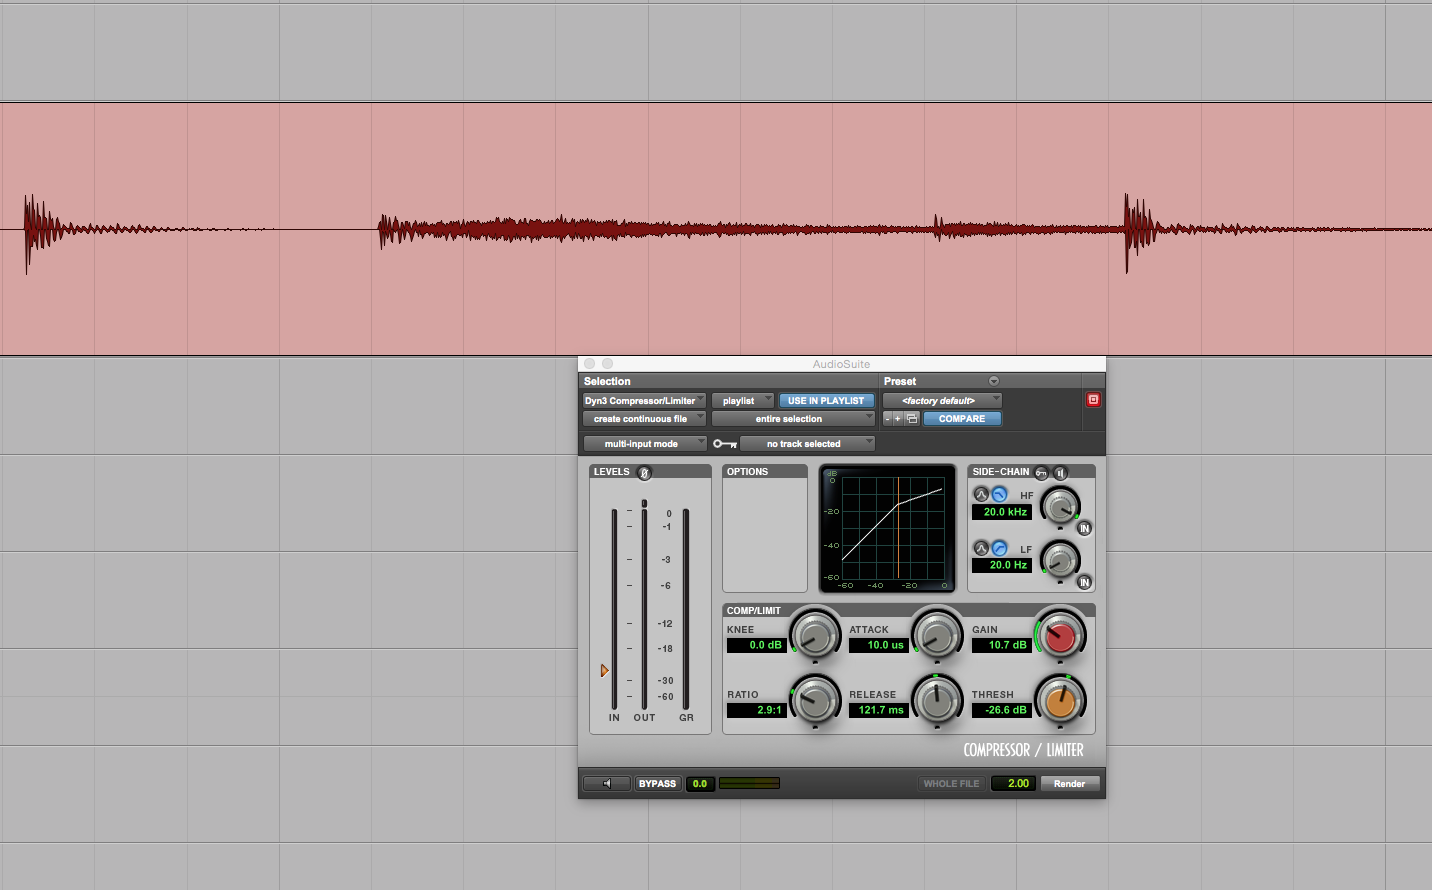
If I were to go in the other direction and set a fast attack as I have in the below recording, I would be working contrary to my goal. As you can see and hear, this further de-emphasizes the transient. We end up with a snare that sounds stuffy, as though the drum were full of socks.
Transient Modification Part 2: Reining It In
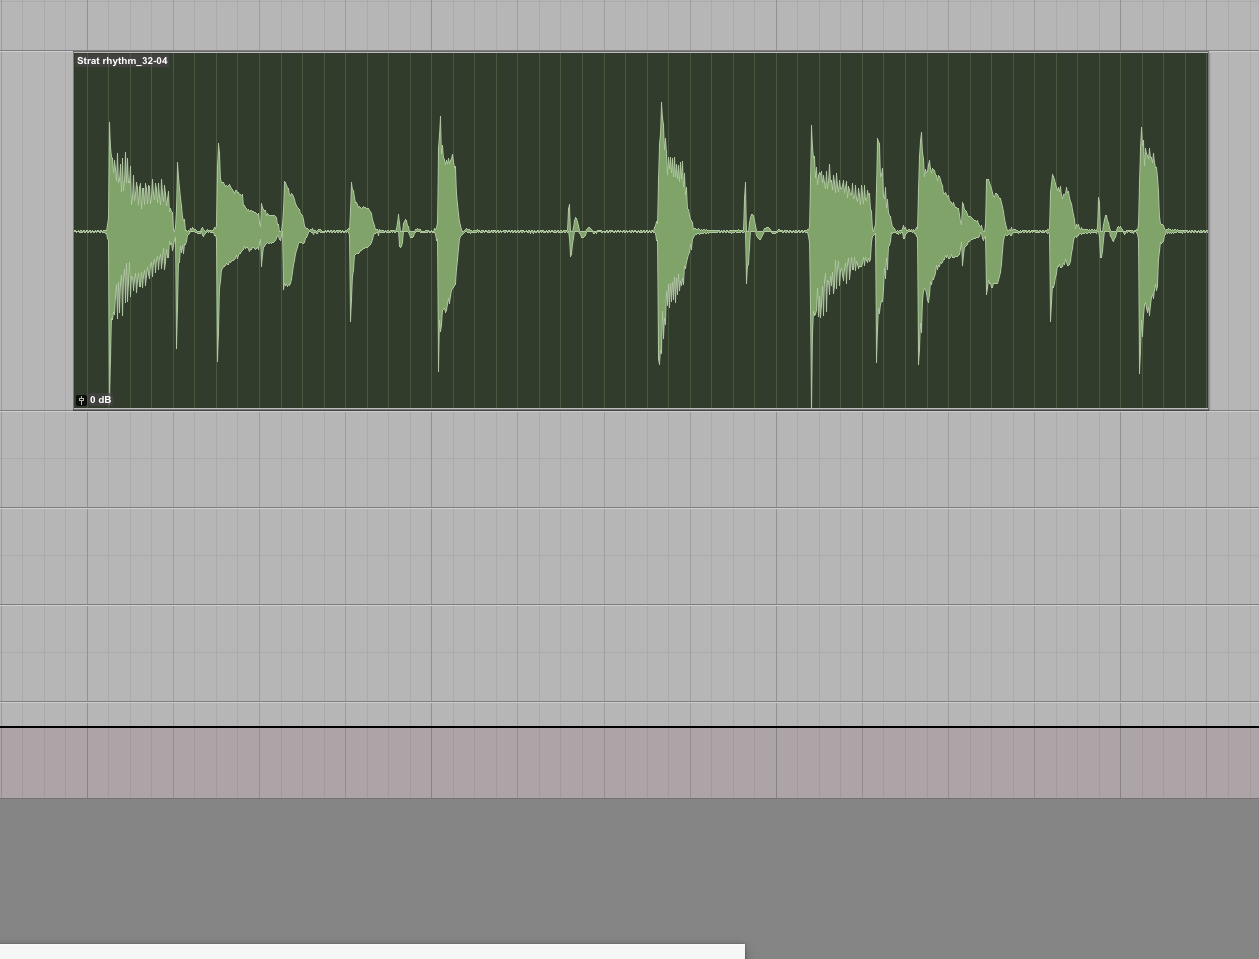
Conversely, sometimes a source is too punchy and transient-rich. In this recording, I have a rhythmic Stratocaster part recorded direct-in without an amp.
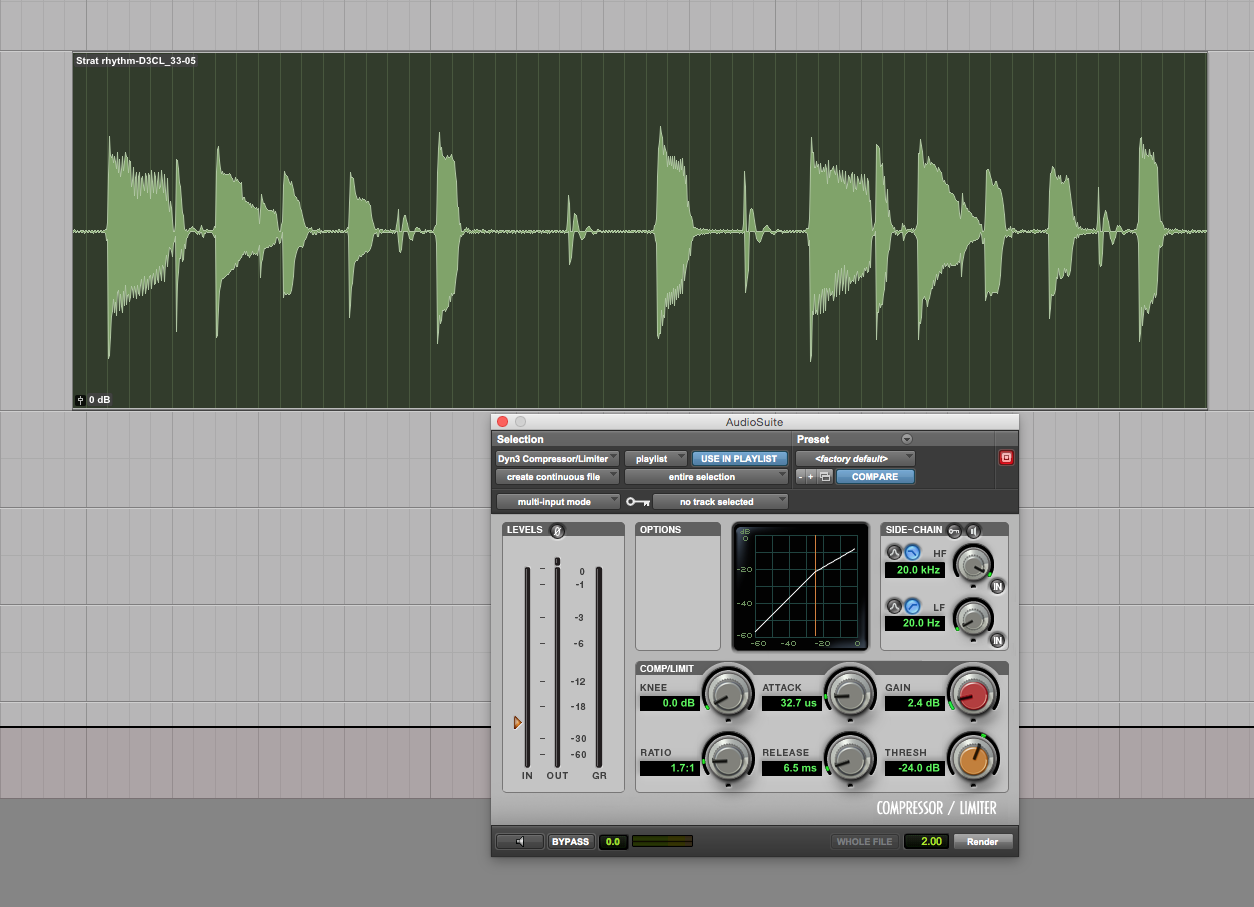
Again, this was a deliberate artistic choice, but if I later determine that the resulting sound is too cutting and punchy for the mix, I might set up a compressor as I have below. The very fast attack lops off a lot of the spiky transient while the fast release allows the compressor to recover in time to bring up the body of the note.
I was relatively conservative with the makeup gain, but the apparent average loudness can be made much greater now that the sound is less cutting and pointy.
The difference may seem subtle at first, but pay attention to how the front of the note is ever-so-slightly more “smeary” and amp-like on the processed example. Try it for yourself and really exaggerate the settings to get a handle on the cause-and-effect relationship.
Sustain Modification
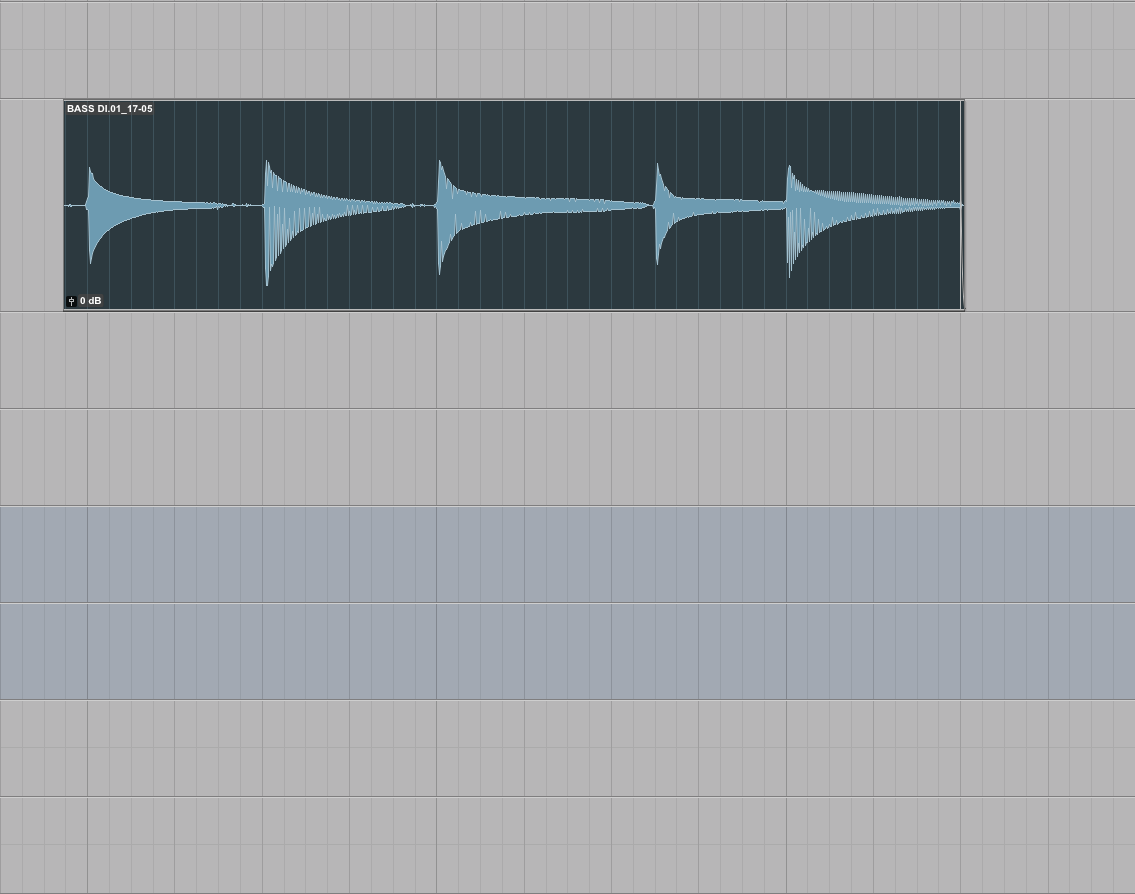
Particularly on slower material with long sustained notes, a compressor can be used to bring up the tail of a naturally decaying source like a plucked string. In the example below, an electric bass was recorded direct-in playing whole notes.
Due to the natural decay of the strings, the note disappears before the end of the measure and some of the low-end support for the rest of the track goes away.
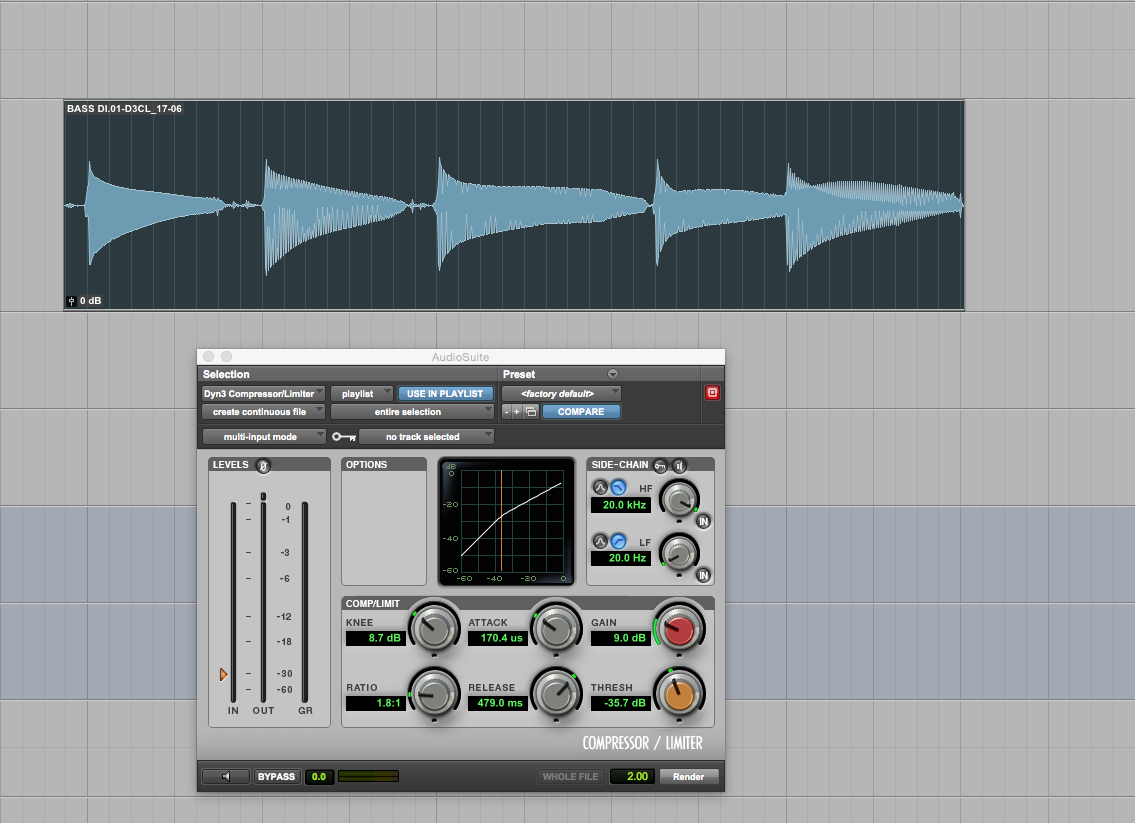
To counteract this, an engineer might decide to set a compressor to lengthen the sustain a bit. Below, I’ve set the threshold rather aggressively such that the body of the note is in gain reduction the majority of the time. The slow release is timed to the song’s tempo (so it just gets out of the way before the subsequent note).
Since the goal here is to alter the balance between the bass’ attack and its sustain, I’ve employed a fast attack setting to get it under control rather quickly. If we set this up correctly, it’s almost as if there’s an automatic fader ride gradually bringing up the tail of the note, somewhat counteracting the string’s natural decay.
Destruction
Sometimes, deliberately over-compressing a source within a mix can make a track feel energetic and aggressive. This is something that’s easily overused and can easily fatigue a listener, so handle with care. But it’s a color on the palette, so it’s there if the music calls for it.
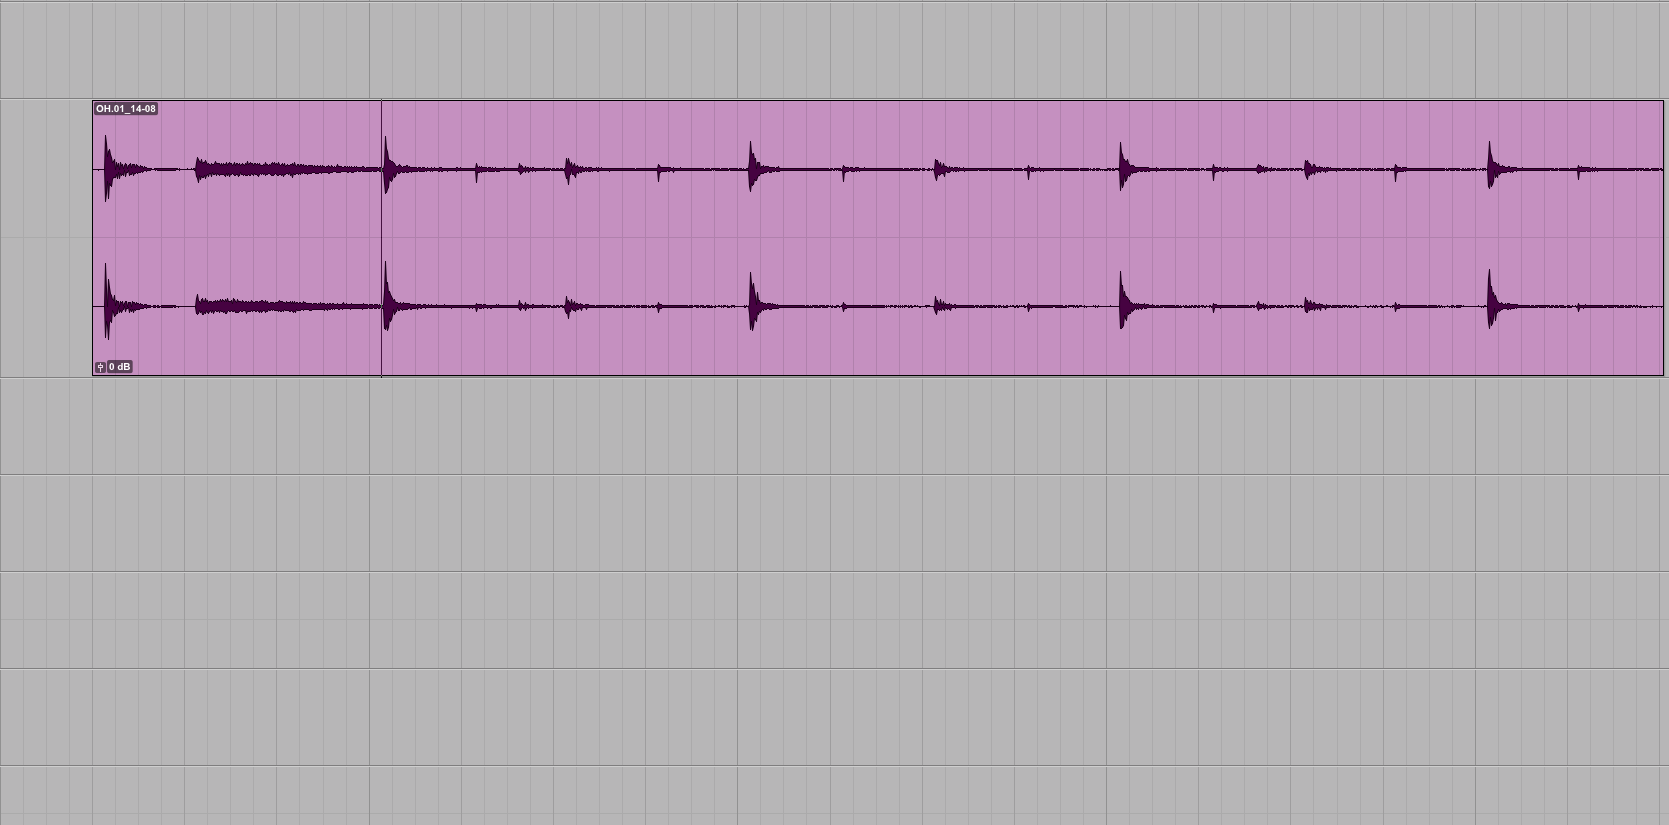
In this final example, I have a fairly well-recorded pair of drum overheads.
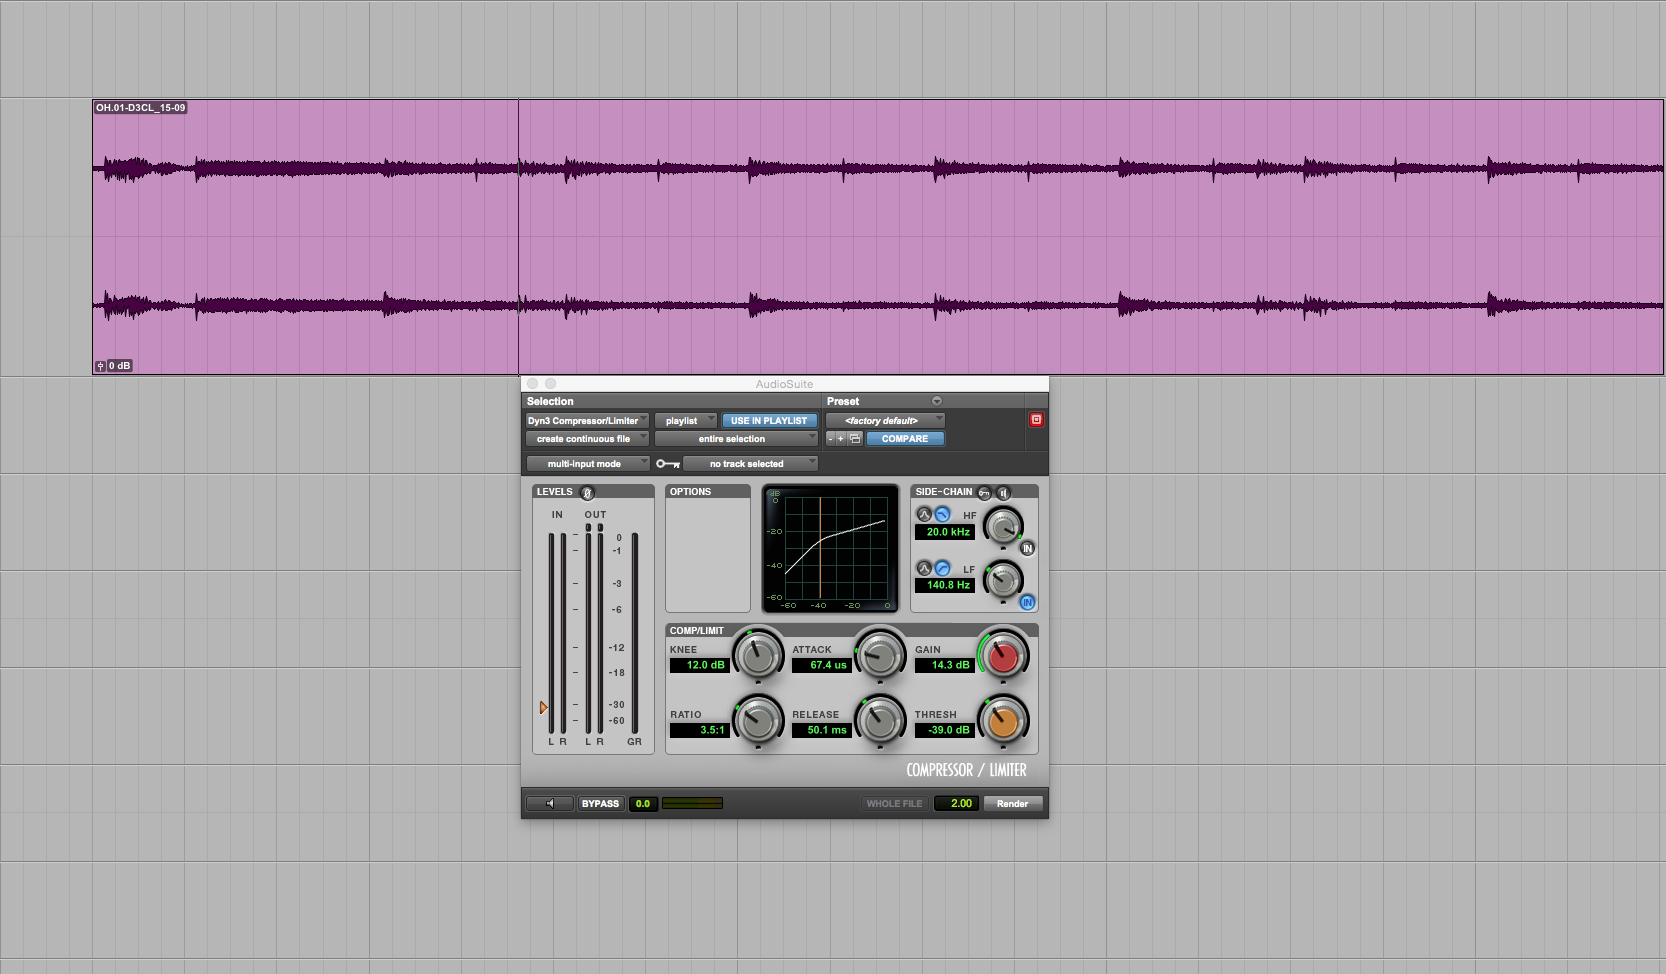
If we wanted a more aggressive color that we could blend into the mix (perhaps in parallel with the unprocessed tracks), we might set a compressor similar to the example below. It has:
- a fairly aggressive threshold
- the ratio set at a relatively stout 3.5:1
- a moderately fast attack
- a timed release, synchronized to the tempo of the song so that the cymbals swell in time for dramatic effect
As I was setting this up, the effect was at first somewhat too pronounced when the kick drum struck. The compressor was disproportionately responding to its low-frequency energy, creating an exaggerated “pumping” effect. To temper this, I engaged a moderate high-pass filter in the detector circuit’s sidechain.
Compressing for Timbre
Obviously, modifying the transients and sustain will change the perceived sonic character of the source. Even besides that, there are some (generally hardware) compressors that impart pleasing, euphonic tone coloration from their own amplifier circuitry.
Perhaps you inherited a vintage Collins or Gates compressor whose tubes and transformers imbue a subjectively pleasing sonic color even when the unit is barely doing any gain reduction at all. There’s no reason not to exploit this if it serves the music.
Explore the endless possibilities.
We’ve only scratched the surface here. As your experience with compression grows, you’ll likely want to learn everything you can about these devices and their applications. You may even want to research the diverse array of compressor technologies, their distinct behaviors, and their sonic characters.
Although it’s beyond our current scope to detail the differences between VCA, variable-mu, optical, feed-forward, and feedback compressor designs and their software emulations (and where you might want to exploit one type of device or plugin over another), this is useful information that is worth seeking out on your own.
Finally, I can’t stress this enough: Use your ears and train them to listen for subtlety. Particularly in the analog domain, many compressors will be well into gain reduction before the meters even move, so don’t listen with your eyes.
Watch out for loudness bias. When we’ve made a signal louder, it’s treacherously easy to fool ourselves into thinking we’ve improved it (even if we’ve actually made it worse). Set time constants like attack and release with intent, purpose, and understanding. Inattention here often results in doing more harm than good.
Lastly, be aware that heavy compression will emphasize bleed and worsen the signal-to-noise ratio as makeup gain is applied. Be judicious, and don’t forget to listen to your adjustments’ effect on the other tracks as well.
Nobody ever said this would be easy. In the end, the best way to learn is to get in there and do it. Armed with some basic understanding, it’s time to open up some tracks, exaggerate some compressor settings, and see what happens!
Improve your music with creativity & curiosity on Soundfly.
Subscribe to our YouTube channel for weekly videos, or join Soundfly’s all-access membership to all of our artist-led online music courses, an invite to join our Discord community forum, exclusive discount perks from partner brands, access to artist Q&As and workshops, and more.