How Color Filters Affect B&W Photos
If you’re new to film photography, chances are that you’ll get into shooting black and white sooner or later because you have been inspired by the masterpieces of old masters. But before you become the next Henri Cartier-Bresson or Sebastião Salgado, there are a few introductory things you should know.
Why are some colors identical when turned into B&W?
Imagine a bus with only 50 seats (and no standing space) that has to carry 200 hundred people at the same time. If they all want to get in, some people will have to share the same seat. It’s the same with colors turned into B&W, there are too many to fit into the 500 shades of gray, so they must be compressed to all fit in the bus. To put this into an image, I’ve turned the 6 basic colors into gray so you can see how they translated in B&W.
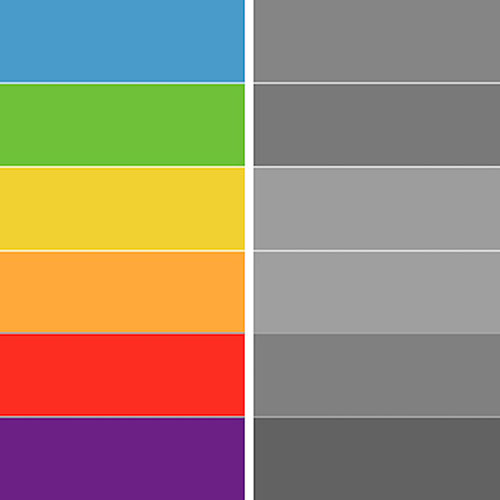
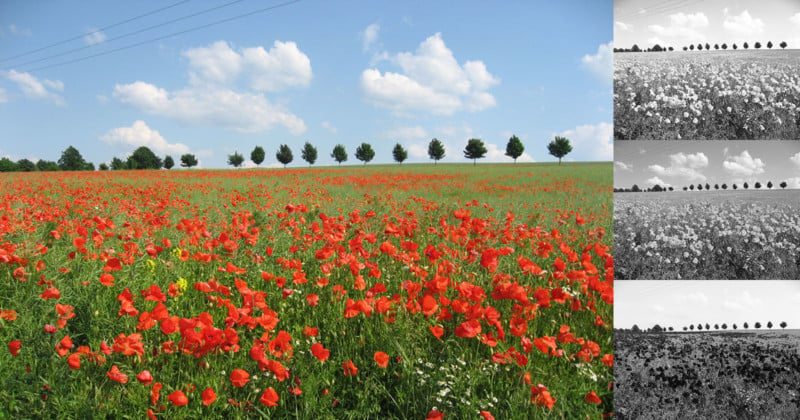
We can see that some share the same seat. Look at the yellow and orange: they are nearly identical, so that affects sunset pictures. Another interesting comparison is the red and green: they are almost identical, which makes pictures of poppy field look like a muddy gray landscape… how disappointing!
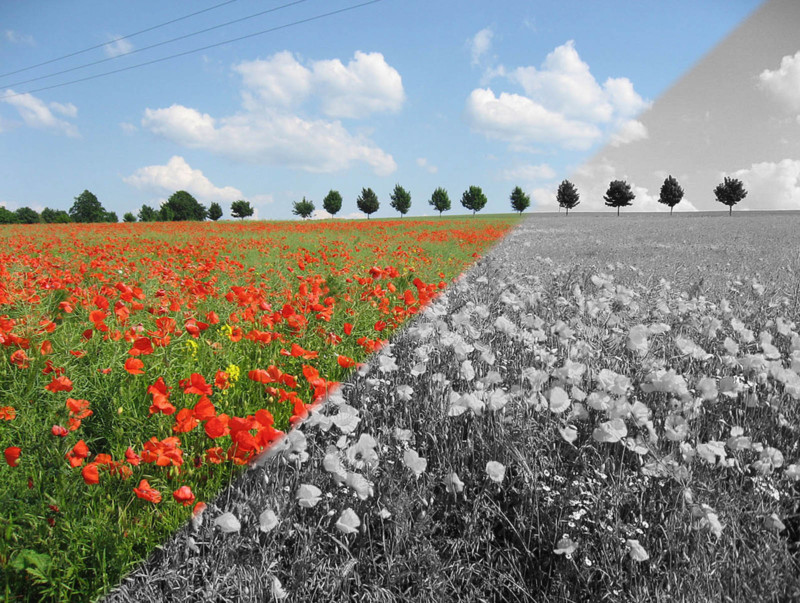
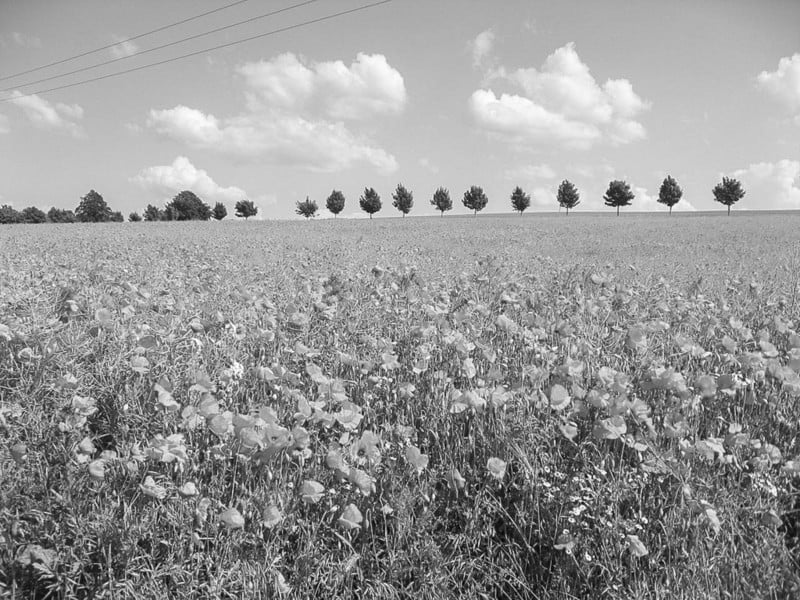
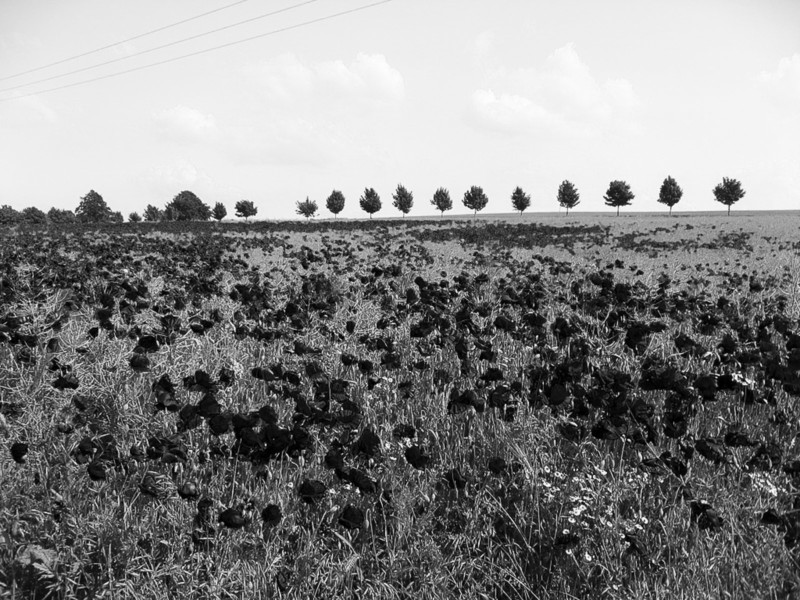
Does that mean that I can’t take a good B&W picture of a poppy field?
Hopefully not! There are ways to change the way B&W film responds to colors. For this, you will have to rely on colored filters. Let me briefly introduce each of them:
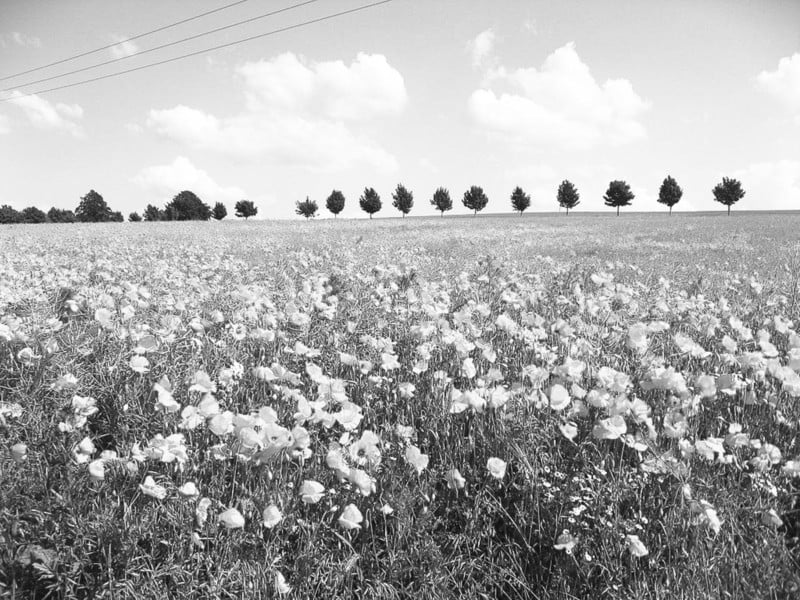
Yellow filter: The classic among black and white photographers. Blue skies are darkened, which helps to increase the separation with the clouds. Other colors like green, red, orange and yellow will appear brighter.

Orange filter: It comes right after the yellow in terms of strength. Blues will become even darker for a more dramatic effect. Most warm colors will also show brighter than greens.
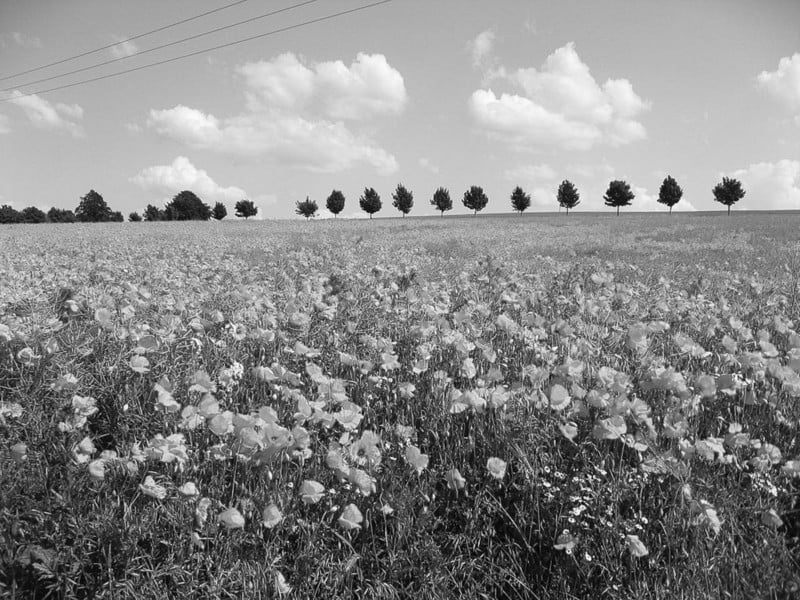
Red filter: This one is the strongest. Red will turn into white and foliage appear very dark. If you want your poppy flowers to pop out that’s the one but pay attention to the background. We can see at the horizon the light green turned also into white. It works best with darker shades of green like in the foreground.
Green filter: The opposite of the previous one. Red will turn darker and green brighter. It’s not very popular because of its limited span of action, but it can give very interesting effect when used on the correct scene.
Blue filter: Another uncommon filter but if you want to brighten blues it’s the one! Warm colors will be darkened and red turned into black, which can help to separate elements in a mixed colored scene. It also increases fog and haze which can help to emphasize a moody landscape.
One important thing about using filters is that they all reduce the amount of light by 1 or more stop. So you must compensate this loss of light when exposing. It varies depending on the filter so refer to the manufacturer’s product information.
Considering contrast when shooting B&W
Now that we know how to manipulate each color, the other element to consider when shooting B&W film is contrast.
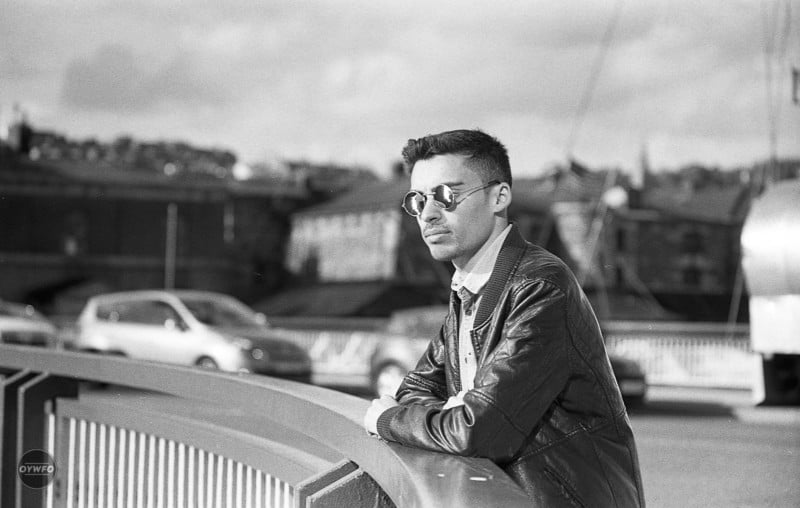
Depending on which style you are going for, contrast will play a major role. There are no colors to define the mood of your image so the type of light is probably the most important element to create the ambiance you want to achieve. Direct sunlight can be a nightmare for color photographers, but not in B&W. If you want to shoot street photography, for example, it’s exactly what you are looking for as it will create contrast and harsh edges in your image. It will help to detach the subject from its environment and re-enforce your composition.
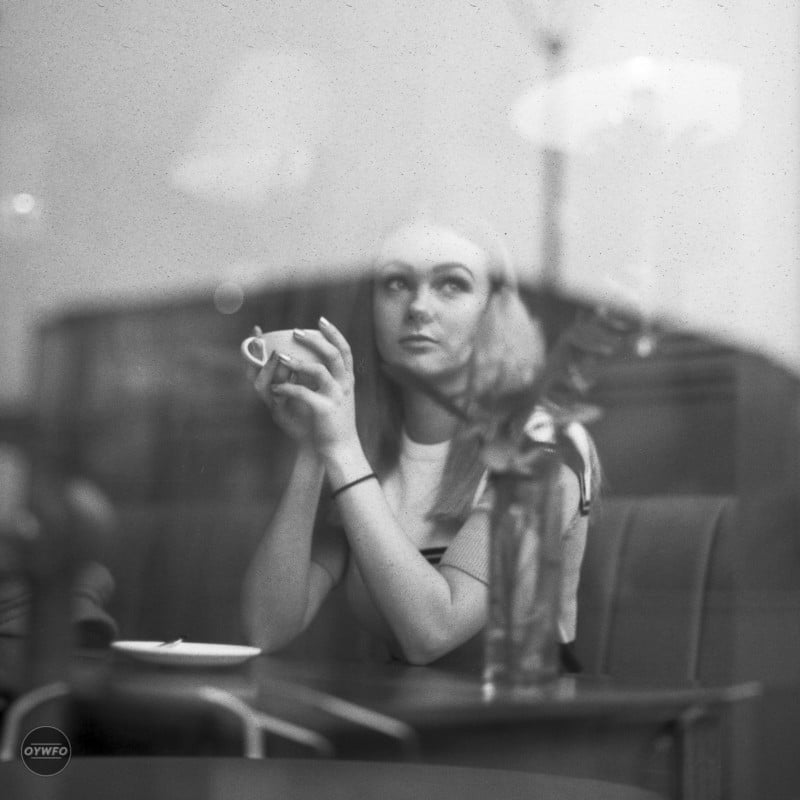
If you prefer a softer ambiance, look for an atmosphere with low contrast. Cloudy or foggy days are perfect for this type of images. The light is evenly distributed which result in a mellower ambiance. It’s also the ideal situation for shooting female portraits, as it makes skin looks softer and more pleasing.
Another crucial element that affects contrast is the type of film you shoot with. B&W films don’t react the same way and it’s important that you choose the proper one based on what you are looking for. This is really a matter of personal tastes and there is no right or wrong film here, just the one you like.
If I want to go for a contrasty image, Ilford HP5 or Kodak Tri-X are my go to films. If I’m aiming for a softer image, Fomapan 200 or 400 is the one I prefer.
“There are so many films, which one is the best?”
Choosing film can be overwhelming when beginning so if you are not sure about which one you should use, check out the “Film Dating” quiz I created. It helps to find the right film for you in just a few clicks.
The last point that will influence the result of your image is the development technique or chemicals you will use. There are many ways to go when developing and the combinations of film/developer can completely change the look of a negative.
I’ll take the example of stand development, as that’s the one I’m more familiar with. Depending on the film and developer you are using, it can completely change the contrast of your photo. I have tried this approach with Fomapan 400 (low contrast) and Kodak Tri-X (high contrast).
When developed using the stand technique using Ilfotec DD-X developer, Fomapan 400 turned into a super contrasty film. On the opposite, Kodak Tri-X, which is known for being contrasty, turned into a flatter image with this process. These are just examples and combinations are infinite when developing. The best is to experience yourself with the chemicals and films you have at home. If you want more information about developing time for each film and chemical, check out this Massive Dev Chart.
We’ve now seen that many factors can influence a B&W image, but the most important point is your ability to see the world in monochrome. That’s what requires the most practice but with experience, you’ll become better — it’s just a matter of training your imagination.
If you are just starting out, forget about everything else and just concentrate on imagining a scene in B&W. Once you’ve gained more experience, it’ll be easier to apply what you’ve read above.
About the author: Vincent Moschetti is an Ireland-based photographer who is in the middle of a year-long experiment where he’s shooting only film photography. You can find more of his work or follow along on this adventure by visiting his website or following him on Facebook and Instagram. This post was also published here.