 Your Privacy Choices

With the increased popularity of the Heckler & Koch SP5K and other HK-patterned roller delayed firearms, I thought it might be a good idea to demystify some of the basic mechanics and maintenance that new owners might face from time to time. So when my new faux four position trigger group for an update to my PTR Industries K3P PDW (G3K) showed up with a 9mm ejector and 9mm hammer spring, I decided to learn about HK trigger groups in a “gunsmithing for dummies” kind of way.
For this walkthrough, I am considering myself a dummy – that means before you decide to crack open your $2,000+ MP5 clone, consult an expert. There are easily dozens of different trigger group/pack combinations, any number of which could have different internal combinations. And as always, make sure you follow all of the cardinal firearm safety rules.

PTR Industries K3P from Atlantic Firearms – Trigger Group from HKParts.net
Although I don’t often care much for aesthetic options when it comes to firearms parts an accessories, I have always been a sucker for the looks of the four position trigger group as seen on many MP5 variants. After some research, I settled on a four position (0,1) trigger group from HKParts to swap out the stock PTR group.
As I mentioned above, the four position group accidentally shipped with some 9mm parts. No big deal, stuff happens and HKParts was able to ship me some replacements and offered phone installation assistance. However, I only learn by doing, so I decided to fix the issue on my own.
Hopefully I don’t make this more complicated than it is – the process is really simple.
HK Trigger Groups – Disassembly For Dummies:
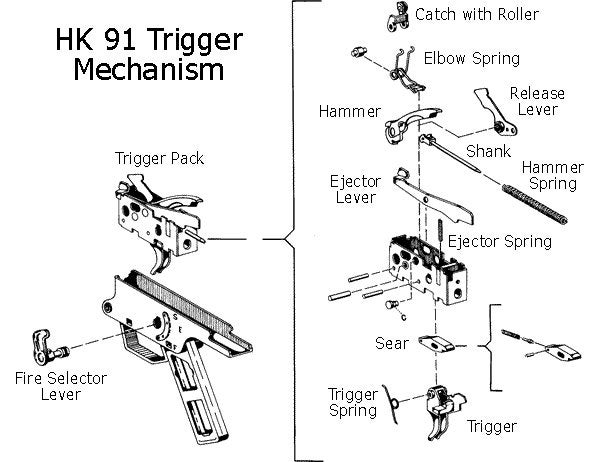
1. Remove the trigger group housing from the weapon by pushing the pins out from rITSR to left.
2. Drop the hammer (slowly) by rotating the selector to fire and pressing the trigger while supporting the hammer with your thumb or palm.
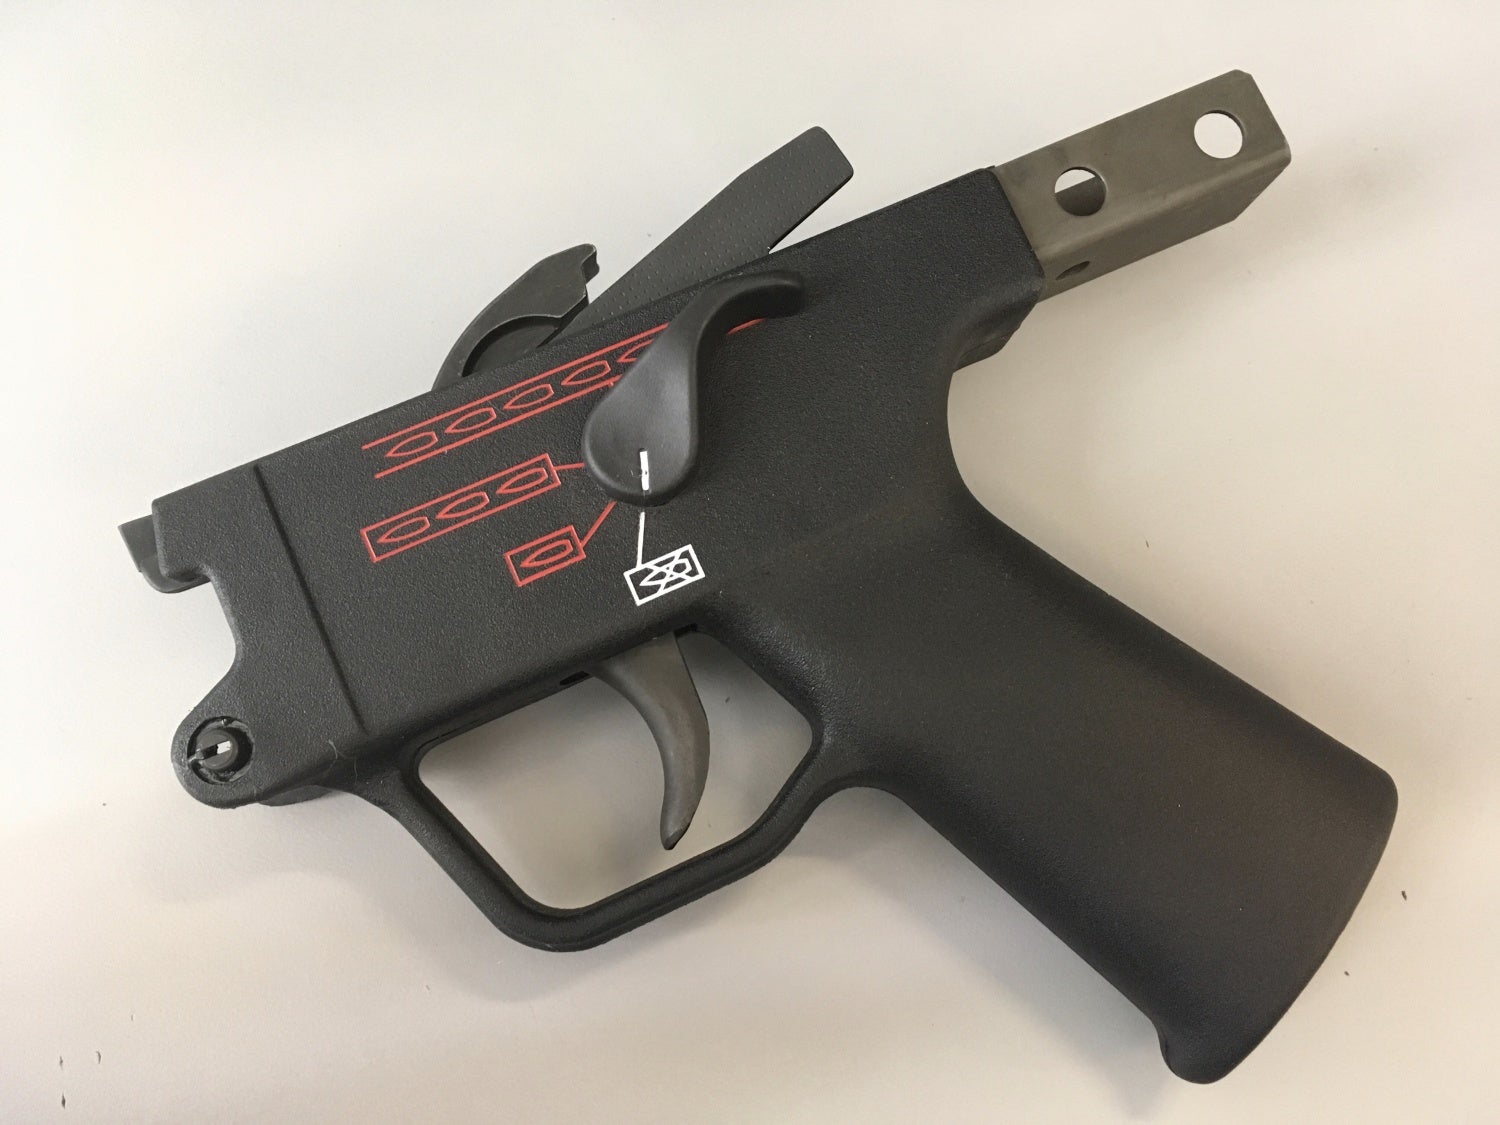
3. Depress and hold the “selector retaining lever” while rotating the selector clockwise to approximately the four o’clock position.


4. Remove the selectors by wiggling and gently pulling away from the housing.
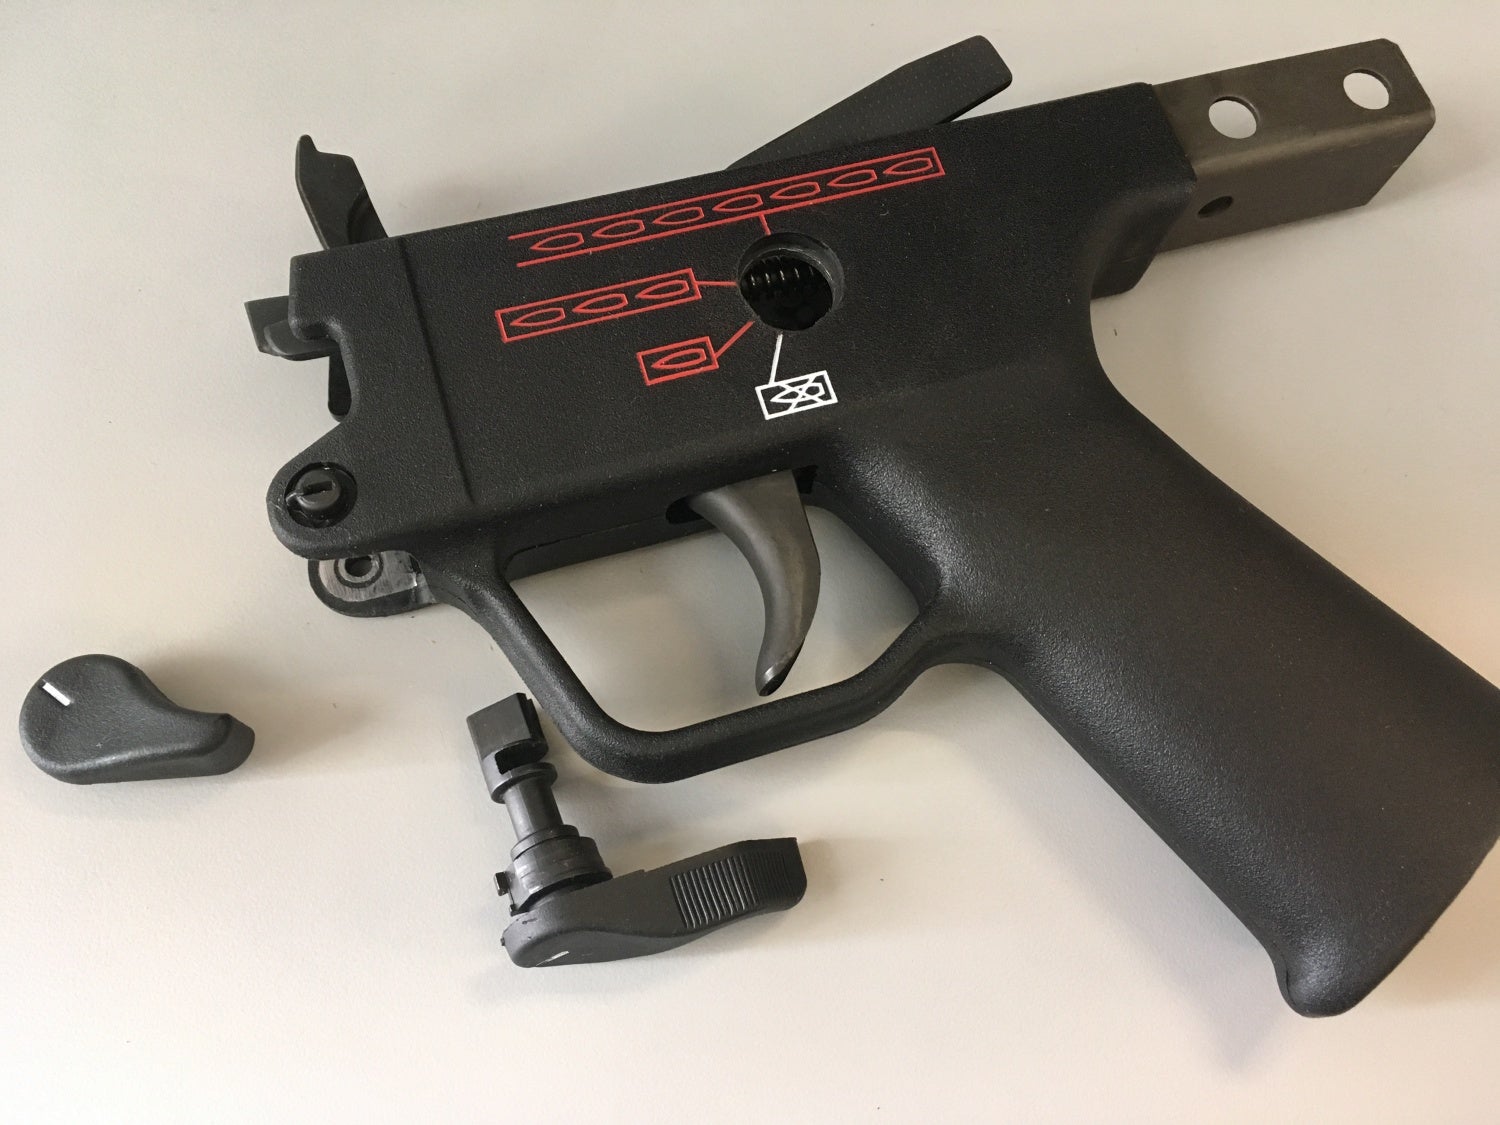
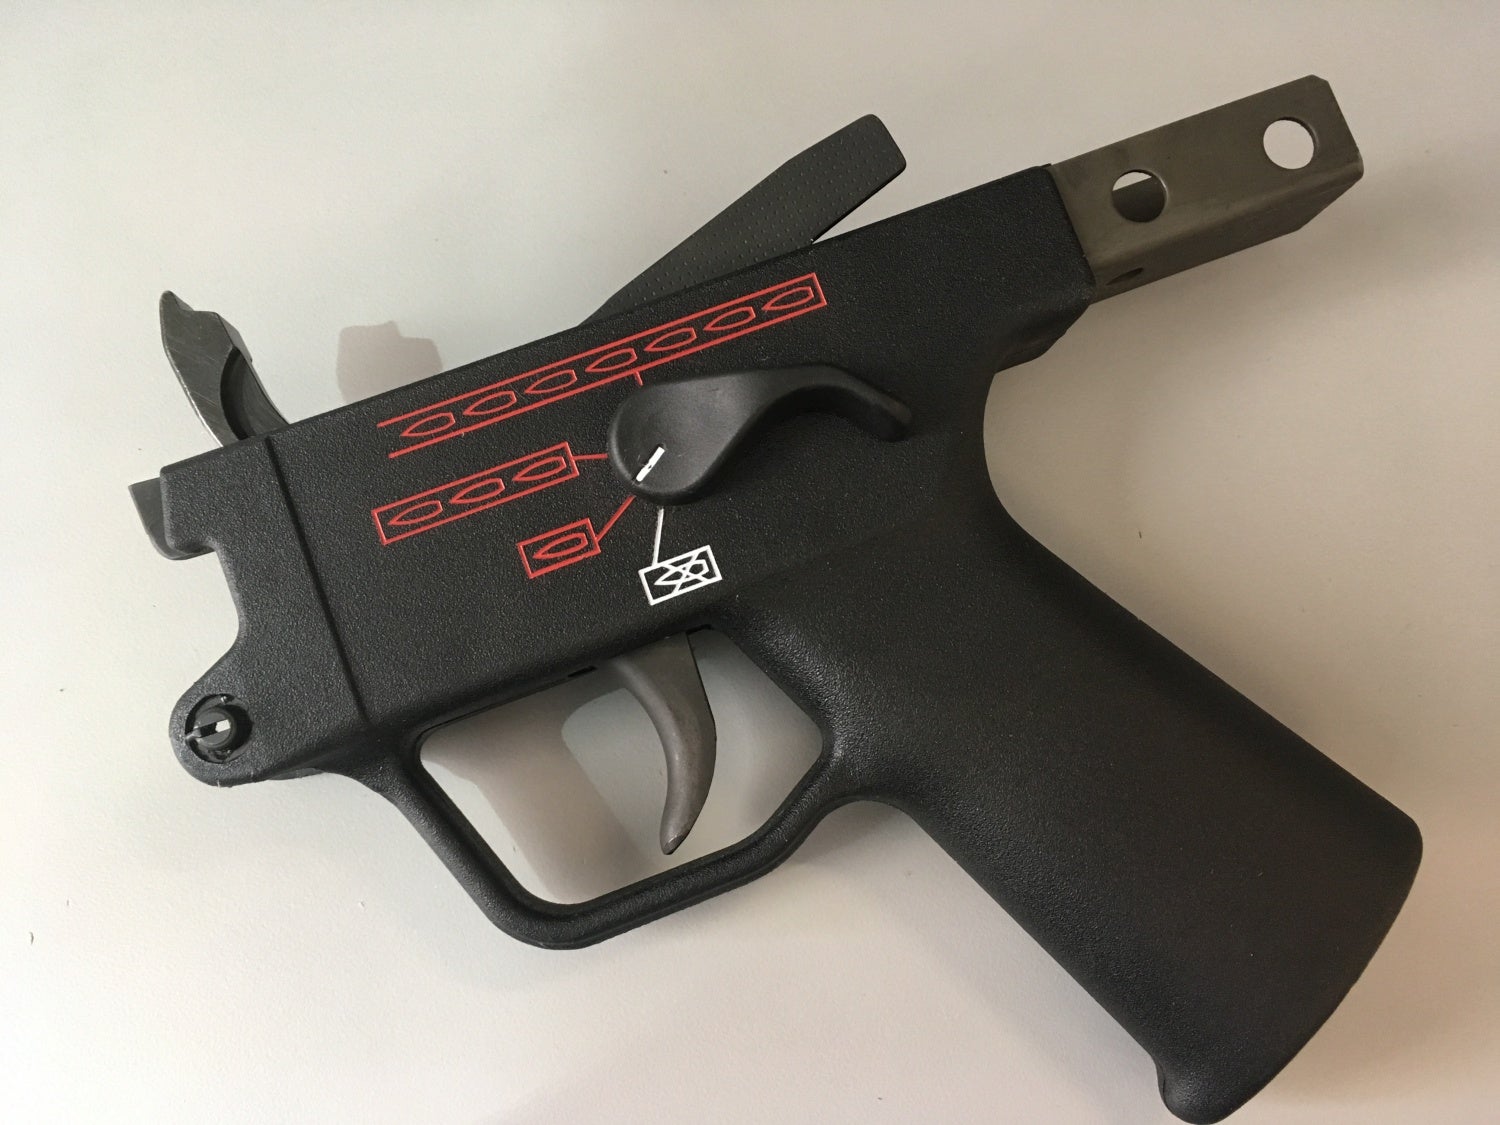
5. To remove the trigger pack from the housing, push the ejector from the front of the housing up and out.
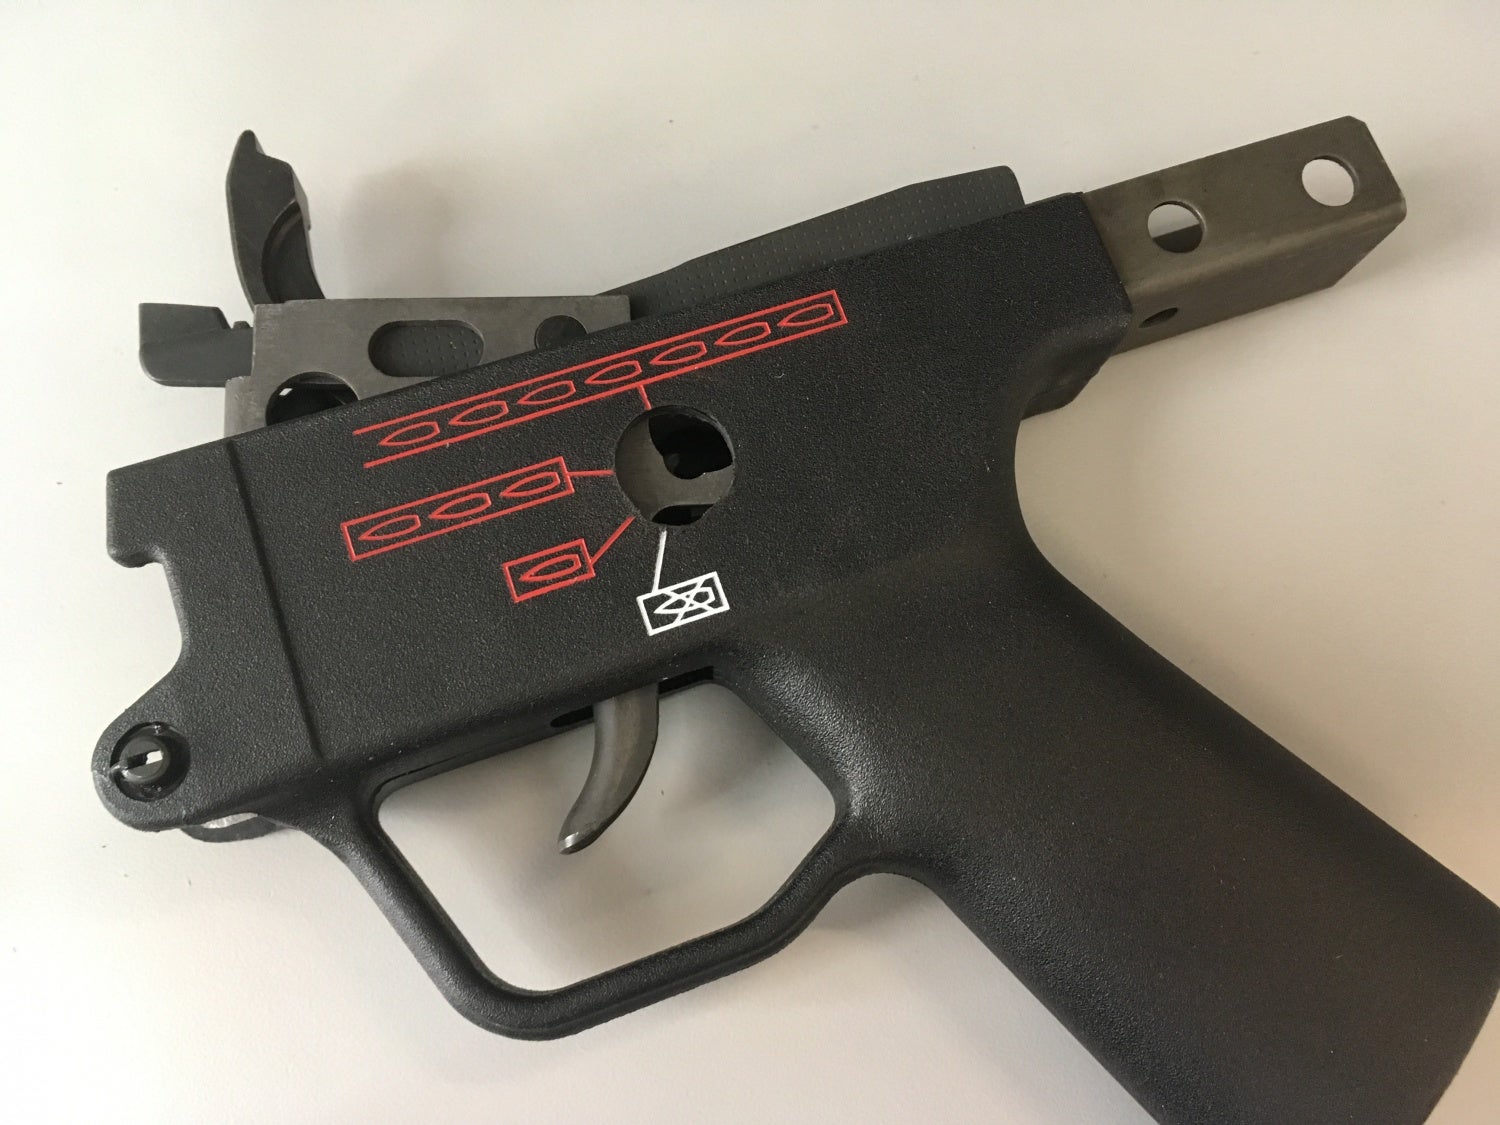
6. Remove the trigger pack from the housing.

7. To remove the ejector lever, use a punch to push out the ejector lever pin from the inside out.

8. Ejector lever (.308) top, ejector lever pin middle, ejector lever (9mm) bottom.
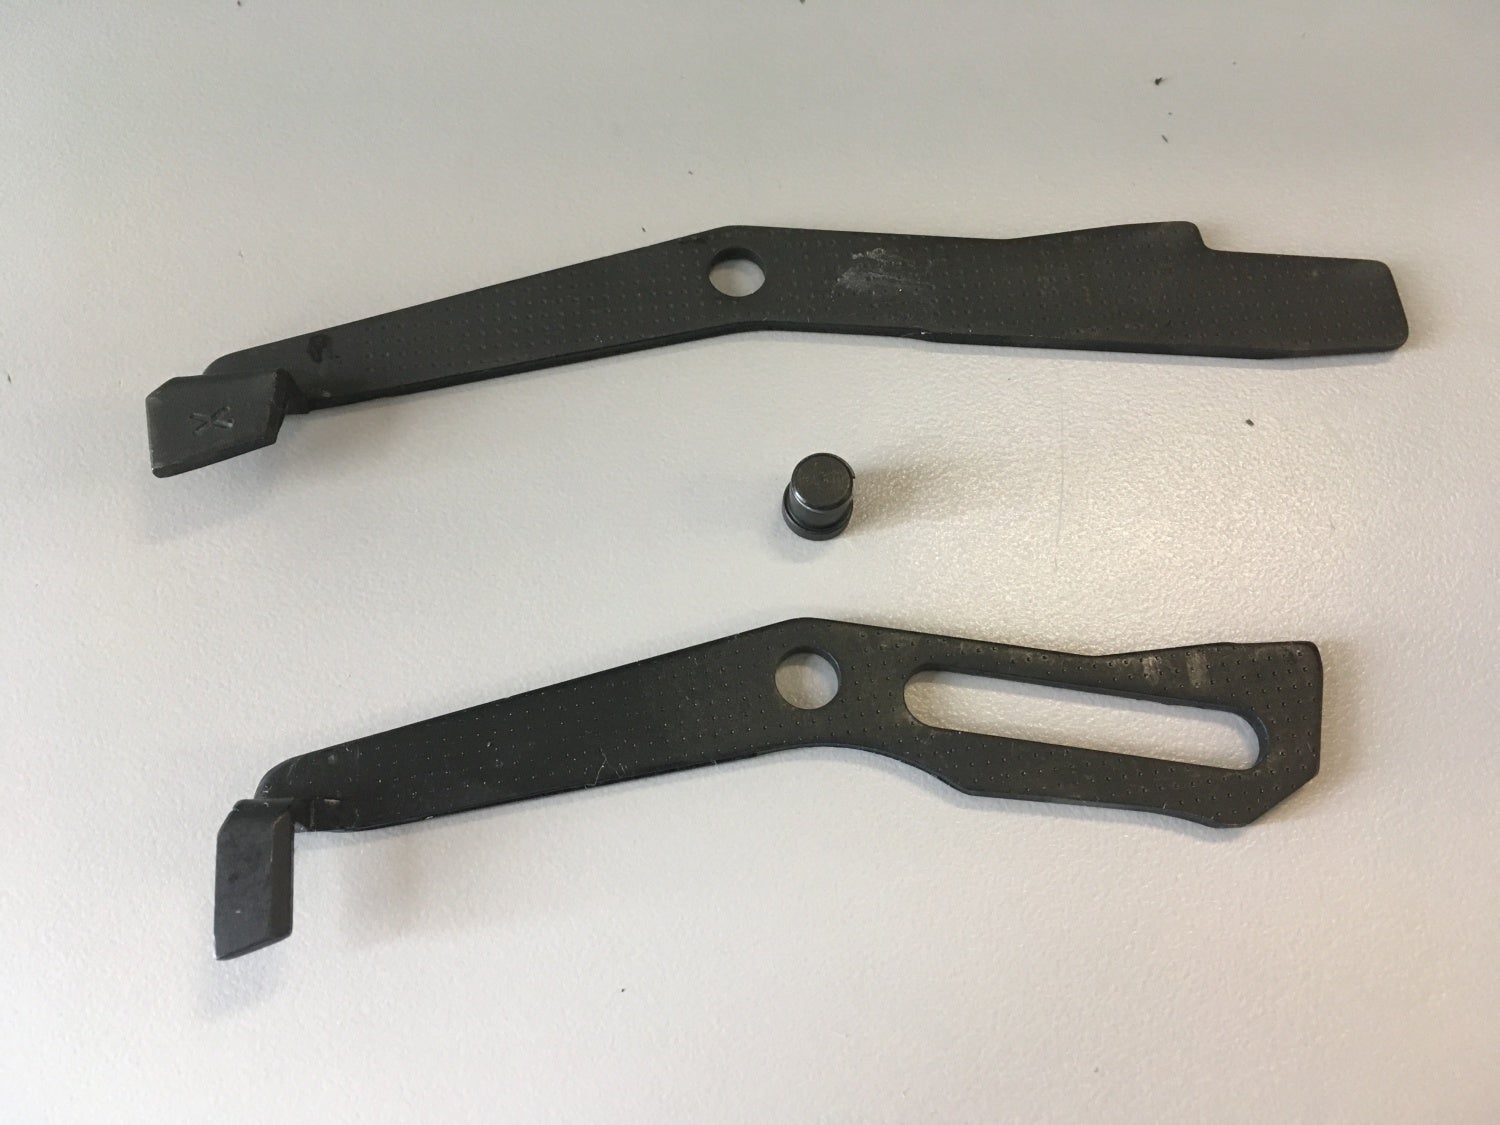
9. To remove the hammer, shank and hammer spring, press the hammer pin (axle). Be careful not to lose the ejector spring (protruding out of the bottom right side of the pack in the picture).

10. Hammer, shank and hammer spring (.308) top, ejector lever (.308), ejector lever pin, hammer spring (9mm), ejector lever (9mm) bottom.

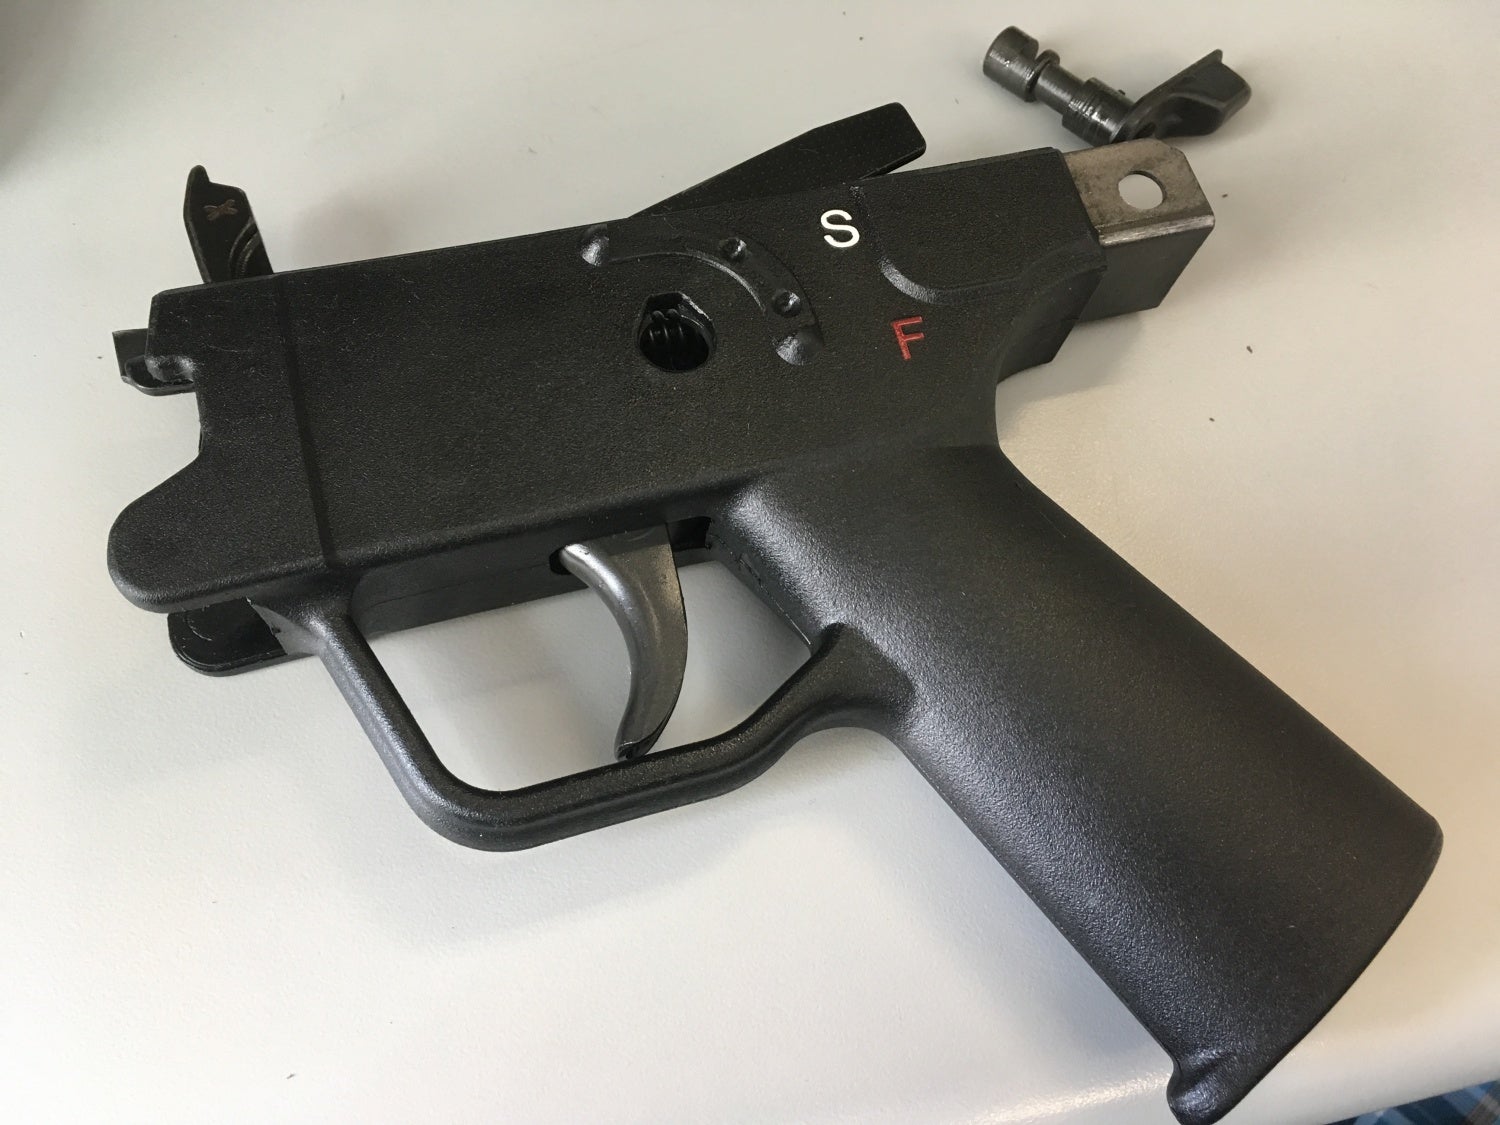
Bonus: The S/F trigger groups disassemble differently. After dropping the hammer slowly, rotate the selector counterclockwise to the 12 o’clock position and pull away from the housing to remove.


To disassemble my trigger groups for the first time, I used a series of videos from HKParts.net.
If I get brave enough, I’ll do a second part where we will walk through a full disassembly of an HK trigger pack. For now, however, I’m happy with my baby-step progress.