

Introduction: Dewalt Power Bank


This is nothing new. There are a lot of instructibles regarding making a power bank. The difference in this power bank is that I am using battery cells from a recycled laptop. I think that this makes it interesting and I hope that you do as well.
I wanted to make a nice power bank and of course I wanted to put it into a Dewalt case. I looked through my cases and I found these bit cases that looked like the perfect size. So that turned into this dewalt power bank. I like it and I hope you will as well.
Step 1: Gather Your Materials


Here are the materials / parts / Tools Required to build this Dewalt Power Bank.
Parts
- Dewalt bit case -- Ebay $15.99 for 2
- Power Bank Controller -- Amazon -- $7.99
- Battery Cells from Hp Chromebook Laptop
- Momentary Switch / Button -- Amazon $7.79
- Misc Wires / Heat Shrink
Tools
- Dremel Rotary Tool
- Soldering Iron
- Scalpel / Xacto knife
- Drill
- Liquid Tape
- Hot Glue Gun
Step 2: Collect the Battery Cells


The first thing I need is to collect the battery cells from the laptop. After removing the bottom cover of the laptop it is simply four screws and unplugging the battery to remove it. Now I am left with the battery unit removed, I need to disassemble it and remove the battery cells.
The Batteries for this laptop seem to be stuck together by some sort of sticker, after removing the "sticker" I can remove the plastic skeliton that holds the cells in place. Now I can unsolder the battery cells from the power management board.
Step 3: Prepare the Cells


Now we should have 3 individual battery cells. Supposedly these cells are 2600 to 2850 each for a total of 7800 to 8550mah. I took a multimeter to find out which end was negative and which end was positive, then I marked the positive and negative with + and -.
Next I took 3 paired Wires and stripped and tinned them and soldered them onto the battery cells positive and negative.
After Marking the batteries I drilled smal holes in the metal battery tabs so that the soldering would be easier, Then I soldered the wires I took some liquid tape and covered the connections just for a little extra safety.
After Everything Dried I took and taped the three batteries together with packing tape.
Step 4: Prepare the Controller Board


I will be using a pre-built board that I purchased form amazon. But I need to make modifications so that it will fit in the case the way I want it too.
I will be changing the switch location, in order to do that I will solder small wires onto the two solder points on the bottom of the board.
I also would like to use the LED "flashlight" that is on the board. In order to be able to use it I will un-solder the LED and extend it with two small wires to its new location.
Last thing I will do is go ahead and solder some 18ga wires to the positive and negative terminals on the board.
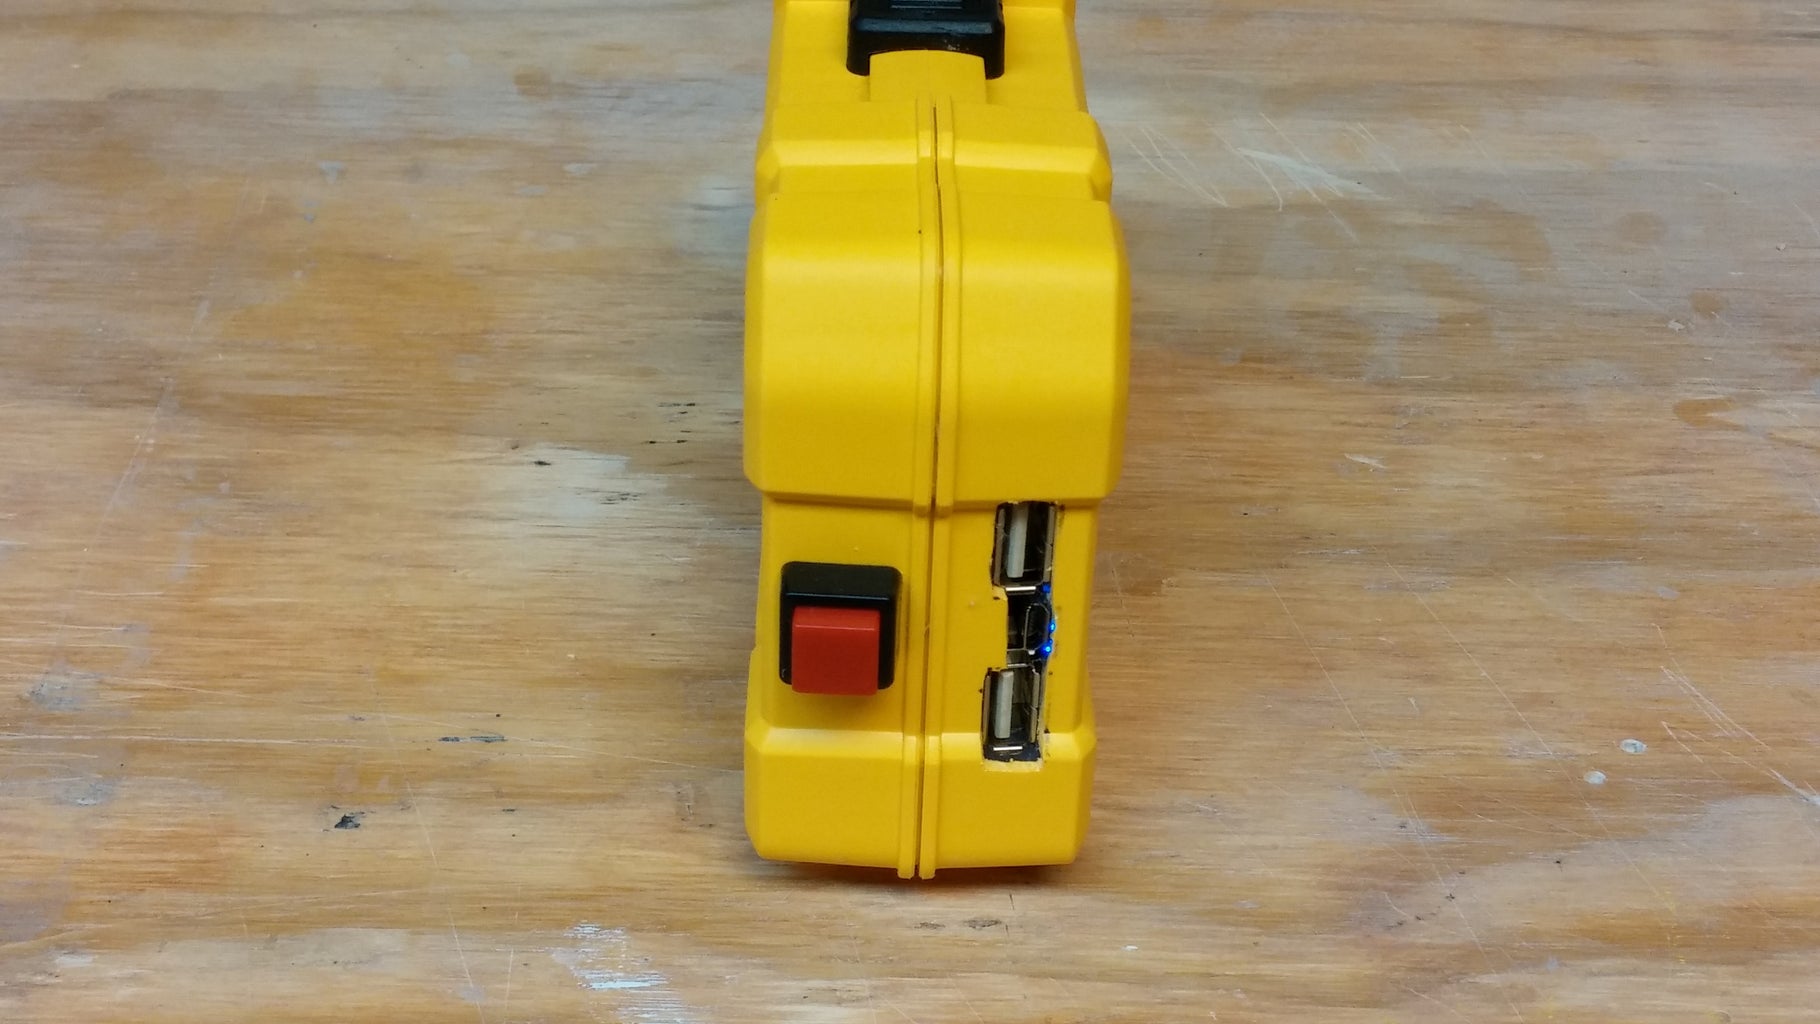
Step 5: Cut the Case


I was not really sure how I was going to lay everything out at first, but after a little planning I marked the places that I needed to cut and then cut the holes with a dremel rotary tool and normal drill. I then Cleaned up the holes using a scalpel.
Step 6: Wiring the Power Bank


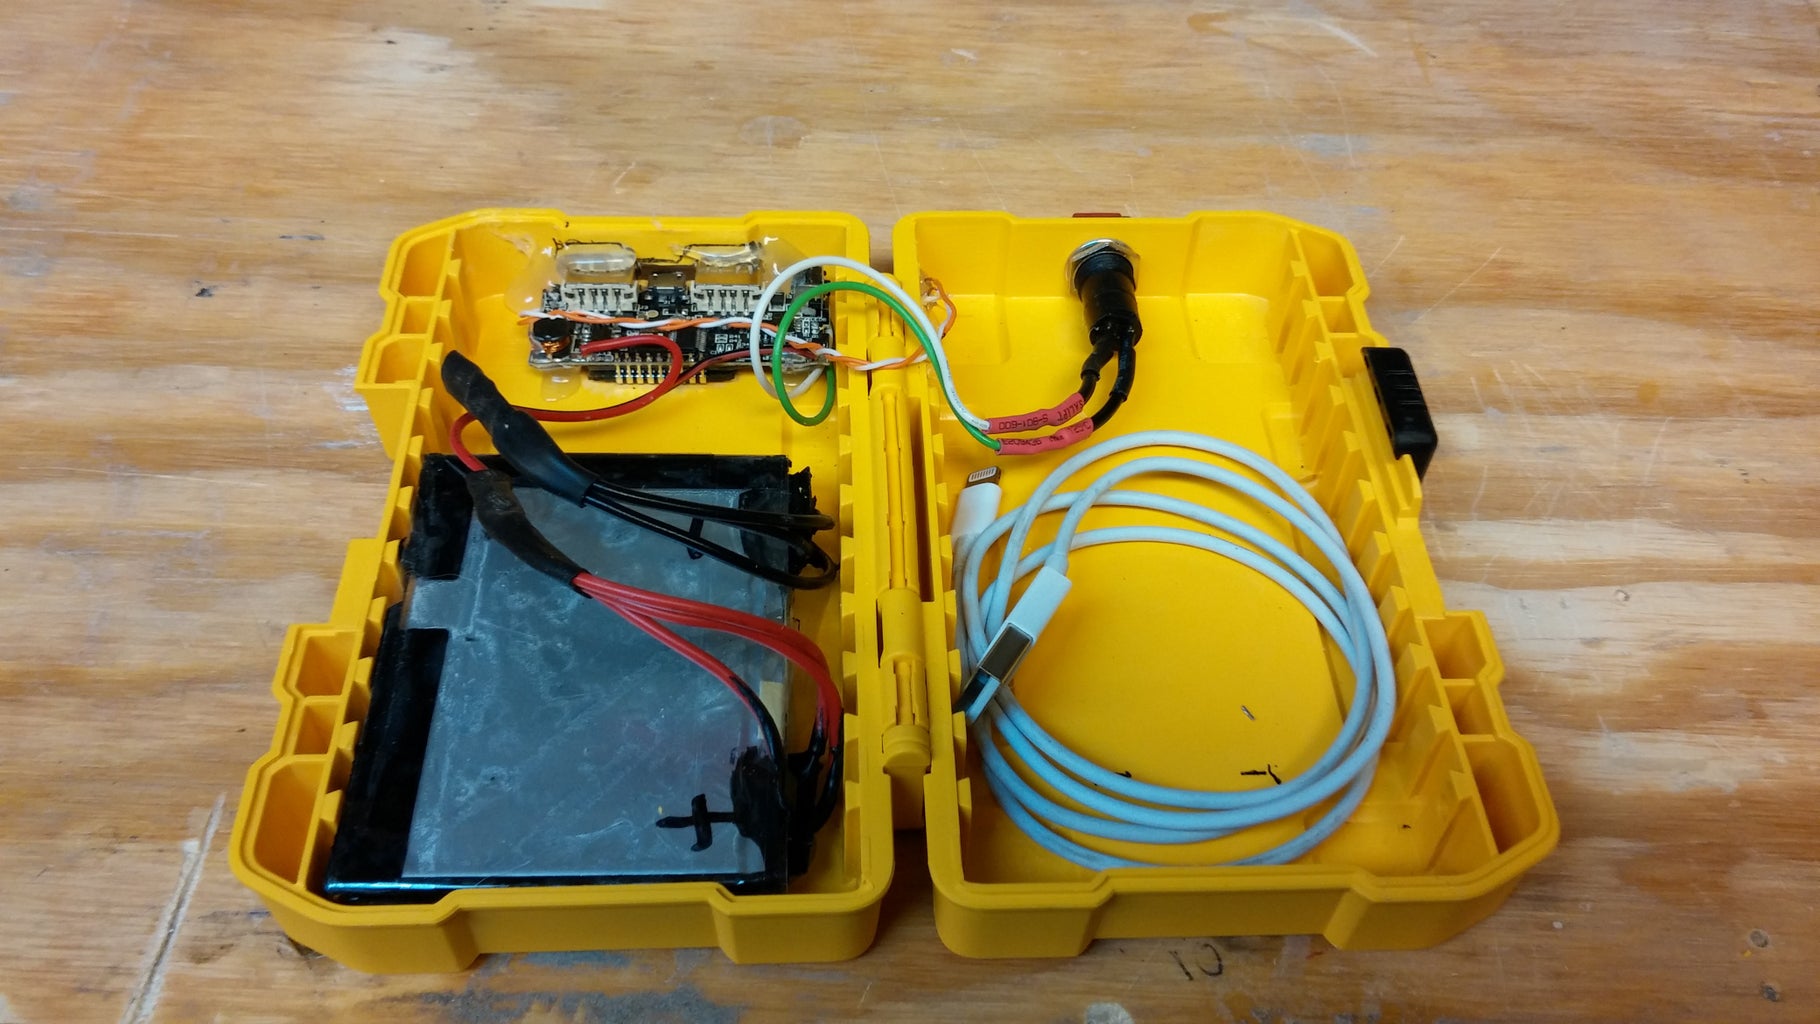
The wiring on this power bank is very simple. Because we want the total battery voltage to be approx 3.7 volts, we will need to wire all the batteries in parallel. So all the positive connections go together and all of the negative connections go together. Both of those wires then go to the controller board.
Step 7: Final Thoughts


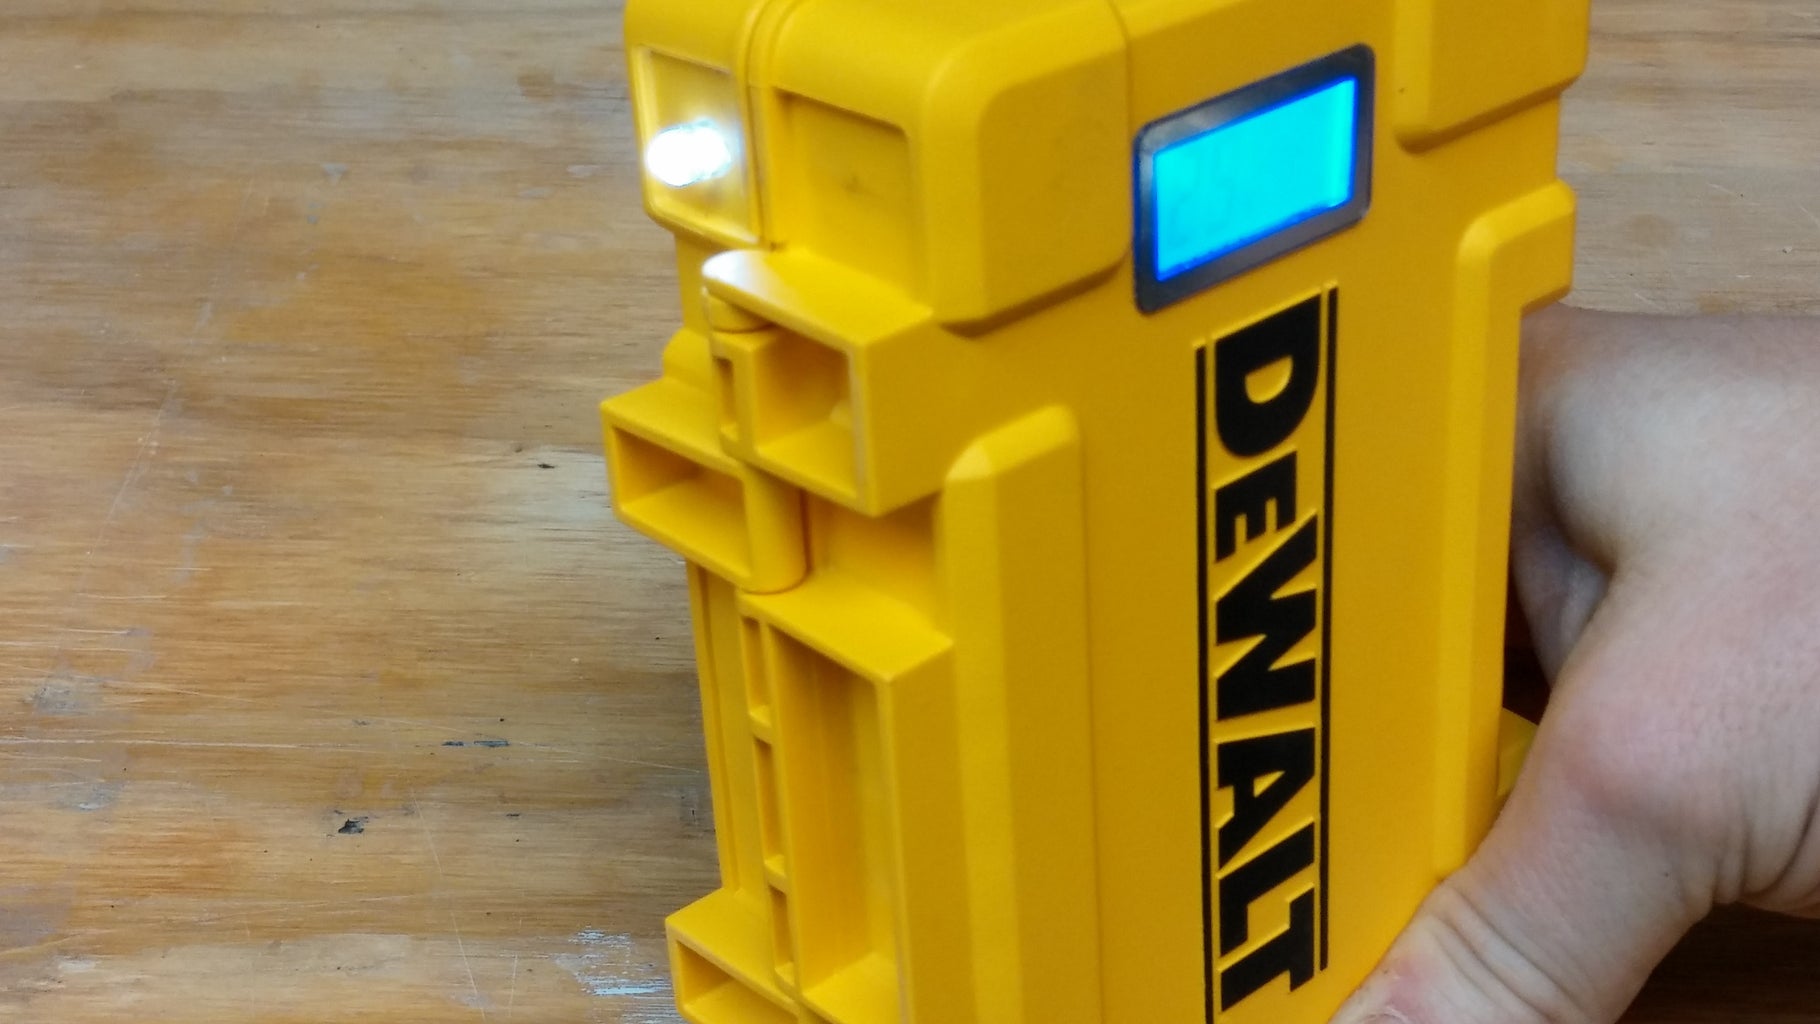
I only charged it up to 25% before this write up, but the 25% was 2847mah according to my charger meter. I know that it will not be 100% efficient to convert that to usable power, but I think that is pretty good. The button works, once to turn on, double tap to turn on flashlight, and long hold to turn off. I really like the backlight on the LCD, that looks nice.
I am very happy with the way that this project turned out. It looks a lot nicer than I thought it would honestly. Thank you for taking the time to check out my instructible. I hope you enjoyed it.

Participated in the
Homemade Gifts Contest 2016

Participated in the
Make it Glow Contest 2016

Participated in the
Epilog Contest 8


