

Introduction: Impossible Dovetail Joint Puzzle


A few years ago I saw a puzzle like this somewhere on the internet and I was really amazed. The only problem I had was my woodworking skills. Now I think I am ready to make one myself, although the handcrafted version of it is quite difficult. So why not make one using power tools for ease and precision? Fortunately the only power tools that I needed were the ones we all have in our workshops. No fancy stuff here!
Tools And Materials:
- 4.5 x 4.5 x 30 cm oak wood
- 4.5 x 4.5 x 30 cm iroko wood
- 4.5 x 4.5 x 40 cm pine or other wood
- 25 x 25 x 1.6 cm plywood
- Router table
- 13 mm dovetail router bit
- Woodworking square
- Sliding bevel
- Pencil
- Measure tape
- Clamps
- Jig saw
- 10 mm drill bit
- Countersink
- Wood screws
Here is a video of the whole process, please check it out first:
Step 1: Making the Jig (Part A)


The basic concept behind the jig is that all the passes on the router should be made in 45 degrees angle. When we work with such a small work piece a jig is a must for ease and security!
So lets get started!
We will need a 25 x 25 cm piece of 16 mm thick plywood for the base, 2 pieces of lumber 4.5 x 4.5 x 4.5 cm and two more pieces of lumber 4.5 x 4.5 x 13.5 cm.
Take all your pieces of lumber and crew them in order to create a wooden square with a 4.5 x 4.5 cm hole in the center using some 7 cm wood screws. You can find the exact plan in the embedded PDF and also you can check how I made it by checking out the embedded video. Its really straight forward!

Step 2: Making the Jig (Part B)


Now take your 16 mm thick plywood and on top of it place the part of the jig that holds the work pieces (The one you have from the previous step) at 45 degrees angle. You can do this by using a sliding bevel set to 45 degrees.
Mark the inside of the square hole with a pencil.
Drill four holes, one on each corner of the square and use a jig saw to make the square hole.
Finally align the hole on the plywood and the hole on the upper part of the jig and secure them using some 5 cm wood screws. At this point you have to make sure that your screws are on a line. You do not want your router bit to hit any screw.
Step 3: Making the "Male" Part


Take your 4.5 x 4.5 cm piece of oak and divide each of its surfaces into three parts like in the picture 1 and 2, each part should be 1.5 cm. Now connect the markings like in the picture 3 again with your sliding bevel. You should have four parallel lines like it the picture 4.
Set your router bit 13 mm above the table and start routing.
Stay on the lines, remove the material from the two edges and in the middle and you should have something like this.
Step 4: Making the "Female" Part


The process is pretty much the same as the previous step. But this time instead of routing the two corners and the middle part of the wood, do the opposite!
In order to correctly mark your second work piece align it to the other one and transfer the markings from the dovetail corners.
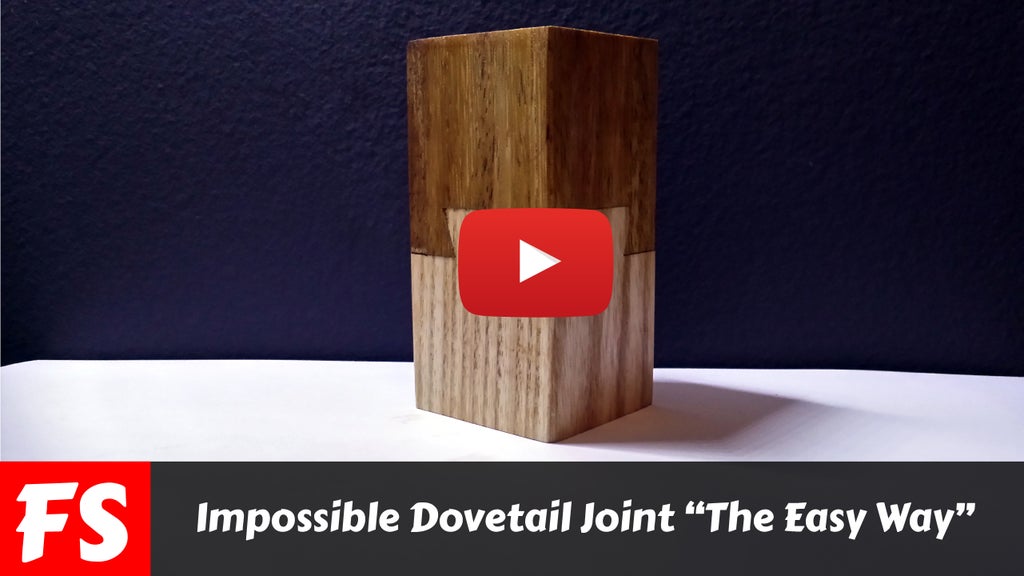
Step 5: Finished!

Just slide the one part into the other and you are good to go!

Participated in the
Epilog Contest 8


