RP1044_266

RP1044_267

rubberband engineer

Editor’s note: this project is an excerpt from Lance Akiyama’s book Rubber Band Engineer. This book is all about taking common household items and making awesome things out of them. We featured another project from this book in April. The book is available to purchase here.

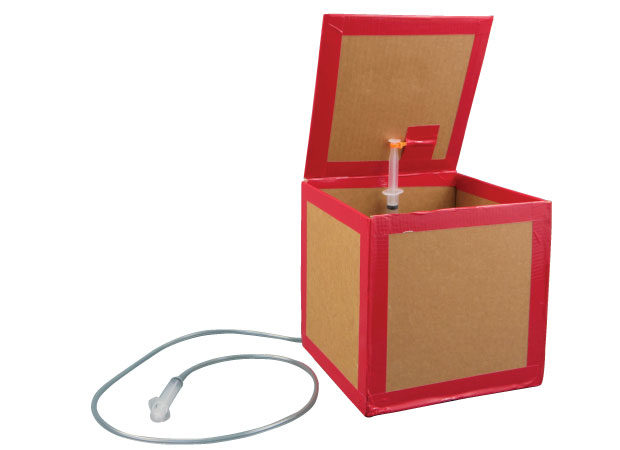
This box appears to open and close itself — just the thing for spooking your friends. The Magic Box is easy to build, yet the smooth pneumatic action gives it a satisfyingly sophisticated movement. Start with a ready-made box with a hinged lid or construct your own as shown here.

Project Steps

STEP 1

RP1044_258

Hot glue the edges of four pieces of cardboard together, one as the base and three as the sides of the box. Make the box’s hinged lid by attaching a fifth piece of cardboard with duct tape.

STEP 2

RP1044_259

Use a long piece of tubing when you create your pneumatic box, but if the tubing is longer than 5′ (1.5 m) then you might want to use a hydraulic system, instead. Pneumatics lose their efficiency with greater amounts of air in the system.

STEP 3

RP1044_260

Push in the plunger to empty the syringe of air and center it just under the hinged edge of the lid.

STEP 4

RP1044_261

Secure the syringe by taping only the tubing to the inside of the box. Do not tape the syringe itself to the box.

STEP 5

RP1044_262

Wrap a cable tie around the syringe plunger.

STEP 6

RP1044_264

Extend the syringe’s plunger. Lift the box’s lid and tape the cable tie to the lid about 2″ (5 cm) above the hinge. Cut off the excess cable tie.

STEP 7

RP1044_265

Make a discreet hole in a back corner of the box and lead the tubing through it. Glue the final piece of cardboard into place. The box is complete, and you may now cover up the corners and edges in duct tape.

STEP 8

RP1044_267

Attach the second syringe and try it out! Once you have it working, invite an unsuspecting guest to inspect the box, and then magically open it before them. It’s 100 percent sure to surprise!