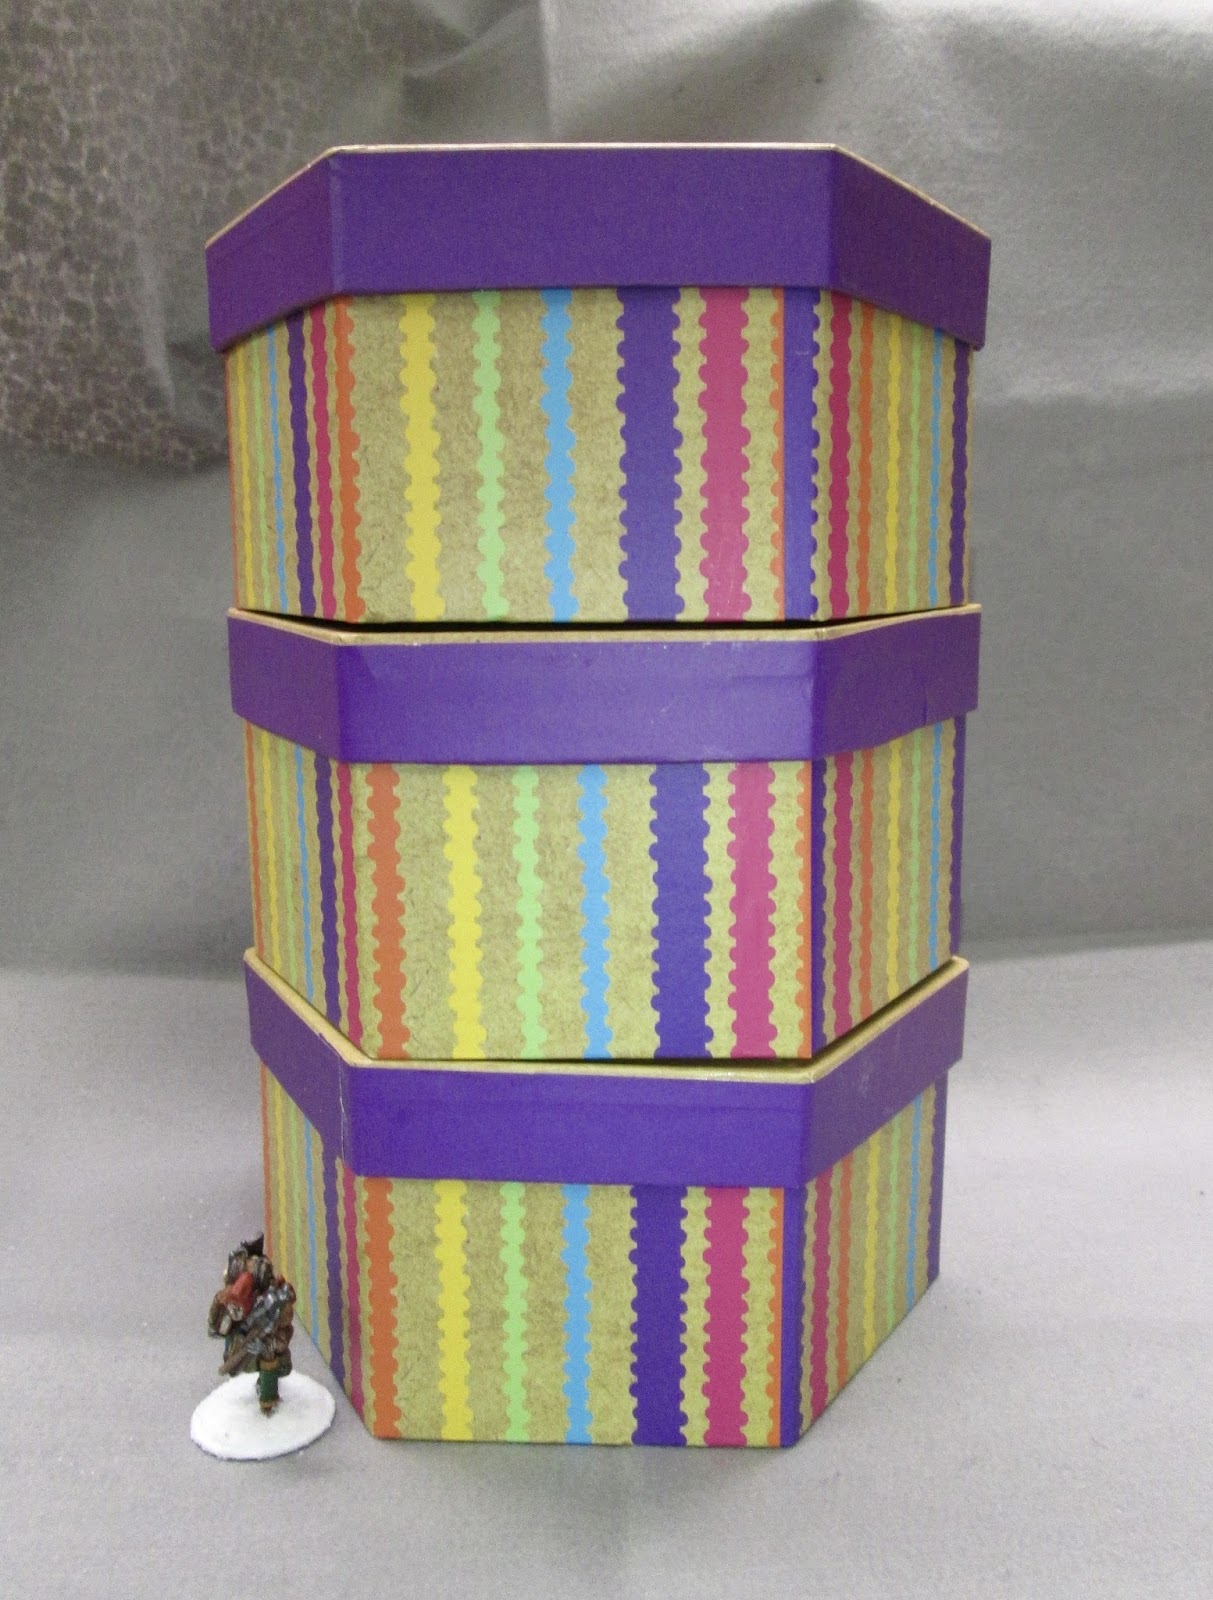
Over the past couple weeks I have been working on making a Ruined Wizard's Tower out of 3 hexagonal gift boxes that I bought at the local Dollar Tree store. For a while I had been contemplating how to make a traditionally cylindrical wizards tower out of the cork tiles I've been using to make my Frostgrave buildings; and all attempts at bending the cork into a tightly curved shape had been unsuccessful. Then it hit me that I could possibly use a multi-sided geometric shape to give the idea of a circular tower without it actually bring curved. I just needed to find a form to work from, as doing such a complicated structure freehand, making all the sides, angles, and measurements come out right with my measuring and cutting skills, would be difficult.
And then I found these boxes...
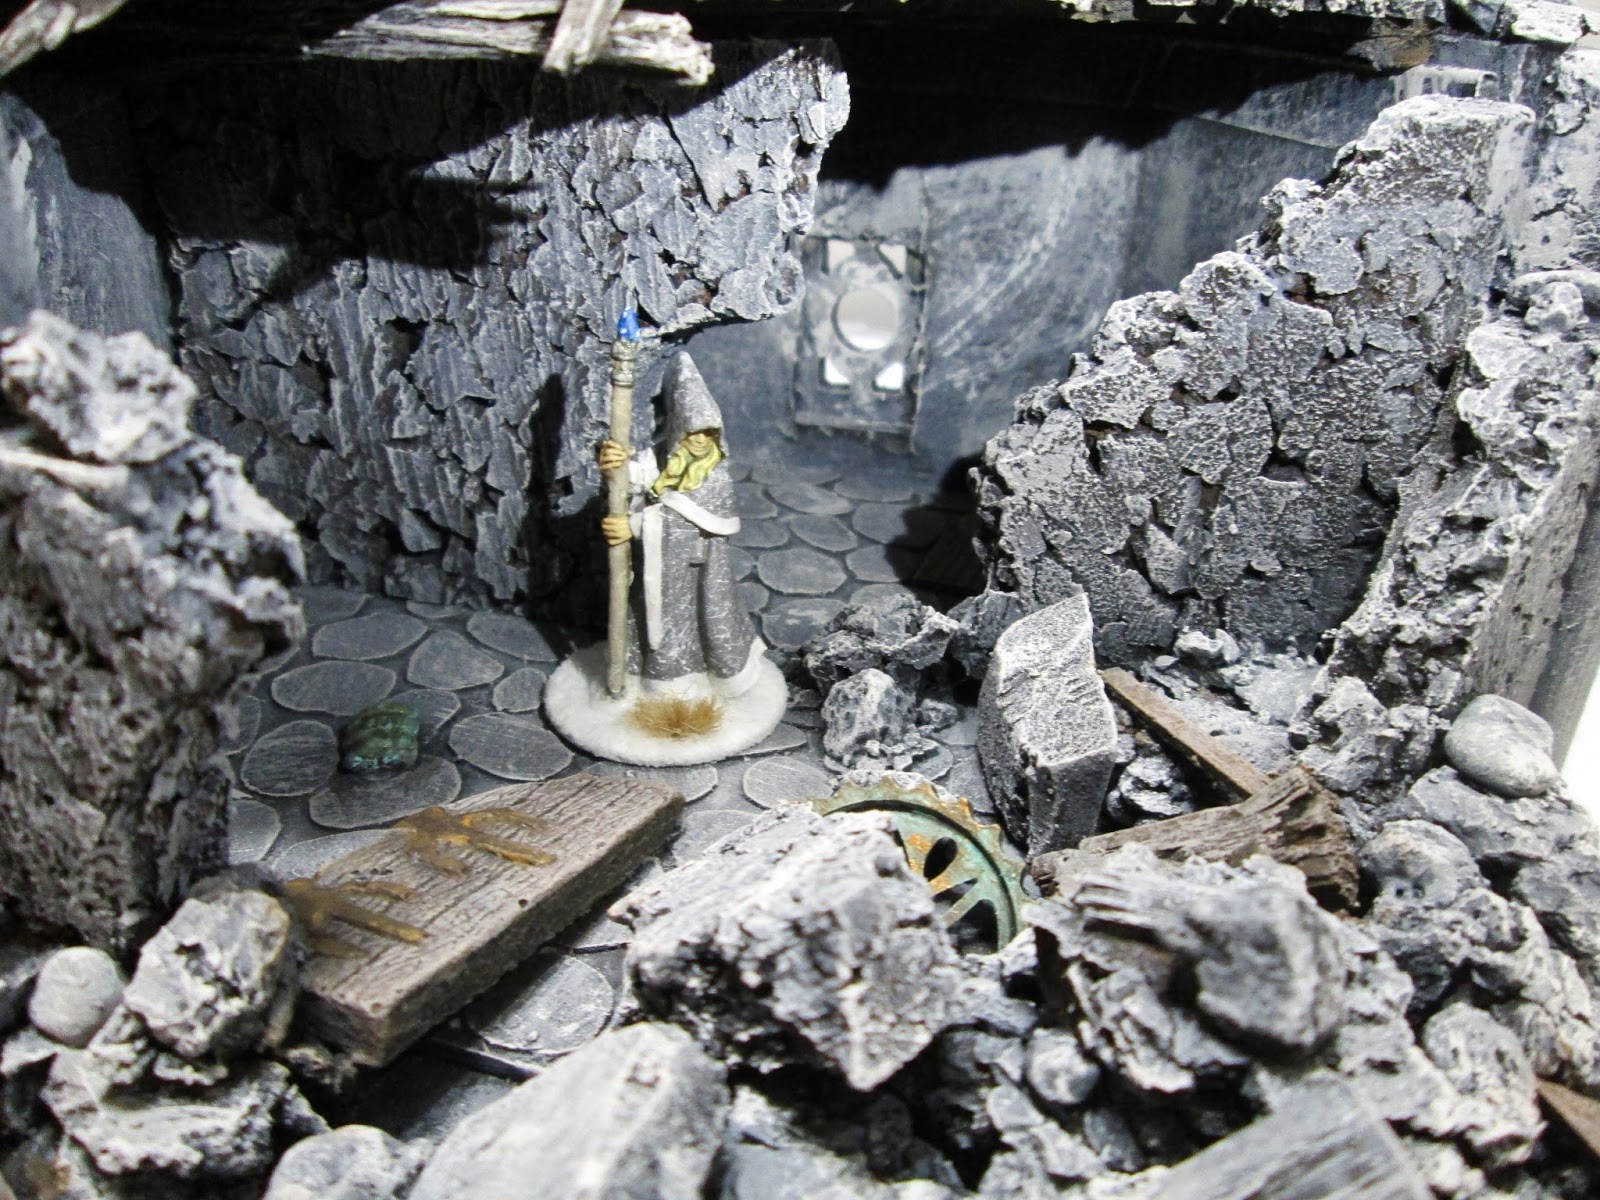
I began by cutting the boxes into a rough ruined tower shape, and then glued the lids of each box to the underside of the box above it, so the tower could be easily taken apart and reassembled. I also glued the "ground floor" box to a cork base.
I then began covering the sides of each "floor" of the tower with sections of cork tile.
Since the box lids stuck out a little further than the walls of each box, I covered the edges of the lids with sections of pink insulation foam carved to look like rows of stone blocks. I also cut sections of dowels to fit in the joints between the cork wall sections.
I glued some old plaster window frames I had into holes I cut in one of the walls on each floor. On the top floor I build the framework of an old roof using balsa wood and shingles cut from cardboard.
Inside the tower, I cut cardboard flagstones for the ground floor, and used balsa strips to make floor planks for the other three floors.
On the ground floor I also added some interior walls, and the ruins of a wood stair case.
My last construction step was to add rubble and debris all over the base of the tower, and a little on each floor.
After all the glue was dry, I sprayed the entire thing with black spray paint. When that was dry, I began drybrushing the stonework with dark grey paint.
I did two more successively lighter shades of grey drybrushing on the stonework, and then did three levels of brown drybrushing on the wood parts. Lastly, I painted the shingles and the metal bits.
And here is the end result, shown with a Reaper 28mm figure for scale:
I'm really happy with how this turned out, and look forward to using it in this Saturday's Frostgrave game.


Damn that is an amazing model! Well done!
ReplyDeleteThank you, adeptgamer!
DeleteImpressive. When looking at the first pic it seems the result would be less stunning. I was bluffed when seeing the results.
ReplyDeleteThank you, cedric! Yeah, I have to say the results even surprised me! :)
DeleteLooks great Chris!
ReplyDeleteThanks, J!
DeleteGreat stuff! I love the use of cork tiles as stonework!
ReplyDeleteCheers, Peter
Thank you, Peter! So far it is the quickest and easyiest way to make good looking stone buildings that I have found.
DeleteAmazing! Great results as always.
ReplyDeleteThank you!
DeleteThat looks awesome! I couldn't see how it would turn out when looking at the initial picture of stacked boxes, but it came out great!
ReplyDeleteThank you!
DeleteExcellent build!
ReplyDeleteThanks!!
Delete