

Introduction: AC Detector


Hello,
today I’m gonna show you how to make a really simple ac voltage detector.
Step 1: Watch the Video

The video is in my youtube channel Chris' Project
Step 2: The Schematic

Step 3: Buy All of the Components

The components for this project are:
3 pcs BC547 transistor,
1 pc 1M ohm resistor,
1 pc 100k ohm resistor,
1 pc 220 ohm resistor,
an led,
a 9V battery clip, and a 9V battery.
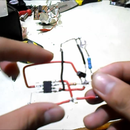
Step 4: Connect the Three Transistors

The connection goes like this: the emitter pin of the first transistor is connected to the base pin of the second transistor, and the emitter pin of the second transistor is connected to the base pin of the third transistor.
Step 5: Connect the Three Resistors to the Three Transistors

The first transistor is connected to the 1M ohm resistor, the second transistor is connected to the 100k ohm resistor, and the third transistor is connected to the 220 ohm resistor.
Step 6: Connect the Resistors to the Led

Then, connect the 1M ohm resistor to the 100k ohm resistor. And then connect the 100k ohm resistor to the cathode leg of the LED, and the 220 ohm resistor, we connect it to the anode leg of the led.
Step 7: The Last Connection

Finally connect the positive wire of the 9V battery clip to the anode leg of the led and the negative wire to the base of the third transistor and the antenna to the base leg of the first transistor. Now just plug in the 9V battery and we are done, just remember don't touch the 3 transistors and the antenna.
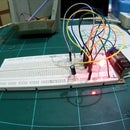
Step 8: Testing

If you connact everything correctly and if you put the antenna near an AC Voltage then the LED will turn on


