Showing posts with label take it outside. Show all posts

Project Stoop Jungle | Containers for Small Space Gardening

I confess, I am a hard core plant murderer.  Many a green thing has come under my care only to shrivel and die shortly thereafter. My alibis have been weak, my victims have been many.


But I'm turning over a new leaf lately.  I've gotten much better with plants as I've learned to pick the right ones for my style.  I forsaken big showy flowers for colorful leafy varieties that can last with a more neglectful owner like me.  And when arranged in the right way, they look just as lovely and showy without the extra effort.


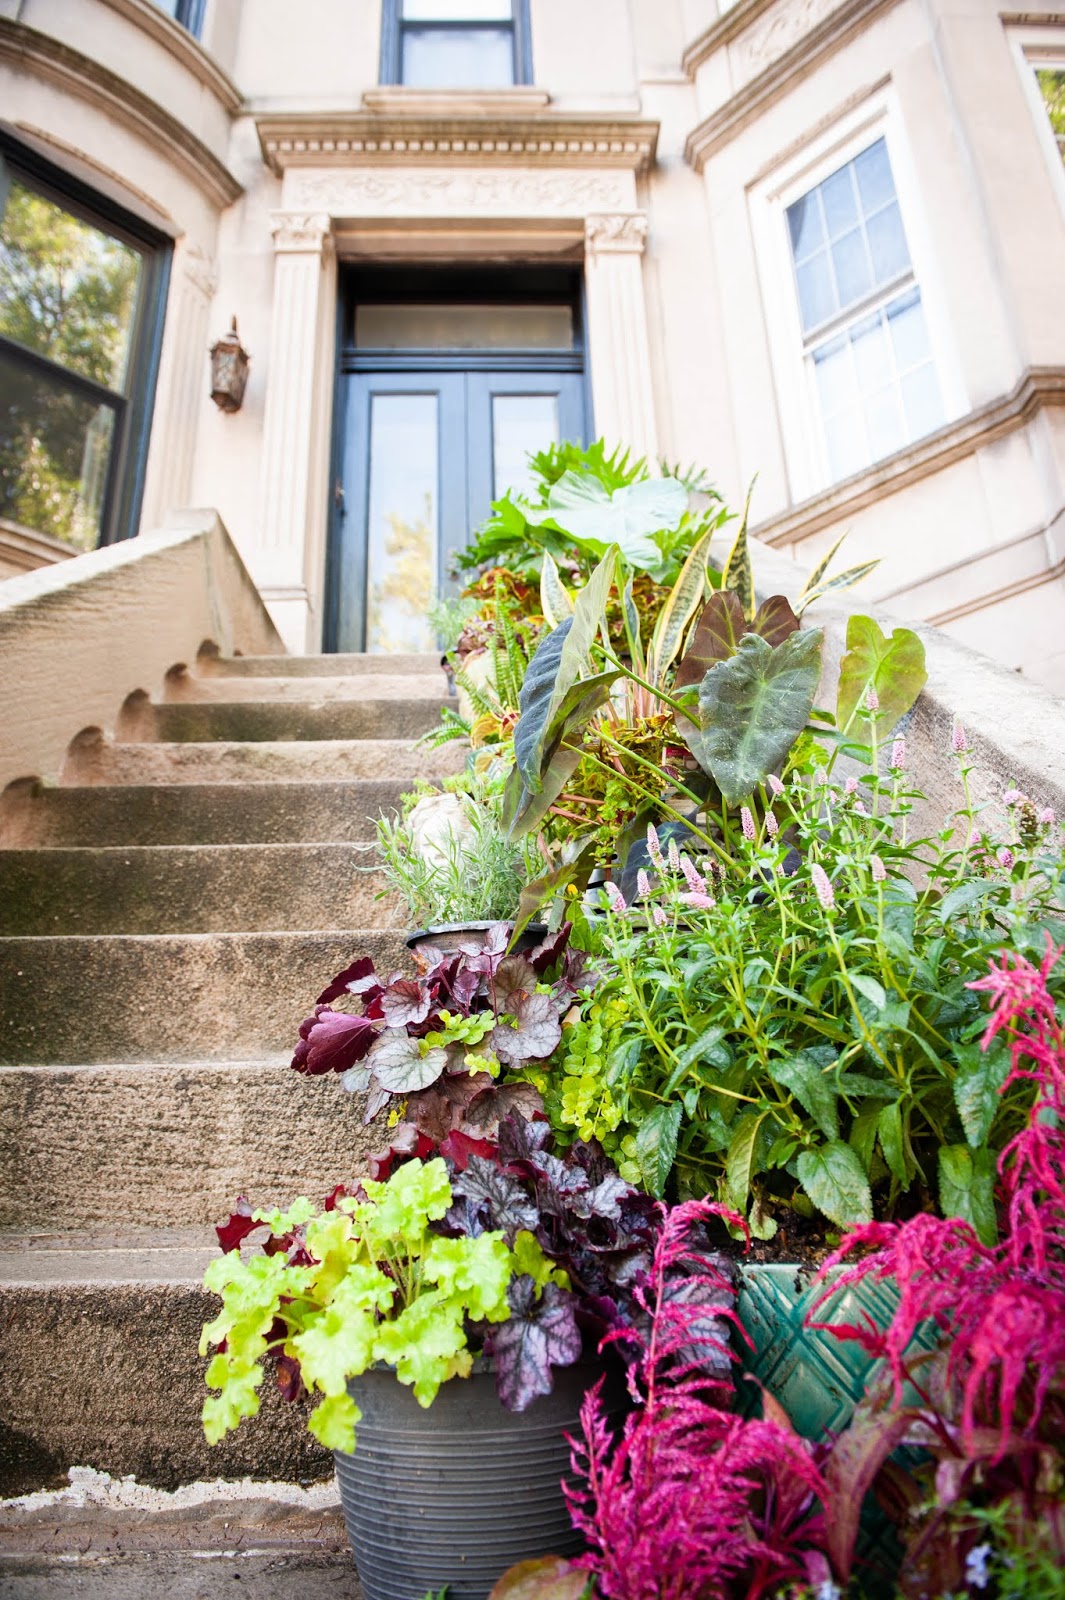
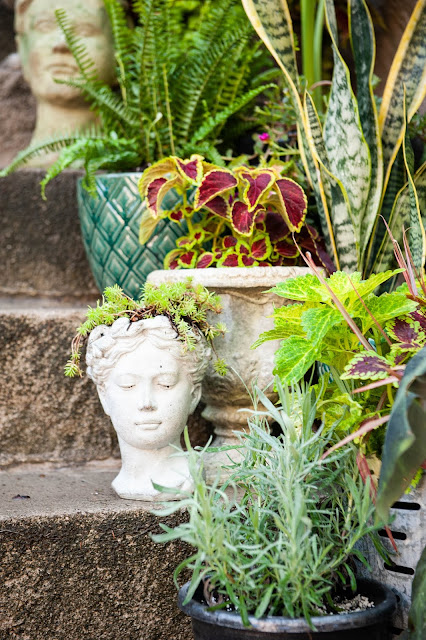
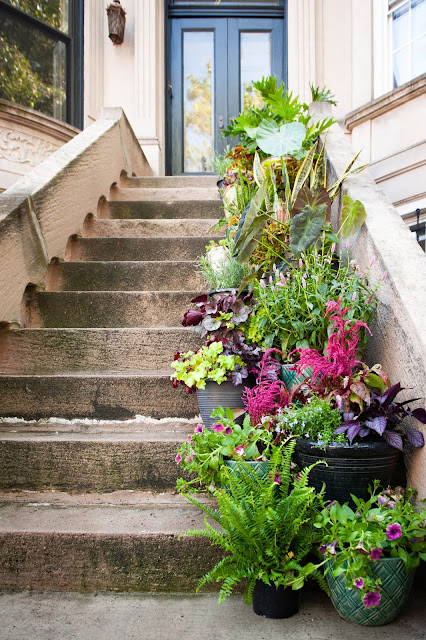
So project Stoop Jungle was born.  The entryway needed some curb appeal.  The front stoop is all concrete so container gardens were the name of the game. Instead of my usual tactic of putting a few small plants near the door and letting them grow to full size just in time for the them to die when the weather turned chilly, I am trying a new tactic.  Filling the containers with beautiful plants so we can enjoy the whole season.  No need to wait until they get bigger because they are lush and lovely right now!  I also mixed and matched traditionally indoor house plants out here as well which add a lot of height and fullness. When the season is over, I can move them indoors to continue to enjoy them all year.  And much to my shock (how did I not know this?) indoor house plants are affordable despite their size so they really make the budget stretch farther.


Off I went to my go-to for all things DIY, Lowe's  - and got to loading my cart with all the prettiest plants and planters as well as dirt and fertilizer to keep those plants glowing and growing.


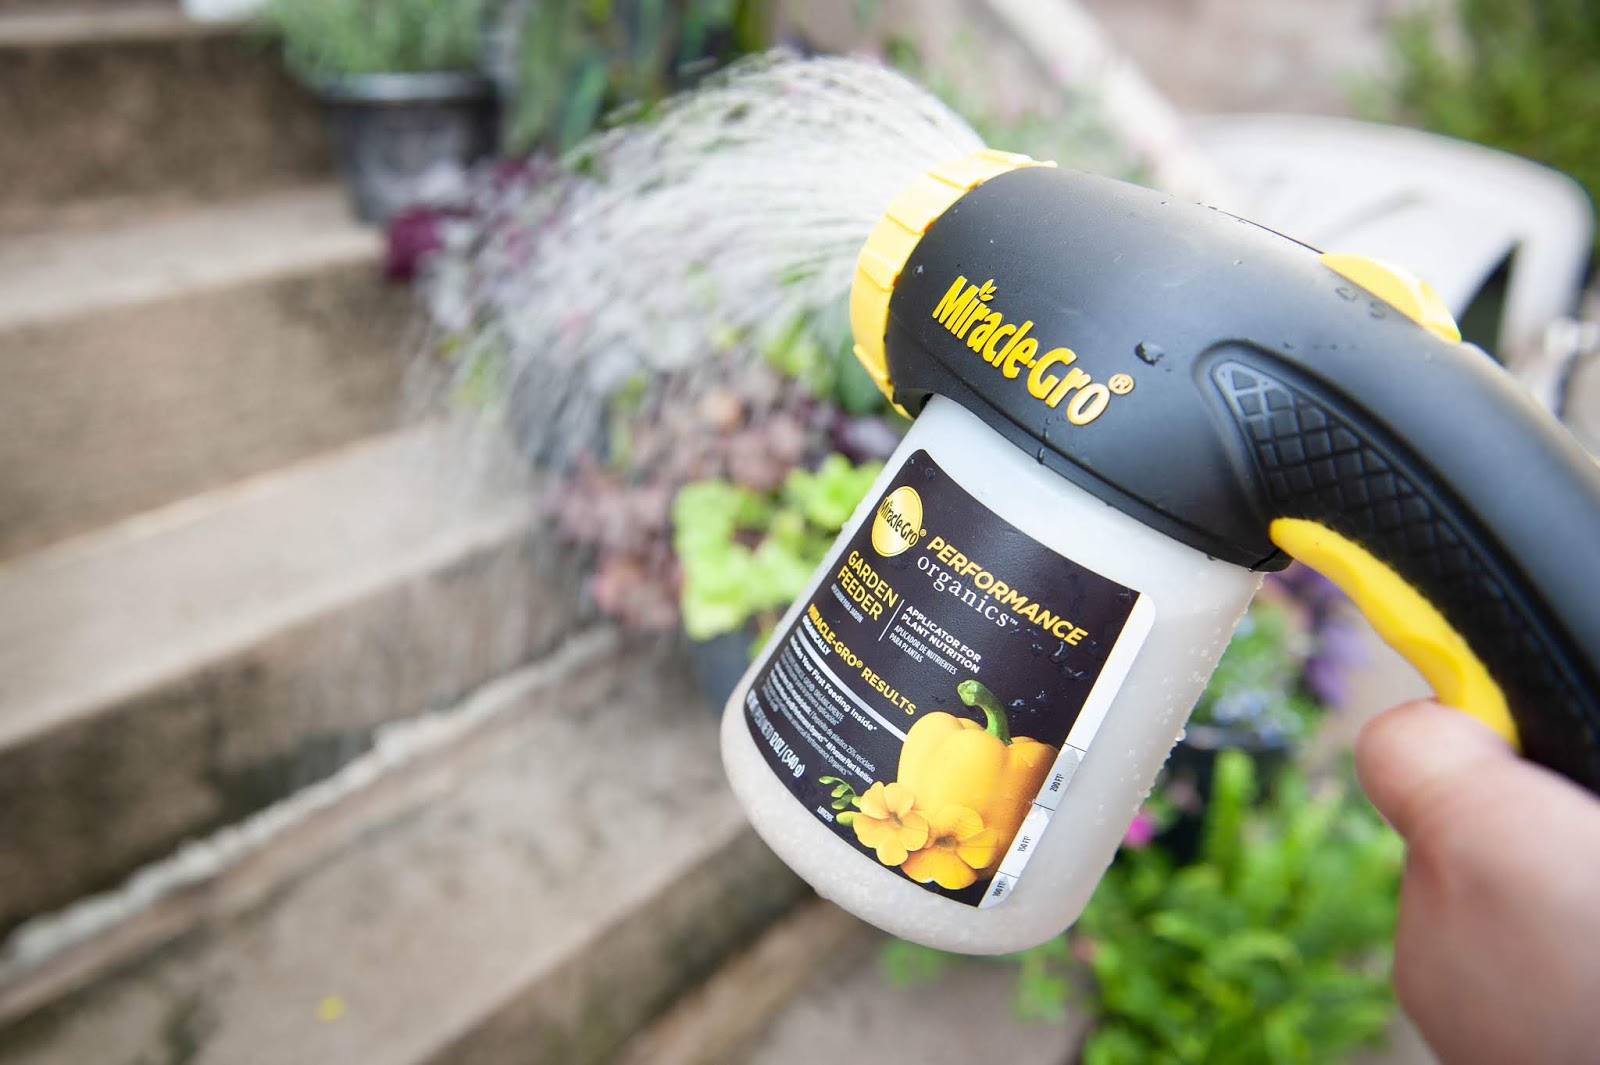
I'm loving these green ceramic (and frost resistant) planters which really look beautiful with any plant and come in small and large sizes. They worked beautifully with these lightweight resin planters I used for the other plants. I used Miracle-Gro Performance Organics which is specially made for container gardens and hopefully will give these plants the best start. Of course, Aggie was eager to lend a helping hand.


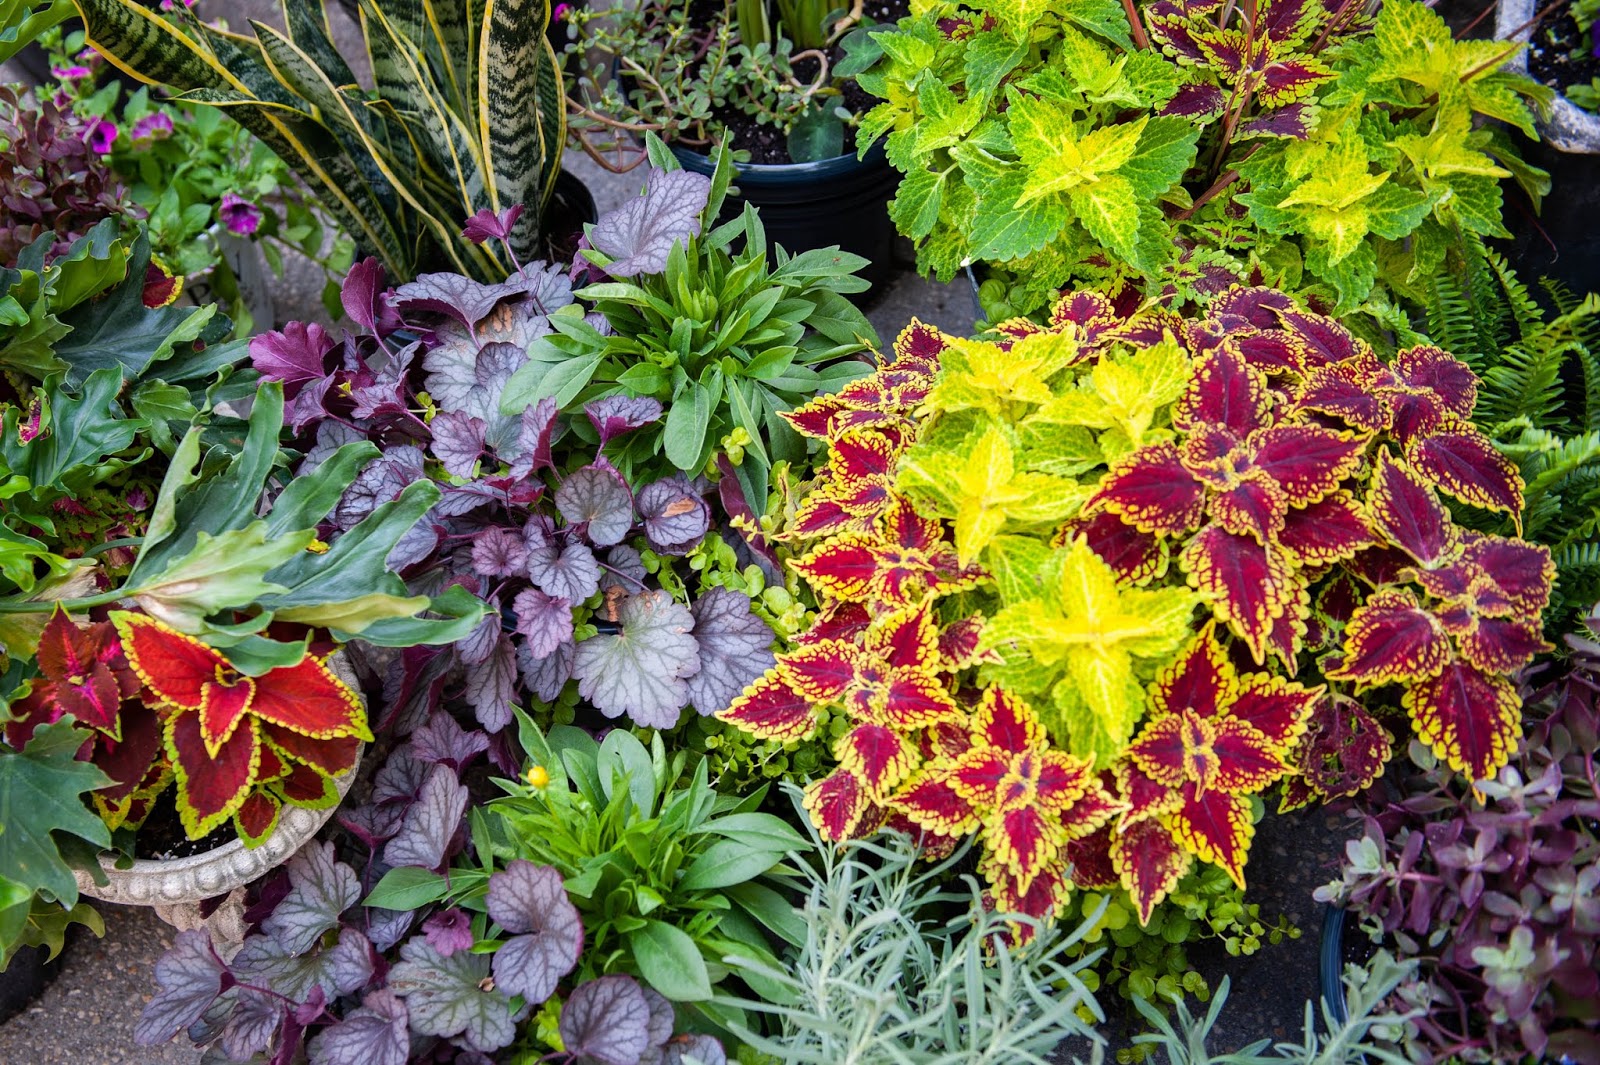
For color scheme I stuck with blues, reds, purples and of course greens. I got so many good plants including Lobelia, Dragon's Breath Celosia,  Elephant Ear, Sedum,  Veronica and Sanseveria.


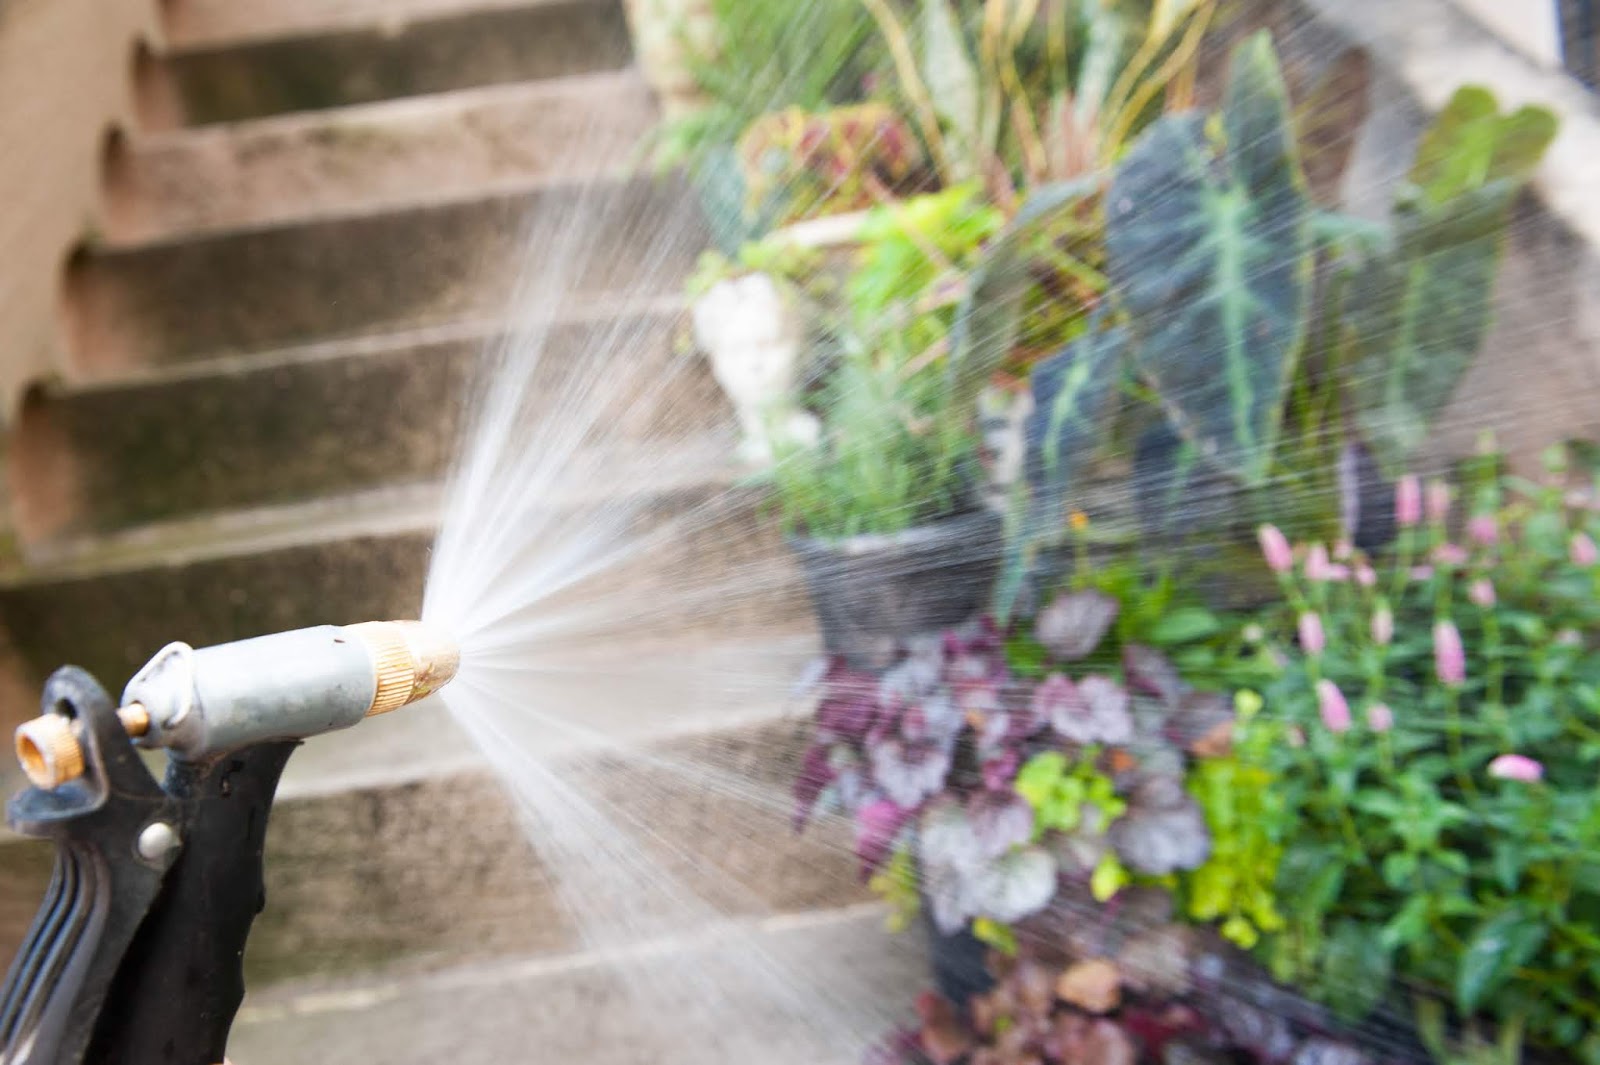
When I got home, my front yard looked like I was about to kick off a plant sale.  But once I got to mixing and matching the plants and laying the planters on my front steps, it all came together.  A few hours of sweating in the sun and the stoop jungle was born.  Now all I have to do is water it and enjoy!

Disclosure: This post is sponsored by Lowe's but all opinions expressed are my own.


Firepit Patio Makeover [Sponsored]

Just in time for the warm weather, I have a fun outdoor makeover post for you. I love a good firepit so I was happy to help a friend design a patio built around a DIY firepit that is perfect for entertaining with a little help from my friends at Lowe's.

diy firepit and armless chairs on stone patio

The existing stone patio was the ideal spot to build upon starting with this very straightforward concrete firepit kit. Simply stack the flagstones and set the fire ring inside and you are ready for s'mores!
Material used: Ashland Firepit Kit

diy outdoor pipe tableSucculents in red lanternWatermelon pillow on outdoor chair


Next up was creating a very long and affordable outdoor table with lumber, pipe and pipe fittings.  Another simple project that can be done without the need for many special tools or skills.  It's a great fit right against the stone retaining wall and holds a ton while still not being too precious for outdoor use.
Materials used: 2x8 treated boards, pipe fittings, pipes

filler spiller and thriller container planterdo it yourself outdoor table and firepit patioplants armless chairs firepit


Next up was seating. Instead of purchasing individual chairs, we used an armless sectional and broke up the pieces rather than using them next to each other. It's a great way to get a cozy, cohesive look while still being super flexible when you are changing the layout for different events. We also created a few other seating areas at the edges of the patio to give some different conversation spots using accent chairs.
Materials used: The Allen + Roth Sea Palm 6 piece sectional we used is sold out but their Altadena collection is a very similar style.  Alternatively these Bellmare chairs or the this outdoor sectional would have also worked well separated.) Tucker Bend Conversation Chair for the extra seating.

succulent firepit patio

Along with the seating we needed a few side tables that would hold drinks and plants to fill out the space.  These also make great additional seating as stools when needed.
Materials used: Allen + Roth Steel Plant Stand and Faux Cement Plant Stand

diy firepit kit on patio

After the large items were placed we added a few accessories give some color and personality.  Three bright red lanterns to added some color to the table spread.  And finally a few colorful pillows to accent the seating.
Materials used: Allen + Roth Red Outdoor Lanterns, Watermelon Lumbar Pillows, Green Square Throw Pillows,

firepit chairs plants


The last step was adding personality to bring the patio to life.  I fell in love with some cement planters (that are insanely heavy) and we reutilized some of the planters she already owned.  We went crazy in the garden center filling our cart with plants that would do well in this sunny spot.
Materials used: Concrete Planters, Angelina Sedum, Purple Calibrachoa, Fuschia Hybrida, Songbird Mix Columbine, Red Cordyline, Mandelvilla, Creeping Jenny, Colorblaze Coleus and Philodendron Selloum

Lucky for us, Lowe's had everything we needed to complete this project with a little planning, a little elbow grease and one busy installation day. I'm so pleased with the result and hope my friend and her family will get lots of happy memories in this space.


Disclosure: This post was sponsored by Lowe's but all opinions expressed are my own.  Thanks to great sponsors likes Lowe's for helping me create projects to share and inspire.


If you are inspired to give your own outdoor space a new look, this weekend is the perfect time to get started. Lowe's is running some fabulous Memorial Day sales including 30% off select outdoor furniture and grills.

Inside Outside Deck Makeover with Lowe's [Sponsored]

Confession: Our back deck has always been a problem. It gets full sun and snow and weather exposure so no matter what product or paint I've tried, I haven't had much luck in keeping it looking good for any extended period of time. Case in point, we just painted the deck boards last year and they already looked like they hadn't been touched in a decade. The kids couldn't play out here because of the splinter issue and so I never put much effort into making it nice.


Despite it's relatively small size, I knew it could be a great addition to our home. An outdoor living room for city life complete with lounging and eating area. But the battered floor boards always stopped me in my tracks.


That was until I had the idea to cover the boards with faux grass. Until I started doing some research, I had no idea how far faux grass had come in the past few years. I was only familiar with that tacky green rug like turf that I had seen growing up. Well it's come a long way baby! It was definitely a risk but one I was willing to take.


Luckily Lowe's carried the perfect product - Sequoia Everlast Artificial Grass - it had some great reviews and came in variable widths. Despite it being somewhat unruly to carry, it was surprisingly easy to install. Unroll, cut around the edges and post and voila. It was transformed! It was soft underfoot and the kids immediately fell in love with it. Cue rolling around on the deck laughing.


Now that we had a space we could really enjoy, it needed some furniture. Back to Lowe's I went. The most important piece was the seating and I got lucky and found an L shaped Outdoor Sectional that was a perfect fit. I used an upturned barrel planter as a side table and 2 piece nesting table set as a coffee table. The bistro set I had from 10 years ago fit perfectly into the other side to create a little dining (okay, coloring and outdoor craft) area.


Heavy duty string lights fit perfectly across the pergola posts (this is one strand doubled so that the bulbs are closer together) paired with a set of stylish lanterns add some nice light. A majesty palm tree tucked to the side adds a little bit of tropical luxury to the space. All installed in a few hours!


The budget?  All this for less $1300!  Well worth it for adding an entire other lounging space for the whole family to enjoy.

Not only do we get to use this space when the weather is nice but I have also improved my view since this is what I see out of my kitchen window. We spent more time out on the deck the first weekend than we did in all 10 years prior.


Disclosure: This post was sponsored by Lowes Home Improvement. All opinions expressed are my own. Thanks to wonderful partners like Lowe's that make this blog possible.

DIY Tiki Bar

Build a basic tiki bar for your next backyard luau with these easy to follow instructions.


Somehow Oscar is turning one next week and we wanted to make sure to mark the occasion in a way that would fun for the adults and the kids. A backyard luau is something we have never done before so we went with it.  In addition to the grass skirts and flower leis, I wanted to build a basic tiki bar to add to the charm. I made this one small enough for our back deck but you could adjust to any size.


I wanted to make something quick (I made this during baby naps over 1 24 hour period), easy (no special tools required) and reasonably cheap.   This was my solution and I think it looks appropriately Gilligan's Island. I also plan on reusing it for this year's Halloween display so doubly useful for me.  If you wanted to create something that would withstand the elements for longer and/or looked less rustic, you could use cedar which withstands moisture and rot but I just used the cheapest lumber I could find.

Materials used: 13 1x4 cut into 35 inch lengths, 2 1x2 cut into 29 inch lengths, 6 1x2s cut into 13 inch lengths, 1 16x36 inch wood piece for the top, 2 29.5x13 wood pieces for the shelves, wood screws, stain or paint

Build the Tiki Bar

  • Line up 9 of the 35 inch pieces edge to edge. Screw together using 1x2s.  Place those pieces where you want your shelves to sit. I have them at 13 and 21 inches from the bottom. This will make the front of the tiki bar.
  • Line up 4 of the 35 inch pieces edge to edge, screw together using 1x2.  Repeat.  This will make the left and right side of the tiki bar.
  • Screw the left and right sides to the face by abutting the short edge to the back of the long edge.
  • Screw in the 1x2s to the underside of the top.  Screw in at right and left for extra hold.
  • Place the shelves on the 1x2s support
  • Stain or paint as desired. I used a mix of brown paint and MinWax Coastal Grey stain.
  • Optional: use scrap wood to create Tiki Bar sign hanging from the counter

The only tools you need are something to cut the wood with (or get your local hardware store to do it for you) and a drill.  It came together pretty easily and has a lot of rustic charm perfect for a luau display.


Fall Friendly Ways to Keep your Patio Party Going through Fall {Sponsored Post}

Confession: I spend most of the summer quietly mumbling about the humidity and the mosquitos, longing for the cool breezes of autumn.  Just as the moisture leaves the air and a crisp air rolls through is exactly when I leave my air conditioning hibernation and want to spend time lounging outside.  Fall is fast approaching, so it seems like the perfect time to share some tips on how to extend your patio life for best time of year to actually enjoy it!

Since we got to design the country cottage patio from scratch (see the full before and after post here), lots of fall friendly elements were incorporated into this space so it makes the perfect example to illustrate.


Layout  When selecting and laying out outdoor furniture, think about how you really use the space.  Do you spend most of you time gathered around a table enjoying a good meal or do you focus more on lounging?  For example we knew lounging would be priority #1 so we created this patio space with a conversation area featuring cedar adirondack chairs all facing each other and the firepit. Directly behind it sits a zone for relaxing in a hammock as well as eating dinner at a picnic table in the grass.  Creating these zones make for great entertaining flow and function.


Lighting  With the long daylight hours of summer fading fast, you'll need to think about how to best light your outdoor space once the sun goes down. Whether eating meals with the whole family or just enjoying a glass of wine out back, you'll want to be able to see after sunset.  There are endless options but some of the easiest to install as well as most beautiful to look at are simple string lights. Since we wanted to be able to move them as needed, we strung these Allen + Roth White Plug in String Lights  from cedar branches set in cement bases but you could easily hang them from trees, a garage or a deck.  Their soft glow not only serves the function of lighting the patio but also makes for a great celebratory decoration when entertaining.  You can compliment the main lighting with ambient lighting accents like lanterns and candles.


Fire There are few things more primal or more entertaining than starting a raging fire. Enter the firepit - an activity that never seems to get old for our group no matter what the temperature. Not only does it keep everyone warm and toasty during a chilly night but gathering sticks and lighting it ablaze becomes a party in of itself with everyone lending a hand.  When the fire is roaring, everyone can gather around for some sweet s'mores.  We used this Flagstone Firepit Patio Block Kit to build this one and it works beautifully with the brick patio and was easy to install.


Serve This patio was built with friends and family in mind so having a spot to serve treats for young and old alike was key. Instead of a fixed piece of furniture, we used lumber, plumbing supply pipes and casters to build a moveable feasting cart.  Used here as a s'mores bar, we outfitted it with jars of chocolate, graham crackers and marshmallows, lots of firewood and some apple cranberry cider wash it all down.  For different occasions, it can easily be used indoors or out as a rustic bar cart, firewood caddy or bbq food prep bar.  We also situated this wooden picnic table just off the side of the patio to serve as separate seating and serving space to use as needed.


Cozy Once all the key elements are in place, don't forget to add a few cozy touches to make our outdoor space feel just as comfortable as your indoor.  Outdoor striped pillows were used in each chair for both color and comfort. Add a few throw blankets (these can be the regular indoor kind, just be sure to bring them in after the evening is over) to snuggle under for extra warmth.

There are so many ways to make the most of your outdoor space this fall - those were just a few of them.  How many days til the start of fall?

Disclosure: This post is written in partnership with Lowe's Home Improvement.  Thanks to them and all my sponsors who help make the projects you see on Brooklyn Limestone a reality.  As always, all opinions expressed are my own.

Source Project List
Red Charcoal Holland Concrete Patio Stone
Paver Base
Sand
Polymeric Jointing Sand
Landscape Fabric
Flagstone Firepit Project Kit
Adirondack Chairs
Picnic Table
Striped Pillows
5 gallon buckets
Quickcrete
Allen + Roth Lights


Firepit Patio - Country Cottage DIY Circular Outdoor Entertaining Space

This DIY firepit patio creates the perfect entertaining spot for evening guests. It's circular pattern gives it fun and whimsey.

Completed firepit patio with Adirondack chairs lights and plants

Disclosure: This project was done in partnership with Lowes but all opinions expressed are my own. 

Woo-hoo!  The country cottage's circular firepit patio is finally complete!  It was a bit of a battle as we had some obstacles in the form of bedrock at the patio site and an extra cold spring and rainy weekends but it got completed in July and I'm so happy to share it. Let's start at the beginning.

This is the before we installed the Firepit Patio:


  Before photo of firepit patio space

After the spot was excavated, there was a fair bit of jackhammering and rock moving required to get that round hole dug deep enough to start laying the base for the firepit patio. Once the prep was done, the rest went a bit easier and you could really see the outdoor area take shape. (I can take no credit for any of that backbreaking work as I was very much pregnant and fully okay with using that an excuse to just shout design suggestions from the sidelines.)  We used a layer of landscaping fabric to prevent weeds followed by pea gravel, sand, the stones and then polymetric jointing sand to hold the whole thing together.

Man jackhammering ground for firepit patioStacked bricks on sand for firepit patio pattern Spreading sand in cracks on firepit patio bricks
Thanks to some super wet weather, we had to let that dry for several days before it felt stable enough to proceed but it did harden eventually.  Finally it was time for the firepit - the center of the action at any outdoor gathering with us!  My brother and sister in law smartly used some of the rock broken up from the excavation to lay a windy stone path from the house to the patio. Waste not, want not!

Circular DIY Brick Patio www.brooklynlimestone.comPhoto May 30

Once the hard work was behind us, the fun part of outfitting the firepit patio with just the right pieces to make the most of this backyard space was ready to start.   In went Adirondack chairs - painted black to give it a more updated look.

Backyard_BrooklynLimestone (5 of 27)160723
After deciding we wanted to be able to move the lighting for different types of events, these allen + roth string lights were strung from cedar poles anchored into cement bases.

  Circular DIY Brick Patio www.brooklynlimestone.com

Lumber and pipes were used to make this s'mores fixings cart which I'm kind of obsessed with.  Once again, on wheels to make the most of it's function as BBQ cart, firewood caddy or outdoor bar cart as needed.

Close up of s'mores cart on firepit patioS'mores cart with wood slice sign, drink container, glasses, and s'mores supplies

Finally off to the side we created another zone with a picnic table and a hammock for extra mingling and relaxing spots.

Closeup of firepit patio Picnic table next to firepit patioBlack Adirondack chair on firepit patio

I just love this space so much! Maybe it's city life but the raging fire is the ultimate entertainment for all ages. I wish it were in my own backyard but I'll just have to plan to stop over a little more often.

Firepit Patio Resources

Red Charcoal Holland Concrete Patio Stone
Paver Base Sand
Polymeric Jointing Sand
Landscape Fabric 
Flagstone Firepit Project Kit
Adirondack Chairs
Picnic Table
Striped Pillows
5 gallon buckets
Quickcrete 
Bulb String Lights

Love DIY? Check out all of my DIY projects!

Follow @ Instagram

© 2007-2020 Brooklyn Limestone. All Rights Reserved. Privacy Policy
Back to Top