

Introduction: Build a Wooden Fence and Gate


This instructable covers how I built a simple wooden fence with locking gate.
Thanks for checking it out!
Step 1: Preparations


The first thing to do is decide where you want your fence.
As this fence was to be built across a narrow side-yard (rather than along a property line), I actually had several choices of where exactly to build it. The worst thing to do would be to not think through the location and weigh all possible considerations, and then build a fence in a place where you end up not liking it!
If you have buried utilities where you live, you need to call the buried utility authority and have them come out and mark any buried lines, and then follow any guidelines they provide regarding excavation.
Step 2: Dig Holes, Plumb Posts


After utilities were marked, I carefully laid out where I wanted my fence posts, and spray painted their locations on the ground.
In general, posts for wooden fences should not be more than 8 feet apart, both to prevent sagging and to take advantage of common-length lumber. For mine, the distances between posts were dependent on how wide I wanted my gate, which was 36 inches.
I dug the holes for my end posts first, and then used scrap 2x4 boards to temporarily anchor them in perfectly plumb position. This was done with stakes and screws, as shown in the photos.
The posts are 4x4 pressure treated beams, and the slats added later are cedar fence slats.
Step 3: Concrete


I mixed and added concrete to the post holes. After a few days I removed the 2x4 supports.
Step 4: A Little Trick


I took advantage of the short length of this fence to aid in getting all of the posts perfectly inline.
With the two end posts in place, I screwed a 10-foot board across the span and used this to position the interior posts and mark their precise locations.
Holes for the interior posts were dug, and then the posts were plumbed and anchored in position with supports. Concrete was then added to these holes.
Step 5: Cross Pieces


With the posts cemented in position, I removed the supports and trimmed the post tops so they were all level with each other.
Cross pieces were added with exterior grade screws.
Step 6: The Gate

The following steps show how I built and installed the sturdy little gate.
Step 7: Build the Gate


The gate was made by first creating an external frame of 2x4s that were screwed together with exterior screws installed through drilled and countersunk holes.
A diagonal cross brace was then added. This will keep the gate square and prevent sagging. Diagonal cross-braces like this should always angle downward to the lower hinge. See notes in photos for more details.
My gate ended up with a slight warp, so a second brace was added to counteract the warp. This 2nd brace was installed with a little pressure in the opposite direction as the warp, which pulled everything nice and flat (see photo notes).
Step 8: Mount the Gate


Some additional boards were added to the gate and fence posts as needed to hold the hinges I was using.
The gate was propped into position and clamped in place with a few paint stirrers acting as temporary shims to provide a little stand-off on the hinge side.
Due to the natural movement of wood and to help the gate always close all the way without binding, it's good to leave a little gap on the hinge side rather than install the hinges with the gate and post mashed up against each other.
With the gate in position I was ready to start adding fence slats over which I'll install the hinges and other hardware later on.
Step 9: Add Fence Slats


This is where building a fence gets exciting. All the hard work is mostly done!
I tied a string across the top of the fence to indicate where I wanted the tops of the slats to be. Some fences follow the terrain while others are created with level tops - it's just up to what you need and want.
The slats were cut individually as needed and installed with exterior grade deck screws.
Step 10: Add Hinges


The hinges were added at this point. These are just basic Home Depot gate hinges which come with lag screws for installation.
The hinges were carefully positioned as desired and the locations for the screws were marked and pilot holes drilled. The screws were installed with a socket wrench.
Step 11: Check and Adjust Clearance

Now's a good time to check the gate's swing clearance. Mine opened, but it was a tight fit and bound up just a little.
I used a belt sander to remove just enough material from the gate frame to allow for proper clearance. This can reasonably be checked and adjusted before you actually install the gate, but I knew it was going to be really close so I just waited till after it was fastened in place.
Step 12: Install Latch Hardware


This step depends a lot on what type of latch system you're using. Again, this is just a common style I picked up from Home Depot.
Some additional support boards had to be added and a lot of boring out holes with spade bits and careful routing were required. After a bit of fine tuning I had a handle and latch in place and working properly.
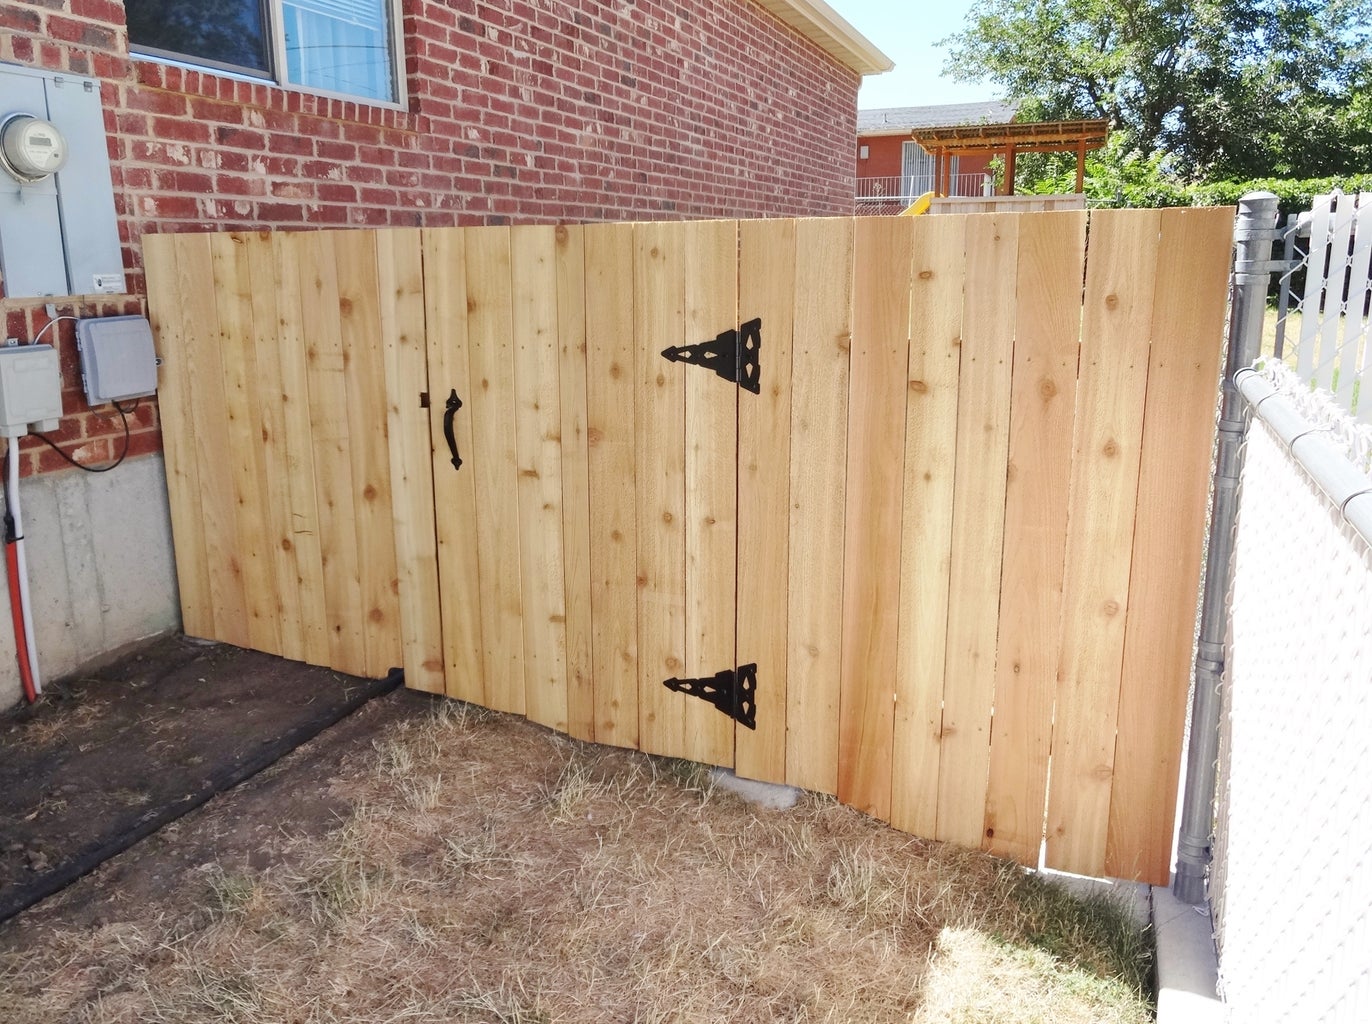
Step 13: Continue Adding Slats; Call It Good

The remaining slats were added to complete the side sections, and the fence was done.
I used cedar fence slats and do not plan to finish them in any way. I live in a fairly dry climate so wood fences like this turn gray in a few years, and then just last until they're deemed too ugly and someone tears them down.
At that point, they call the wood "barn wood" and sell it for 3x what it initially cost.
Thanks for looking!


