

Introduction: Aerial Photography Super Affordable Kite


Hi everyone!
Here is a very fun and super easy to build tutorial on a kite that will take a camera up in the sky and let you snap those aerial photos you’ve always dreamt of. The kite actually costs pennies to make but is very effective in what it does!
It’s good fun to learn about aerodynamics rather than some rocket science stuff that will bore you to death if you aren’t already an expert in engineering.
So all you kids, makers, creators, hackers, grandmas, grandpas, enthusiasts and of course rocket scientists – follow myjourney and make yourself a kite like this!
P.S. I don’t like much text so feel free to scroll and look through all the pictures – they are really explanatory and give you everything you need to make a kite yourself!
Step 1: Birds View Photography Using a Kite


Why would you bother making one???? Okay, for aerial photography we need to get a camera up in the sky obviously. But it isn’t obvious how … we could throw it or fire it with a cannon (that will be fun) or buy a $1000 drone to do the job. The last one is only a bit expensive but otherwise the best option haha. Okay lets be serious we don’t have such a budget … but we can hack the system and achieve the same result with a dirt cheap $10 solution! That is 1% of the cost of the drone
- Affordable
- Easy
- Fast to make
- Fun to play with!!!
Step 2:

Materials needed:
- 4 x 90cm (35 inch) linden or balsa wood rods – 10x10mm (0.4x0.4 inch) cross section
- 4 x 55cm (21.5 inch) linden or balsa wood rods – 10x10mm (0.4x0.4 inch) cross section
- 1 x car cover (or some lightweight fabric like the ones used in tents)
- Thread
Tools needed:
- Drill and a small bit
- Needle
- Saw
- Hot tip cutter (or just scissors)
- Glue
- Measuring tape and a pencil
Step 3: Chop Chop

Chop the wood in the correct lengths!
Step 4: Mark the Short Rod Half Way


Put a mark at the 27.5 cm or 10.1 inch if you are working in metric.
Step 5: Drill at the Half Mark

Use a 2 mm drill bit or 0.04 inches. The smaller the better - we want the wood to stay strong after all.
Step 6: Make a Cross and Stitch It Up


Take two of the small pieces, put them at 90 degrees to each other and stitch them through the holes you've just made.
Step 7: Tighten!


Stitch well and make sure everything is tight! As you see I have tightened the sides of the main stitching.
Step 8: Glue the Joint


Firstly, make sure the angle is as accurate to 90 degrees as you can. Now using some wood glue cover the thread. That will help it stay in place.
Step 9: Drill the Ends of the Cross Pieces


Measure 1 - 2 cm (0.4 - 0.8 inch) from the end of the cross pieces and drill with the same small bit you've used earlier.
Step 10:


Measure 14 and 15 cm (5.5 and 6.3 inch) from the end of the big wooden rods. I've put a mark for long and short - see next step...
Step 11: Assemble the Cross Pieces and the Long Ones


Put some glue and align the cross assembly to the long rods.
Step 12: Stitch Stitch Stitch


Now, get the needle through the hole and repeat many times. Wind some thread around and glue with the wood glue on top of everything.
Step 13: Assemble the Kite's Wooden Frame


Finish the frame assembly by putting all the long pieces and the two crosses together. Use plenty of thread and glue on every joint to make sure it will withstand the winds!
Step 14: Mark Down the Fabric Strips


Now, get the car cover (or destroy an old tent maybe?) and cut it in 28cm wide strips. That's 11 inches. I've used a hot tip wood engraver for the cutting to seal the edges and make sure they won't fall apart. If you cut with scissors you can use a lighter to slightly touch the fabric edge at the cut.
Step 15: Cut Strip to Lenght


Now, lengthwise you just need one turn of the fabric around the kite's frame. Mark the end and cut it off.
Step 16: Stitch the Fabric Around the Frame


Using the same thread now stitch the fabric strips around the wooden frame. Make sure it is somewhat tight and not loose at the ends.
Step 17: Add Key Strength Stitching


To add to the overall strength of the kite stitch the corners of the fabric. This will help improving the anti-twisting performance under wind pressure and will keep the fabric where you put it. Put glue on top of every stitch you make to improve the long term life of your kite.
Step 18: Wire Support and Camera Mount


The kite is held in a single point so adding an additional rod will make it stronger. That will also act as our camera mount location. I don't know whether this additional piece of wood is necessary as it's just my intuition but I've also glued it down and used a fancy knot that I sealed with the glue at the end.
Step 19: Sanity Check


Put the kite on the scale. Mine read only 231 grams! That's like two GoPros (without the underwater case).
At this point it looked promising that the flight will be successful.
Step 20: Camera Mount

Get the camera attached to the frame assembly that we just made stronger. I've used two zip ties.
Step 21: Start the Countdown 10... 9... 8...


The kite is done! Now let the glue dry completely and that is it!
Step 22: The Sky Is the Limit!
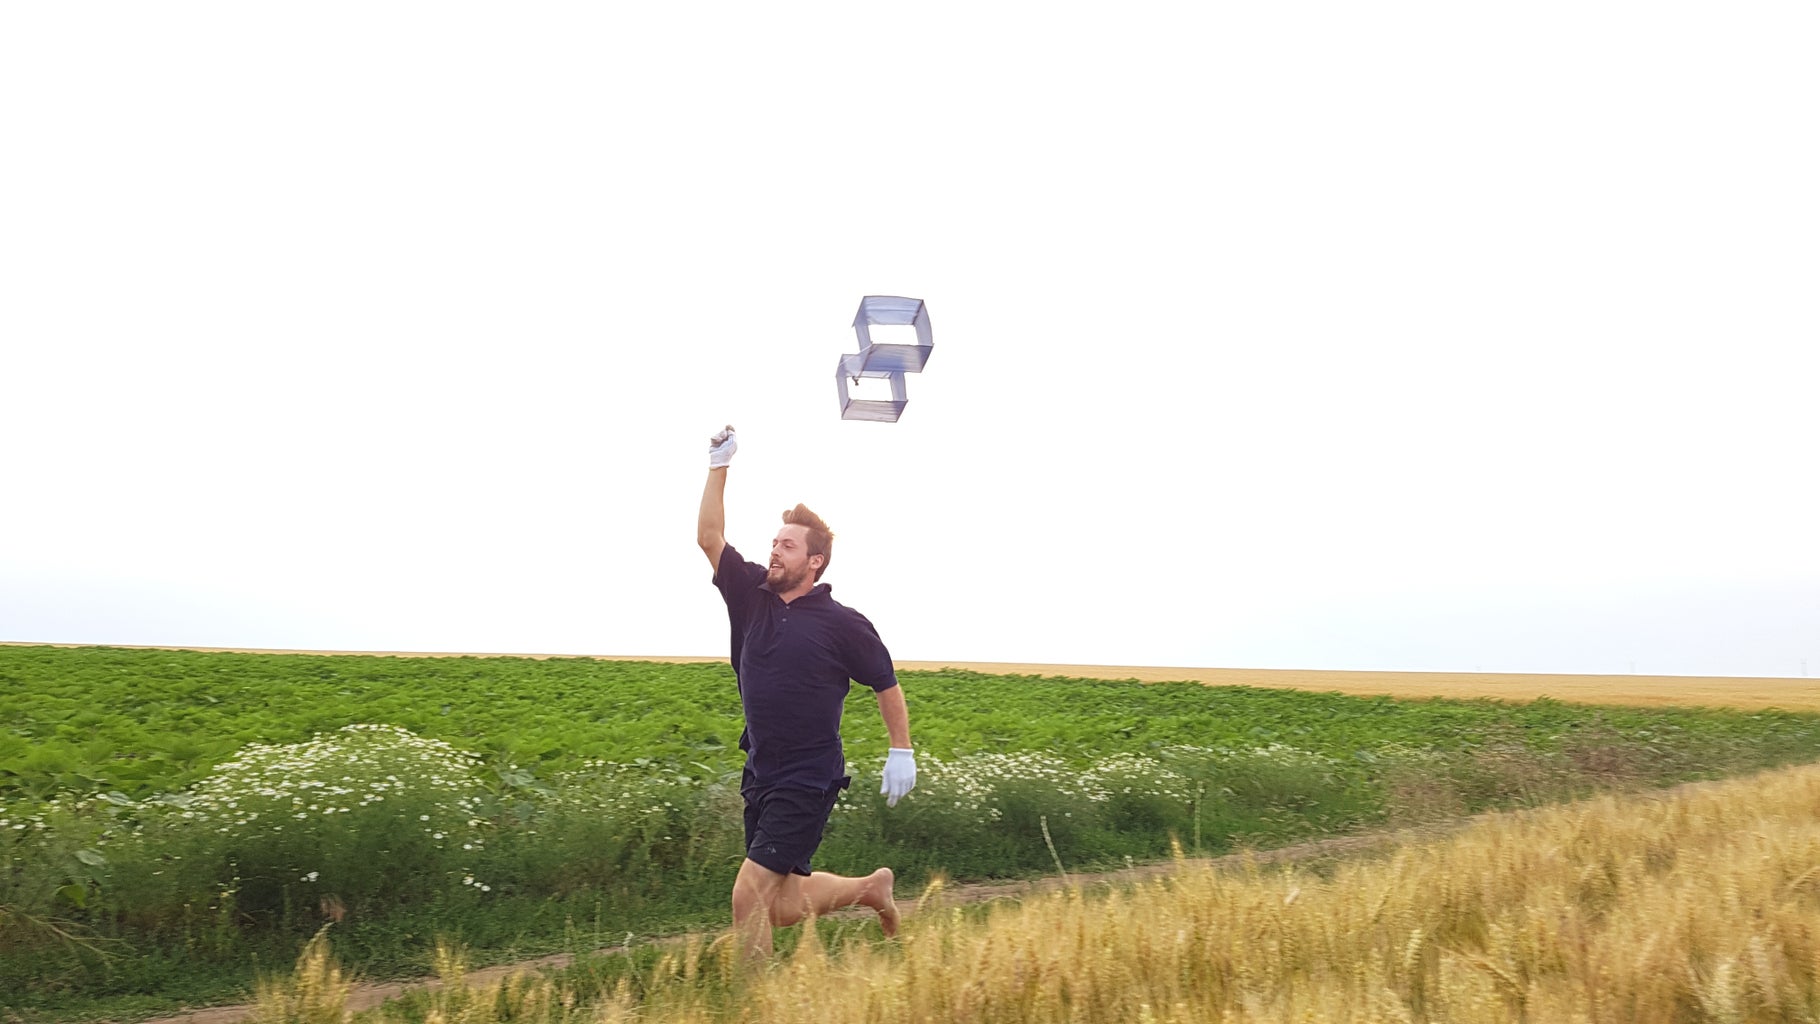


Now it's you and the kite! Run and it will get up in the sky in no time! The design flies really well in low winds 3-5 m/s as well as stronger up to 20 m/s. Tie the rope just after the fabric if there is no/low wind. Tie the rope to the nose if the wind is strong!
I launched it from a moving car which was pretty coll but plenty dangerous haha (no I wasn't driving if you're wondering)!
Thanks for watching! Rate an comment - I'd love to know what you think or want to suggest!
P.S. If you really liked my instructable please vote for it in the MAKE IT FLY contest ;)

Runner Up in the
DIY Summer Camp Challenge

First Prize in the
Make It Fly Contest 2016

Participated in the
Outside Contest 2016


