KanaChord Is A Macro Pad For Japanese Input

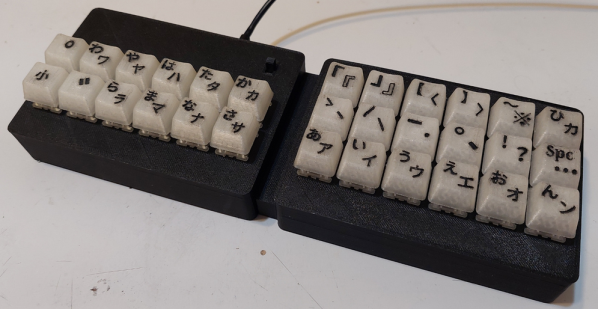
There are various situations that warrant additional keyboards on your desk, and inputting a second language is definitely a good one. That’s the idea behind KanaChord, which generates Unicode macros to render Japanese Kana characters using chords — pressing multiple keys at once as you would on a piano.

The Japanese writing system is made up of Kanji (Chinese characters), Hirigana, and Katakana. Without going into it too much, just know that Hirigana and Katakana are collectively known as the Kana, and there’s a table that lays out the pairing of vowels and consonants. To [Mac Cody], the layout of the Kana table inspired this chording keyboard.

Continue reading “KanaChord Is A Macro Pad For Japanese Input”

Hackaday Prize 2023: Sleek Macro Pad Makes 2FA A Little Easier

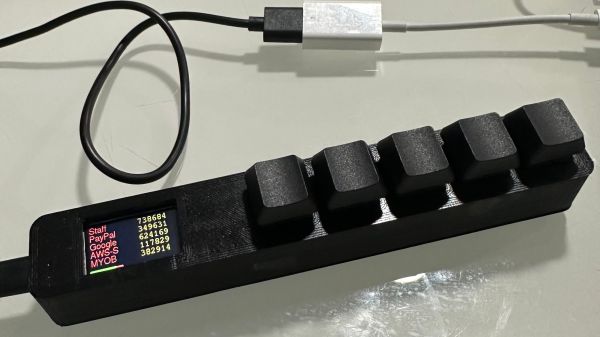
We all know the drill when it comes to online security — something you know, and something you have. But when the “something you have” is a two-factor token in a keyfob at the bottom of a backpack, or an app on your phone that’s buried several swipes and taps deep, inconvenience can stand in the way of adding that second level of security. Thankfully, this “2FA Sidecar” is the perfect way to lower the barrier to using two-factor authentication.

That’s especially true for a heavy 2FA user like [Matt Perkins], who typically needs to log in and out of multiple 2FA-protected networks during his workday. His Sidecar is similar in design to many of the macro pads we’ve seen, with a row of Cherry MX key switches, a tiny TFT display — part of an ESP32-S3 Reverse TFT Feather — and a USB HID interface. Pressing one of the five keys on the pad generates a new time-based one-time password (TOTP) and sends it over USB as typed keyboard characters; the TOTP is also displayed on the TFT if you prefer to type it in yourself.

As for security, [Matt] took pains to keep things as tight as possible. The ESP32 only connects to network services to keep the time synced up for proper TOTP generation, and to serve up a simple web configuration page so that you can type in the TOTP salts and service name to associate with each key. He also discusses the possibility of protecting the ESP32’s flash memory by burning the e-fuses, as well as the pros and cons of that maneuver. The video below shows the finished project in action.

This is definitely a “use at your own risk” proposition, but we tend to think that in the right physical environment, anything that makes 2FA more convenient is probably a security win. If you need to brush up on the risks and benefits of 2FA, you should probably start here.

Continue reading “Hackaday Prize 2023: Sleek Macro Pad Makes 2FA A Little Easier”

Custom Calculator Brings Us Back To The 70s

There are certain design aesthetics from every era that manage to survive the fads of their time and live throughout history. Ancient Greek architecture is still drawn upon for design inspiration in modern buildings, the mid-century modern style from the 60s still inspires various designs of consumer goods, and the rounded, clean looking cars from the 90s are still highly desirable qualities in automotive design. For electronics, though, we like this 70s-inspired calculator that [Aaron] recently built.

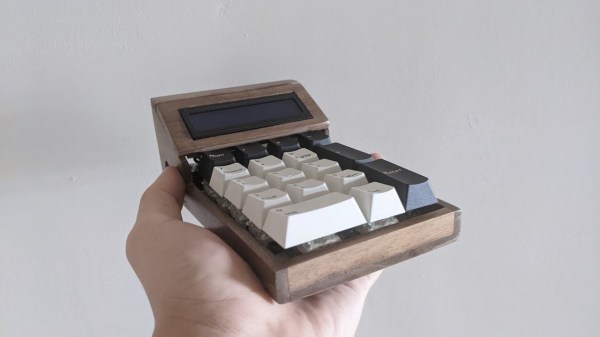
The calculator hearkens back to the days of calculators like the HP-29C with its large buttons and dot-matrix display. [Aaron] built the case out of various woods with a screen angled towards the user, and it uses a LCD display similar to those found in antique calculators. The brain of the calculator is an Arduino which fits easily into the case, and [Aaron] also built the keyboard from scratch with Cherry MX-style mechanical keys soldered together into a custom shape.

The software to run the calculator is fairly straightforward, but we are most impressed with the woodworking, styling, and keyboard design in this build. [Aaron] is also still ironing out some bugs with the power supply as it uses a DC-DC converter to power the device from a single lithium battery. For those who are more fond of early 2000s graphing calculators instead, be sure to take a look at this graphing calculator arcade cabinet.

Continue reading “Custom Calculator Brings Us Back To The 70s”

Faux-Retro “Tape” Player Runs On ESP32 And 80s Vibes

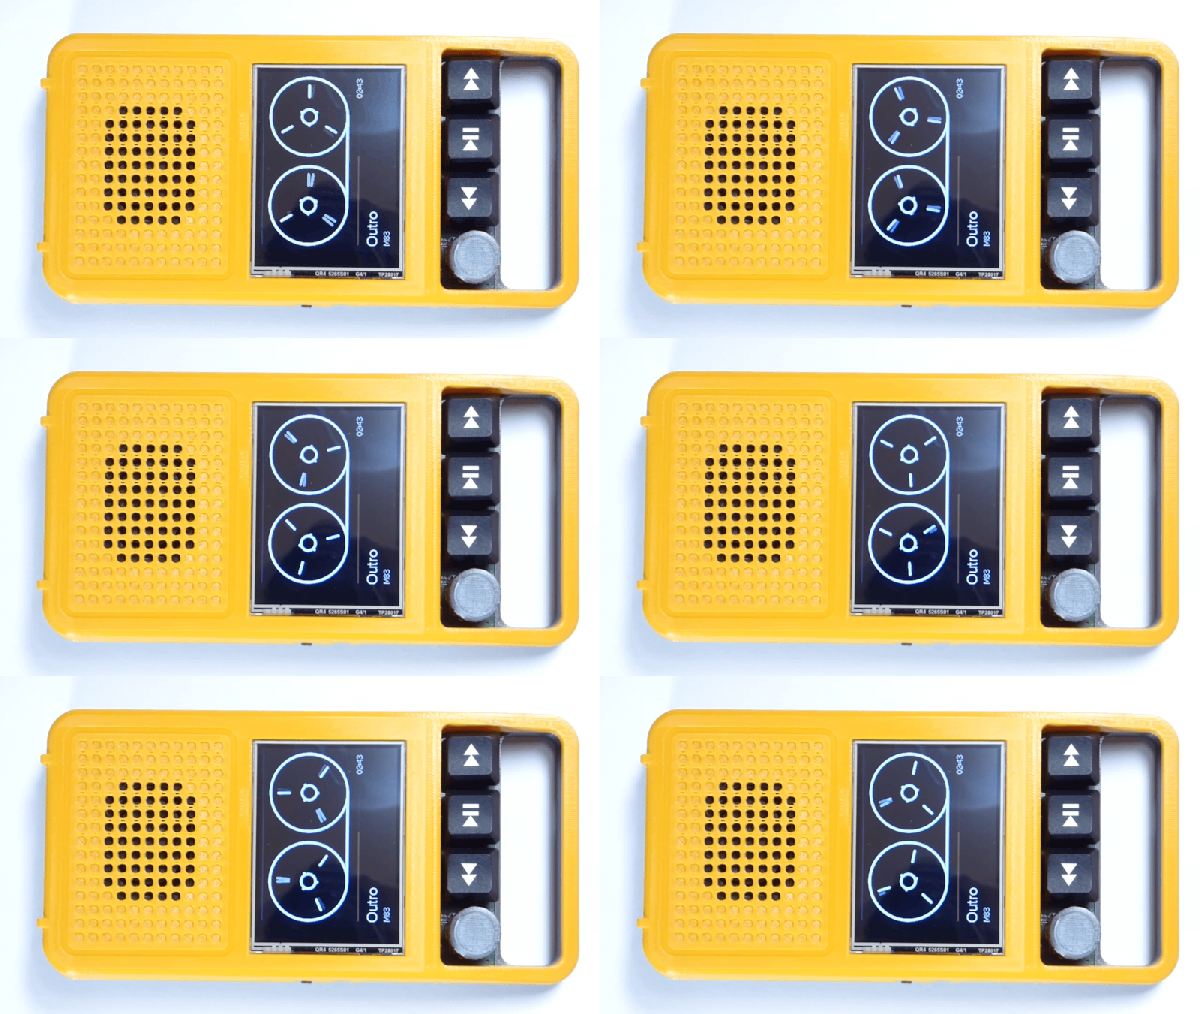
At first glance, this gorgeous retro-styled audio player built by [Max Kern] could absolutely pass for the genuine article. But then you take a closer look and realize that the “tape” it’s playing is actually an animation running on a 320 x 240 IPS display, and the Play and Rewind buttons on the front aren’t the chunky electromechanical affairs of yesteryear but actually cleverly repurposed MX keyboard switches.
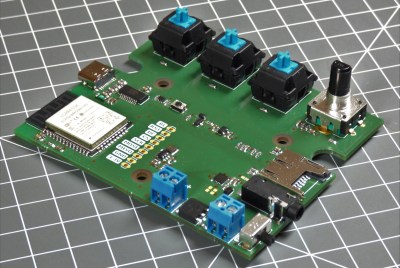
By now you’re probably realizing that this player is quite a bit smaller than you first imagined, which in turn, means that it even its case is a modern fabrication. While it might perfectly encapsulate the look and feel of a piece of 1980s consumer electronics, it was squirted out on a thoroughly modern desktop 3D printer.

Even so, [Max] made sure to include draft angles in the CAD design and and a distinctive separation line so the case looked like it was injection molded. Following similar logic, he decided against using a modern rechargeable battery pack to power the electronics, opting instead for a more era-appropriate set of AA batteries.

In terms of hardware, the custom PCB is home to an ESP32 WROOM, a MAX98357A I2S audio amplifier, a FT231XS USB-to-serial chip, with enough passives and regulators to keep them all well fed and happy. The ESP32 has more than enough computational horsepower to chew through MP3 files, which are conveniently loaded via an SD slot built into the side of the player. As the player was actually intended for audio books, onboard playback is limited to a mono speaker; though there is a 3.5 mm audio jack to plug in a pair of headphones for when the built-in speaker isn’t up to the task.
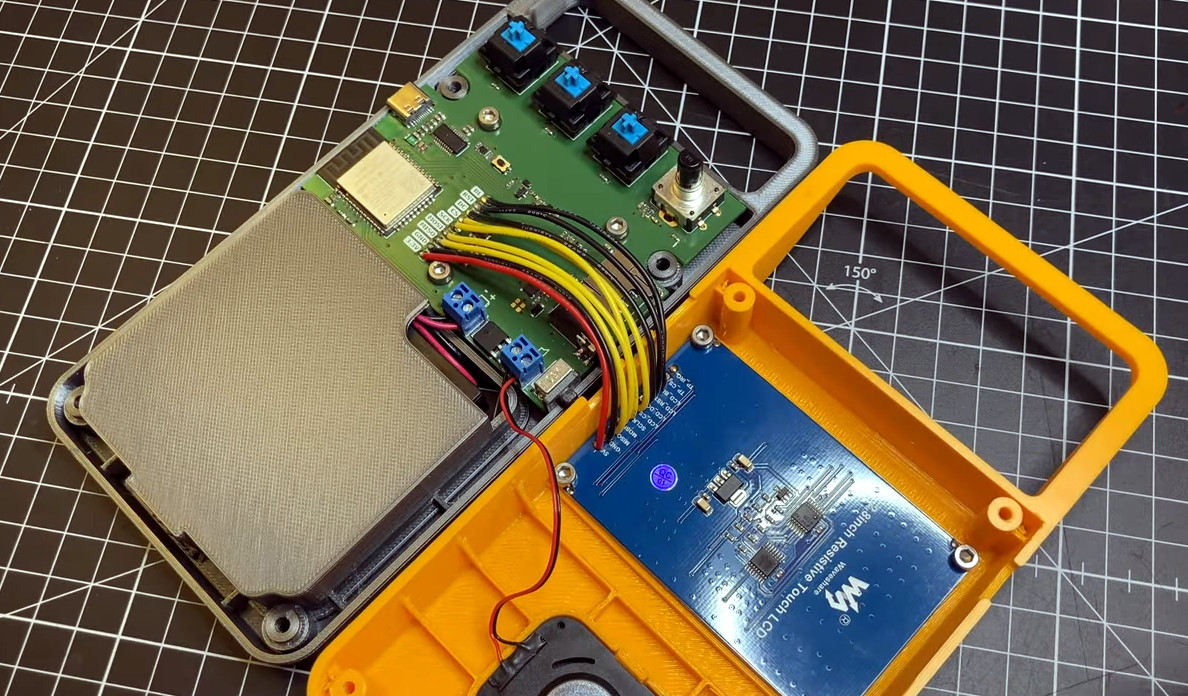
Check out the video after the break to see how the player is assembled, as well as a demonstration of its simple three-button user interface. It looks like a joy to use, though the lack of fast forward and rewind sound effects took us a bit by surprise given the otherwise impeccable attention to detail. We’ll assume there’s some technical limitation that makes this particularly difficult to implement, and that their absence is currently keeping [Max] up at night.

As impressive as the final product is, we can’t say it’s a surprise. Frankly, we wouldn’t expect anything less from [Max] at this point. His adaptive OLED macro pad wowed us back in 2020, and his ZeroBot is still one of the slickest designs for a DIY two-wheeled robots we’ve ever seen.

Continue reading “Faux-Retro “Tape” Player Runs On ESP32 And 80s Vibes”

Illustrated Kristina with an IBM Model M keyboard floating between her hands.

Keebin’ With Kristina: The One With The Grabbity Gloves

I keep saying I need to stay away from auction sites, but then I wouldn’t have as much fodder for Hackaday, would I? As I write this, I’m waiting on a Dell AT101W, which will be my first keeb with Alps switches. Well, hopefully it has Alps SKCM salmon or black switches — according to Deskthority, it might have rubber domes. If it doesn’t keyboard, I will probably salvage the switches and build something more ergonomic. Either way, I’m thinking we need a post about Alps switches, because some people think they’re even better than Cherry MX switches.

Continue reading “Keebin’ With Kristina: The One With The Grabbity Gloves”

3D-Printed, Hot-Swap Keyboard PCB Generator Is Super Cool

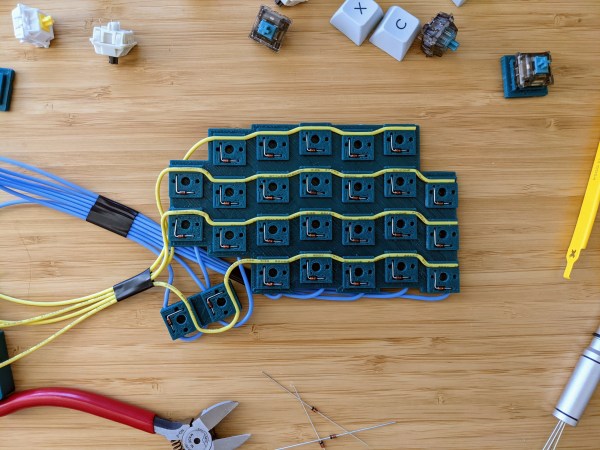
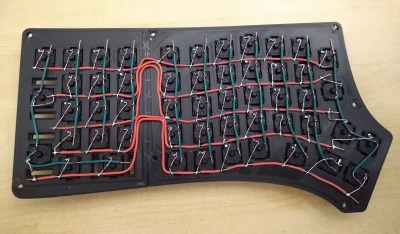
About a month ago, [50an6xy06r6n] shared their hot swap 3D-printed circuit board for keyboard design with the mechanical keyboard subreddit. It’s more of a prototyping tool than a permanent fixture, though nothing is stopping you from using it permanently. Well, now it’s even better, and open source to boot.

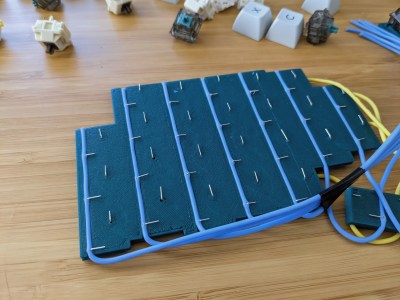
[50an6xy06r6n] came up with this to test split ergo layouts faster and not have to solder anything — the switch pins make contact with the row wires and folded diode legs. In fact, prepping all the diodes is probably the thing that takes the longest.

The design can be generated from layout data, or you can convert directly from a KLE JSON file. We love how delightfully clean this keyboard breadboard generator looks, and we wish we had thought of it!

[50an6xy06r6n]’s PCB generator currently supports Cherry MX/clones and Kailh Choc switch footprints. If you want ALPS, somebody’s gonna have to send [50an6xy06r6n] some ALPS to make that happen.

As long as all the contact points are good, you should be able to use this as the final PCB indefinitely. We’ve certainly seen our share of 3D-printed wire guides. Really, you could print the whole thing, including the switches.

Redox Redux: Split Keeb Gets A Num Pad

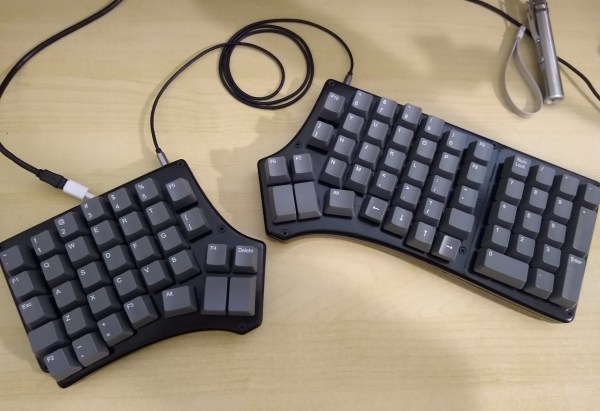
What’s the worst thing about split keyboards? If they have one general fault, it’s that almost none of them have a number pad. If you can fly on that thing, but struggle with using the top row numbers, you will miss the num pad terribly, trust us. So what’s the answer? Design your own keyboard, of course. [ToasterFuel] had enough bread lying around to cook up a little experiment for his first keyboard build, and we think the result is well done, which is kind of rare for first keebs.

This design is based on the Redox, itself a remix of the ErgoDox that aims to address the common complaints about the latter — it’s just too darn big, and the thumb clusters are almost unusable. We love how customized this layout is, with its sprinkling of F keys and Escape in the Caps Lock position. Under those keycaps you’ll find 100% Cherry MX greens, so [ToasterFuel] must have pretty strong fingers to pound those super clackers.

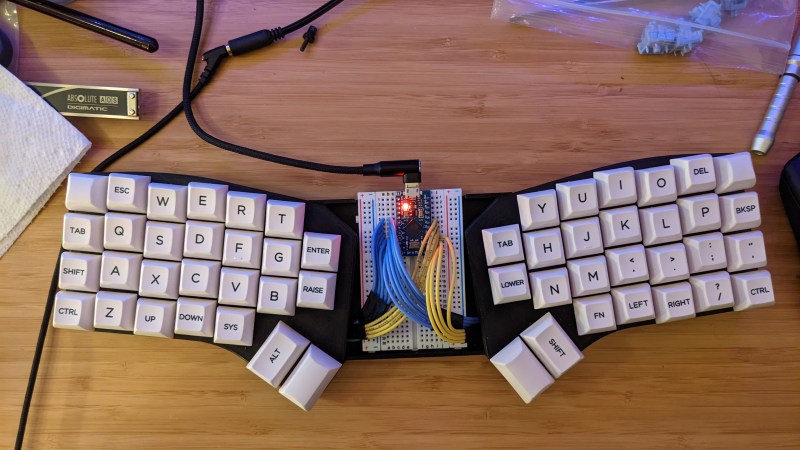
Everything else under the hood is pretty standard, with a pair of Arduino Pro Micros running the show. [ToasterFuel] had to wire up the whole thing by hand because of the num pad, and we’re impressed that he built this entire project in just three weeks. And that includes writing his own firmware!

Already found or built a split you love, but still miss the num pad? Why not build one to match your keyboard?