FLOSS Weekly Episode 778: OctoPrint — People Are Amazing At Breaking Things

This week Jonathan Bennett and Katherine Druckman sit down with Gina Häußge to talk OctoPrint! It’s one of our favorite ways to babysit our 3D printers, and the project has come a long way in the last 12 years! It’s a labor of love, primarily led by Gina, who has managed to turn it into a full time job. Listen in to hear that story and more, including how to run an Open Source project without losing your sanity, why plugins are great, and how to avoid adding a special services employee as a co-maintainer!

Continue reading “FLOSS Weekly Episode 778: OctoPrint — People Are Amazing At Breaking Things”

Get Today’s Forecast In Classic 90s Weather Channel Style

Remember when The Weather Channel actually had weather? It’s been a while, but we sure remember what a boon Local on the 8’s was when getting ready for the day. Not having to wait for the low-information national forecast on the morning shows or putting up with the antics of [Willard Scott] or [Al Roker] was just icing on the cake.

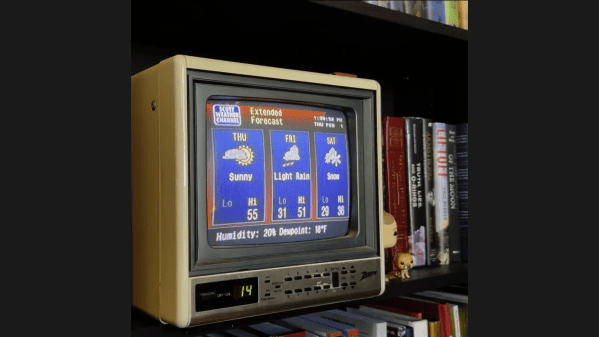
Recreating the retro look and feel of the Weather Channel experience is what this 1990s-style weather feed is all about, and we have to say that [Mitchell Scott] knocked it out of the park. Luckily, a lot of the heavy lifting was done already thanks to the WeatherStar 4000+ emulator project, which renders forecasts using online weather APIs in the distinctive retro graphics The Weather Channel used back in the day. He combined the graphics with the original smooth jazz soundtracks that TWC used back then; they’re online, because of course they are.

To really sell the look, [Mitchell] tracked down a period-correct Zenith TV with a 9″ CRT to display the feed from a Raspberry Pi 4’s composite video output. Why such a small screen? Easy. [Mitchell] wanted it on a shelf behind him to be visible during videoconferences. It’s a bit of a weird flex, but we respect it. Getting the composite video output working was a bit of a chore, as was tricking the TV into starting up on channel 14 so the feed is instantly visible.

The nostalgia is strong with this one, especially for weather geeks. For a more in-depth look at how The Weather Channel brought those local forecasts to cable, make sure you check out how the WeatherStar box was reverse-engineered.

Thanks to [USA-RedDragon] for the tip.

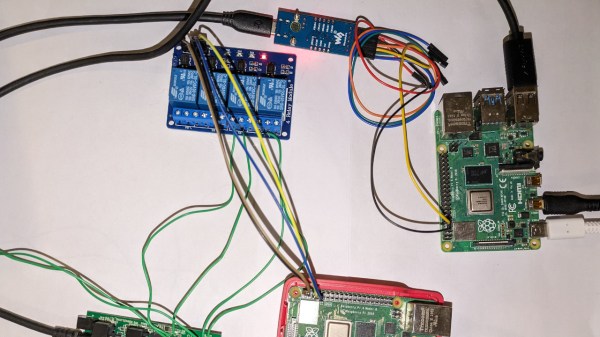
anfractuosity's test setup showing the Pi under test and a few pieces of equipment used to perform the attack

Cold Boot Attack You Can Do With A Pi

A cold boot attack is a way to extract RAM contents from a running system by power cycling it and reading out RAM immediately after loading your own OS. How easy is it for you to perform such an attack? As [anfractuosity] shows, you can perform a cold boot attack with a Raspberry Pi, with a reasonably simple hardware setup and a hefty chunk of bare-metal code.

[anfractuosity]’s setup is simple enough. The Pi 4 under attack is set up to boot from USB drive, and a relay board has it switch between two possible USB drives to boot from: one with a program that fills RAM with , and another with a program that extracts RAM out through UART. The process is controlled by another Pi controlling the relays through GPIOs, that also monitors the target Pi’s UART and uses it as a channel to extract memory.

The outcomes are pretty impressive. After 0.75s of power-down, most of the image could be extracted. That’s without any cooling, so abusing a can of electronics duster is likely to improve these results dramatically. Want to play with cold boot attacks? [anfractuosity]’s code is great for getting your feet wet. Furthermore, the code examples provided serve as a wonderful playground for general memory attack research.

Raspberry Pi not fun enough for you anymore? Well then, you can always start playing with Android phones!

Video Killed The Radio Alarm Clock

For decades now, MTV has been on a bizarre trajectory given its original name was an acronym for Music Television. In the original days in the 80s and 90s it kept mostly true to its name, but starting around two decades ago they expanded into reality and other non-musical television programming and have now left it largely behind. Plenty of those who grew up in its heyday have an understandable amount of nostalgia for the channel as a cultural touchstone, and [Derf] used MTV archival footage to build a video alarm clock which helps him keep in tune with the past.

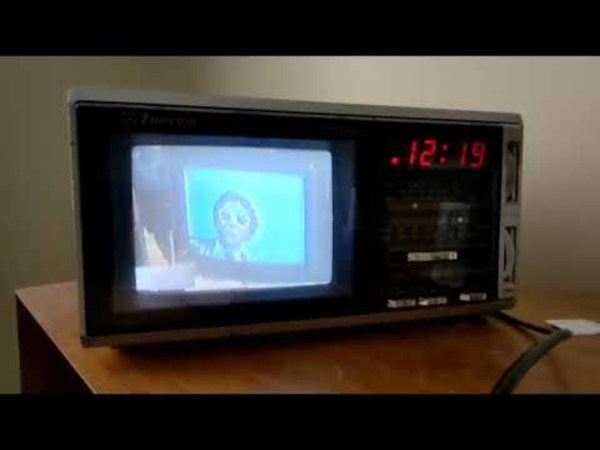
To keep the appropriate 80s aesthetic, the build uses a portable TV from the late 80s with its original CRT. The video files are hosted on more modern technology though, in this case a Raspberry Pi. The Pi is set up to run a python script which launches the VLC media player with a playlist loaded with video files, in this case a long list of MTV shows. Some configuration needs to be done to get it to output to the old CRT properly which depends on the hardware used, but once that’s in place it’s ready to be used as an alarm. [Derf] is using a smart outlet to power the TV at the appropriate time, and a cron job which starts the video player simultaneously at a somewhat random point in the playlist.

As far as retro TVs go, having one as an alarm clock is certainly a novel idea. We have seen a few others in the past, though, one to play the golden age of The Simpsons, and another that recreates the nostalgia of 90s cable television complete with a preview channel and era-appropriate commercials.

Continue reading “Video Killed The Radio Alarm Clock”

Automatic Position Reporting Over HF Radio

While most of us carry cell phones that have GPS and other location services, they require a significant amount of infrastructure to be useful. Drive from Washington to Alaska like [Lonney] did a while back, where that infrastructure is essentially nonexistent, and you’ll need to come up with some other solutions to let friends and family know where you are.

A tool called the Automatic Packet Reporting System (APRS) is fairly robust in the very high frequency (VHF) part of the amateur radio spectrum, but this solution still relies on a not-insignificant amount of infrastructure for the limited distances involved with VHF. [Lonney] adapted a few other tools to get APRS up and running in the HF range, letting his friends keep tabs on him even from the most remote locations.

Continue reading “Automatic Position Reporting Over HF Radio”

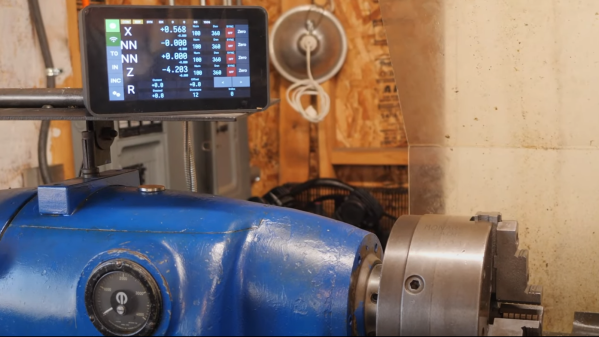
A raspberry pi-based digital readout above an old lathe

Roll Your Own DRO With An Added Twist

When using a manual machine tool such as a lathe or milling machine, there can be a lot of pressure to read the position and feed the axes at the correct rate. That’s why modern machines typically have some form of digital read-out (DRO). [Stefano Bertelli] has created a simple Raspberry Pi based DRO with an additional twist, that of a linked motor drive output.

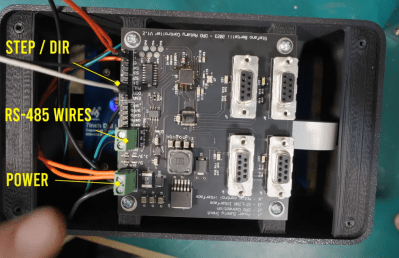
A view of the custom RS485 interfaced DRO readout and motor controller
Realtime encoder position reading and motor control are best done with a dedicated microcontroller, ideally with a proper RTOS.

The axes that need to be monitored should be mechanically attached to a position sensor like a linear encoder or a rotary type. Using a linear sensor with a linear axis instead of a rotary encoder on the downstream dial is better. For the readout unit, [Stefano] used a WaveShare 7-inch touchscreen module with a Raspberry Pi 3 for the UI of the readout unit. The Pi has a custom-designed HAT, that performs power conditioning and provides a robust RS485 interface. Connected via that RS485 link is another custom PCB based on an STM32F411 with a few supporting power supplies and interfacing components. The job of this board is to interface to the position encoders, reading positioning pulses using interrupts. There is an additional stepper motor drive courtesy of a ULN2003 Darlington driver to allow the control of a single motorised axis. An additional motor driver module is required, which should be no surprise since driving a milling machine axis will require a fairly beefy motor. This GitHub repo contains the FreeRTOS-based firmware for this board. This motor drive has the ability to be connected to a measuring axis in a programmable way, enabling one axis to be adjusted to follow or jump in controlled steps with another. This feature can significantly simplify certain types of machining operations, as [Stefano] elaborates in the video.

Lastly, the Raspberry Pi runs a simple Python application with Kivy for the GUI. As [Stefano] explains in the video below, this makes debugging and modification quite simple.

Adding DROs to an older machine is an obvious but valuable hack. Here’s another way to do it. If that’s too much work, then you could just hack a digital readout calliper in there.

Continue reading “Roll Your Own DRO With An Added Twist”

Playing Audio On The Pi Pico With No DAC To Speak Of

Normally, if you want to play music or other audio on a microcontroller, you need to get yourself a DAC. Or at least, that’s the easiest way to go about it and the one most likely to get you good, intelligible audio. You don’t have to go that way, though, as [antirez] demonstrates.

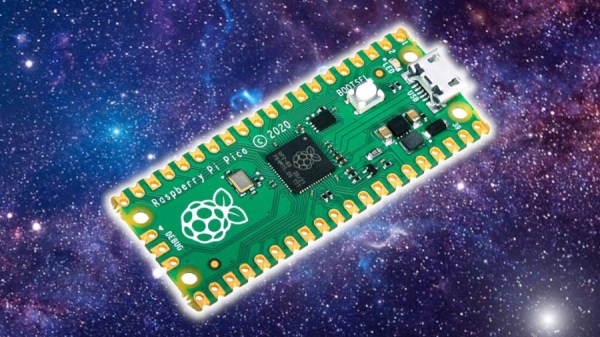
[antirez] decided to do this with a Pi Pico, but it’s applicable to other microcontrollers too. It’s all done with a single pin and a PWM output. The PWM output is set to a very high frequency beyond human hearing. In this case, it was 100 KHz. Then, the duty cycle of the PWM is changed to essentially output various average voltage levels at the pin. Vary the output voltage as per your desired sound file by using each sample to vary the duty cycle of the PWM. Voila! You can output whatever sound you want on that pin! [antirez] steps through the basics of doing this, including processing simple WAV files into a raw format that can be dumped into MicroPython code.

There’s no sound sample on the project page, and we’d have to assume it sounds pretty crunchy when hooked up to a speaker. And yet, it could prove a useful technique if you’re designing your own audio greeting cards or something, so keep that in mind!