

Introduction: How to Imbed an Image With a Hyperlink on Dreamweaver Using HTML

Dreamweaver is an Adobe software commonly used for web design and document editing. These instructions will explain the process of inserting an Image with a Hyperlink into a Dreamweaver document using HTML codes. By clicking an Image with a Hyperlink attached, you will be automatically taken to the assigned Webpage.
Step 1: Find Your Image

Google Images and Imgur are great resources to searching and finding images.
Once you have found the desired image, right click it and select "Copy Image URL."
Step 2: Create a New Dreamweaver Document

Open a new Dreamweaver document and select the "HTML" option.
Step 3: Coding Your Image
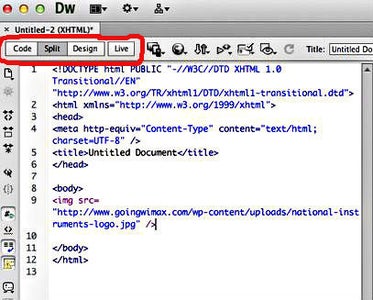
In Dreamweaver, select the "Split" mode (circled in red).
Click after the first <body> tag and press "Enter" (line 8 in picture) to create a new line (line 9 in picture).
Type the tag <img src=""/> in the new blank line.
Right click in between the quotation marks and select "Paste". The Image's URL should appear.
Step 4: Find Your End Website

Go to the Website to which you wish to link your Image.
Right click on the address bar (marked with a red dot in the picture) and select "Copy."
Step 5: Inserting Hyperlink

On Dreamweaver, click in front of the <img src= tag and press Enter. Type the tag <a href=""> in the new line.
Right click between the quotation marks and select "Paste." The Website's URL should appear.
Click after the <img src= tag (marked with a red dot in the picture) and press "Enter" to create a new line.
Write the tag </a> in the new line.
Step 6: Viewing Finished Work

Click the "Design" and "Live" buttons, located next to the "Split" button.
Click the "Globe" symbol and select the Web Browser that you have been using (Google Chrome is pictured, but any browser will work).
Dreamweaver should automatically pull up your image on a new Webpage. Click on the image to ensure that the Hyperlink is functioning.


