Now that you've chosen a Squarespace plan and template, it's time to start customizing the site to your needs. But before you jump into any customizations on your new site's design, it's important to build a foundation through adding pages and setting up your navigation. Today I'm walking you through those steps and giving you a glimpse at just how simple it is to build a foundation for your website using Squarespace.
This post is part 3 in my new Friday blog post series on Squarespace. In case you missed them, here are links to the first and second posts: 8 Reasons You Should Jump on the Squarespace bandwagon, So you jumped on the Squarespace bandwagon... now what?

Customizing Your Navigation
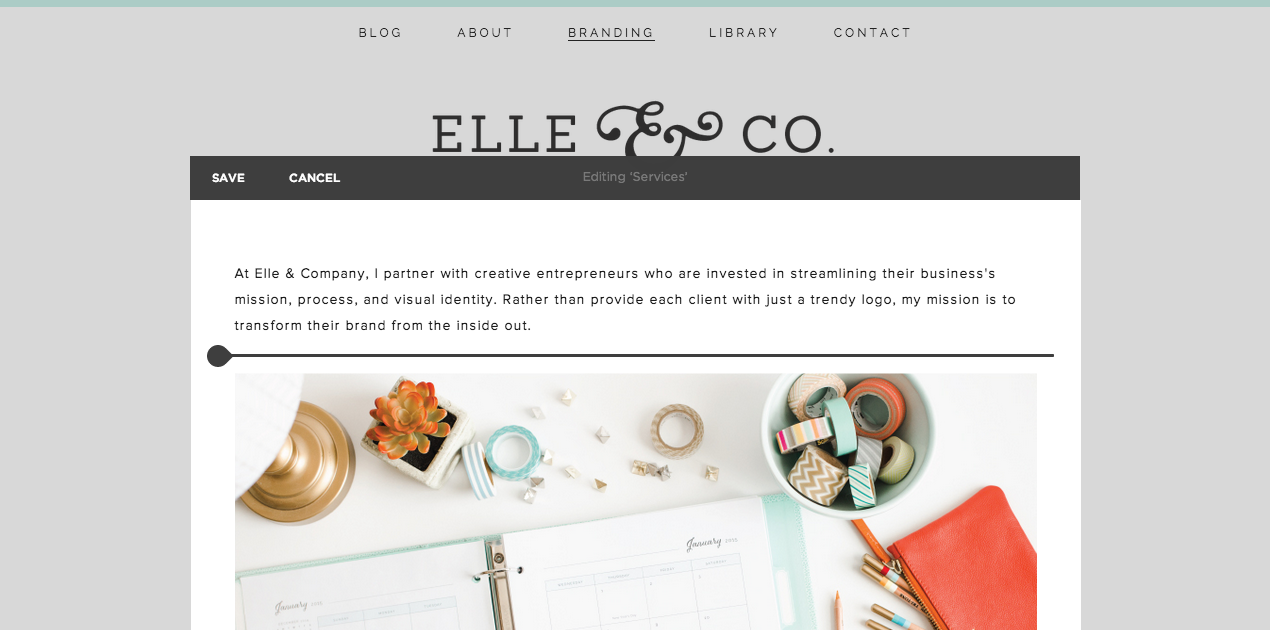
When you log into your Squarespace site, you'll land on a page that looks similar to the image below. The right-hand image gives you a glimpse at your site as you're making changes to it, and the left-hand panel is where all of the set up/drag-and-drop magic happens. Last week we discussed the Settings section, but this week we're jumping over to Pages.

Once you're in the Pages panel, you'll see 3 sections: Main Navigation, Footer Navigation, and Not Linked. The Main Navigation includes all of the visible pages that are featured in the navigation bar at the top of your site. You'll notice that the order that my pages are listed in the left-hand column mimics the order that they're listed across the top of my site. If you would like to switch the order of your pages, you can simply drag and drop the pages into the order that you would prefer.

The Footer Navigation links to any pages that you wish to include in your footer, and the order of the links in the left-hand panel also mimics the order that they will appear in the footer of your website.

The third section, Not Linked, allows you to create pages on your website that cannot be accessed unless they're linked elsewhere. For example, I didn't want to include my Archives page in my Main Navigation or my Footer Navigation, but I wanted to be able to link to it in my blog sidebar. I set it up as an unlinked page and it's hidden from sight until a visitor clicks on its direct link.
Tip: I always suggest that my clients use no more than 6 items in their main navigation; it's simpler, less overwhelming for your visitors, and it helps organize the information on your site. If you need to include more pages in your navigation, consider using folders to house some of them. Simply drag and drop your pages underneath a folder in your left-hand panel and it will create a drop-down menu for you in your main navigation.

Adding New Pages
To add a new page to any of the 3 navigation sections, click the "+" symbol beside a section title. A screen will pop up asking you which type of page you would like to create.

You have several options, depending on which template you choose:
A regular ol' page - This option gives you a clean slate. Elle & Company's About page, Services page, Portfolio, About the Library page, and Contact page are all just regular ol' pages.
Cover page - This is a newer Squarespace option. A cover page allows you to present information on a single bold page and make a powerful introduction to your site.
Album page - I can't say that I've ever used this option, but it would definitely come in handy if you are a musician. Album pages allow you to upload music and allow visitors to listen to your tracks.
Events page - The events page can be used as a calendar or a list of events like speaking engagements, meetings, and public events.
Link - The Link option isn't technically a page either. Instead it connects to another website or page within your own site.
Product page - This page option is customized for store owners; it allows you to create a page to house all of your products.
Folder - Folders aren't technically a page, but they're the secret to creating a drop down menu that houses several pages. The Branding and Library options you see in my main navigation are both folders that house individual pages.
Blog - The blog page holds a collection of blog posts.
Gallery - Gallery pages allow you to showcase a collection of images and videos. This is especially helpful for photographers, designers, and artists.
Index page (not pictured because my template doesn't include it) - An index page displays your content by using thumbnail images to link to pages or organize gallery content. It's useful if you have multiple galleries or projects.

Once you create a new page, you can go into the page settings by hovering over the page in your navigation and clicking on the gear icon that appears on the right-hand side. Here you can name the page, disable it from being accessible while it's being worked on, give the page a unique URL, set it as your homepage, and even set a password if you would like it to be password-protected.
Customizing Your Pages
Once you've set up your page, you can customize it by hovering your mouse over the page on the right-hand screen and clicking "Edit."

Squarespace pages are built and customized using blocks. These blocks allow you to add content like text, images, galleries, divider lines, videos, social media links, and more. You can drag and drop these blocks to customize the pages on your website.
To add a new block, hover your mouse over the left side of your screen and an insert point will appear. Click on it to bring up the block menu.

From there you can choose the block you would like to insert and continue to build out the pages on your website. I'll go into more detail on widgets in next week's post, but I have one fun announcement to make...
Registration for next week's webinar is now open!
Because of your great response to this series these past 2 weeks, I'm hosting a free live webinar on Friday, February 6th at noon EST on how to customize the design of your Squarespace site. You can find out more details and sign up for this webinar by visiting the new Registration Page. I hope to see you then!
On a sidenote, the first Elle & Company Twitter chat was a great success last night! Thank you to all of you who participated and shared your input on blogging, design, and business. I was blown away by the community that was formed over the #ellechat and the number of people who participated! If you weren't able to join in last night, I would love for you to be a part of the next #ellechat on Tuesday, February 3rd from 12:00-1:00pm EST.