Setup a Custom Domain for Github Pages
Beside giving Github Pages for free, Github also allows us to use our own domain name for the Page we created. So instead of using the following name format: {username}.github.io/{project-name}, you can call the blog something like www.myawesomeblog.com instead.
This is a great opportunity for free open source project with the lack of financial support to host their website or blog. There is no need to worry on exceeding bandwidth limits or burning your fingers when the project suddenly becomes immensely popular. There are a number of projects that use this feature including Bootstrap, Jekyll, Yeoman, and Foundation – and a lot more.
In the previous article about Jekyll, we have shown you how to deploy our Jekyll-powered blog to Github Pages using the Github name format. In this article, we will use a custom domain for that blog.
Note: At this point, we assume that you have followed our previous tutorial, in which you already have Github app installed, and have created a Github Pages for your blog.
Recommended Reading: How To Create A Github Page For Your Project
Creating a CNAME File
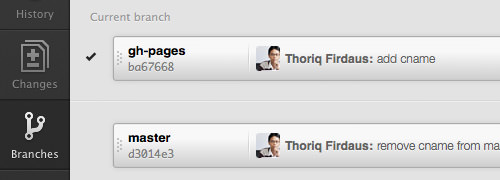
Let’s open Github app (for Mac, for Windows). From the Branches pane, switch the working branch to gh-pages.
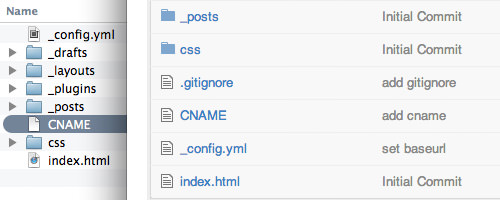
Create a new file named CNAME in the root folder of our local git repository. Write your domain name for the website/blog in it, for instance, blog.domain.com – note that we can only add one domain in the CNAME file.
Then, commit and push the file to Github.
Pointing DNS
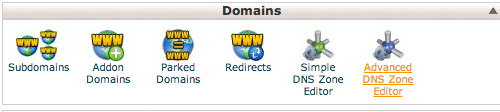
Next, we need to point our DNS for that domain within the CNAME file to Github Pages. I will be using cPanel in this example. Let’s Login to cPanel, and navigate to Advanced DNS Zone Editor.
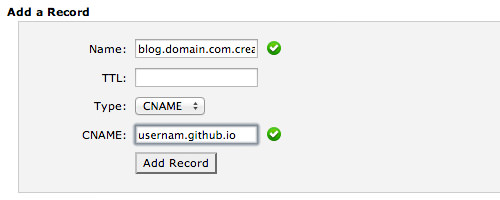
Add a new CNAME record pointing to our Github Page, like so.
Now, we only need to wait for the DNS to propagate; it may take 24 hours or only few minutes. When it does, you should be able to access your website and blog through your own domain name.