So, you’ve chosen your domain name. You have a killer idea for a project. You’re fired up, and ready to unleash your latest and greatest creation upon the internet.
After scouring the internet looking for the best web hosting, you’ve landed yourself a sweet deal on a VPS. There’s one problem though. You don’t know the first thing about operating Linux through its powerful command line.
Well, worry no more. I’m about to drop the know-how of how to install two incredible web applications. One is blogging-platform extraordinaire Wordpress, which powers a huge swathe of the internet, including this very site. I’m also going to show you how to install the latest pretender to the blogging throne; the Javascript and Node powered Ghost. Once you’ve ran through the process of installing these apps, you should be confident enough with the Linux command line to tackle any web application that crosses your path.
To do that, I’ve span up a DigitalOcean instance running Ubuntu 13.10 x64. Digital Ocean are a VPS provider I’ve got a soft spot for; offering quality service and fast virtualized servers with a starting price of $5. I recommend them highly, although there are other VPS providers out there who are quite good.
Installing Ghost
Ghost is blogging, reimagined. Each iota of the experience has been designed to make the process of publishing your oeuvres that bit more painless. My colleague Mihir Patkar gave a run-down of Ghost a few months back.
Whilst we’re going to be installing Ghost on a Digital Ocean VPS – which comes with a Ghost installer – we’re going to ignore the installer and do this the hard way.
First things first, we need to SSH into our box. This should be relatively straightforward if you run Linux or OS X, as they both come with an SSH client built in. Windows users are encouraged to check out PuTTY, which is a pretty incredible, open source SSH client, although there are a number of incredible alternatives, including ones which plug into your web browser.
If we’re logging into our box for the first time, we’re going to have to do a bit of housekeeping first. We’re going to make sure that the package manager is updated and if there are any updates to our system, we should install them. In Ubuntu, this is done by inputting the following commands:
         sudo apt-get update
sudo apt-get upgrade
Note that if you've logged in as Root, you won't need to write 'sudo'. Sudo is used for accounts to temporarily escalate their privileges in order to perform a command which affects the underlying operating system.
Now, grab a copy of build-essential and zip.
sudo apt-get install build-essential zip
This is the third time we've had to use a command which does something with apt-get. So, what is it? Apt-get is the package manager used in Debian, Ubuntu and Linux Mint. It allows us to keep track of all the packages on your system and install new ones, as well as delete and update them. Cool, right?
Oh, and while you’re at it, grab a copy of Node.js. This is the platform upon which Ghost runs, and can be grabbed with a simple apt-get. Users of older versions of Ubuntu might have to grab the copy of Node from Chris Lea’s PPA, which is more current than the official Ubuntu repos.
sudo apt-get install nodejs
You also need the Node Package Manager (NPM). Create a symbolic link between /usr/bin/nodejs and /usr/bin/node, grab the NPM installer and run it.
         ln -s /usr/bin/nodejs /usr/bin/node
curl https://npmjs.org/install.sh | sudo sh
This is the first time we've came across curl. It's actually a pretty cool utility for Linux which allows us to transfer data between programs. In this example, we're using it to grab a copy of the NPM install script. This is then executed with '| sudo sh'.
Before we go any further, let’s verify that we’ve got Node and NPM installed. If your screen looks a bit like mine, feel free to proceed onwards.
         npm -v
node -v
If you see an error, something went wrong. Try revisiting the earlier steps, or dropping me a comment below.
Awesome. Now, let’s grab Ghost and open it up!
         curl -L https://ghost.org/zip/ghost-latest.zip -o ghost.zip
unzip -uo ghost.zip -d ghost
If you're not already in it, switch into the Ghost directory and install it using NPM.
         cd ghost/
npm install --production
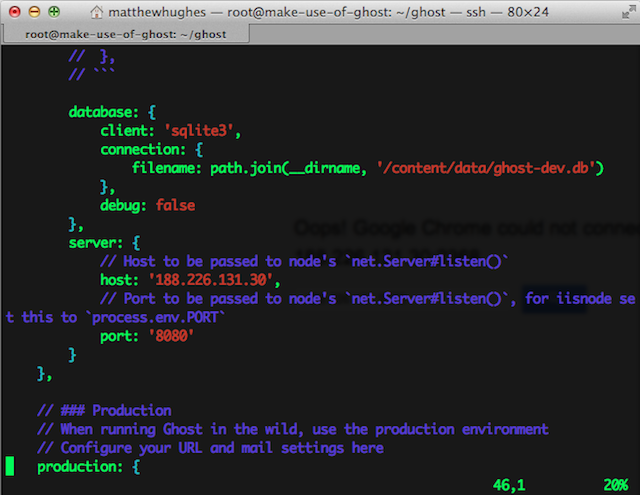
Here’s a cool thing about NPM. It actually installs all the Javascript dependencies for Ghost for you. Awesome, right? Once it’s finished doing all the hard work, open up config.js and edit the port number to 8080 with your text editor of choice. Nano is a great choice for beginners, although I'm rather fond of Vim. You'll also need to change the hostname to the IP address of the server you are connecting to.
Now, it's time to start Ghost up! In the directory which you installed Ghost, run:
npm start
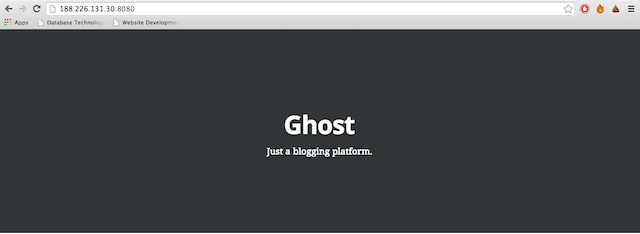
To check if this works, navigate to the server you installed Ghost on with your web browser, ensuring that it has the port number which you specified in config.js.
Huzzah! It works!
Wordpress
Now, time to install Wordpress. We’re going to start from scratch here with a fresh Digital Ocean droplet. As before, SSH into your server, update the package manager and install all updates. Once you've done that, we’re going to start off by creating our LAMP stack. This stands for ‘Linux, Apache, MySQL and PHP’, and refers to the platform, web server, database and programming language used to run our installation of Wordpress.
Getting your LAMP stack set up is easier than it sounds. Admittedly, there’s a small laundry-list of dependencies you have to install. Fortunately, Ubuntu comes with a nice one-liner which handles everything for you.
sudo apt-get install lamp-server^
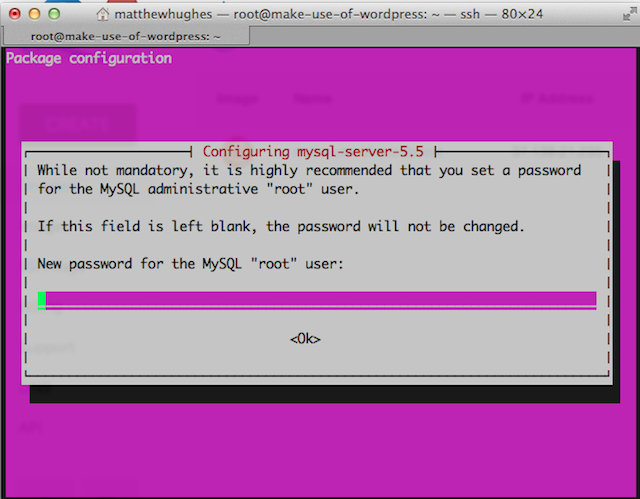
Your MySQL server is where you store all of your data. As a result, you are strongly advised to create a strong root password for your server when prompted.
And that’s it. Seriously. That’s totally it. You’ve now set up your LAMP server. Now to install Wordpress!
We first need to create the table in which Wordpress will store our blog posts, as well as the database user which Wordpress will use to interact with the database. Log in to MySQL.
Now, run the following lines of code. Take care to enter each line individually.
         CREATE DATABASE wordpress;
CREATE USER ‘wordpressuser’@‘localhost’ identified by ‘password’;
GRANT ALL PRIVILEGES ON wordpress. * TO 'wordpressuser'@'localhost';
FLUSH PRIVILEGES;
exit
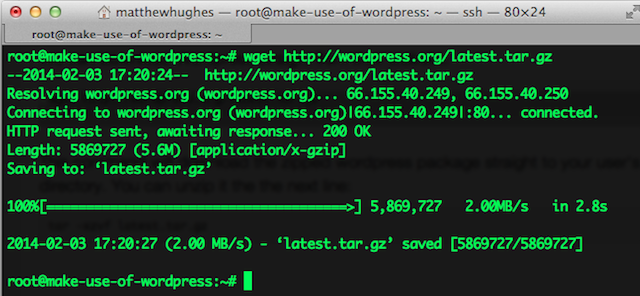
Now, download and unzip Wordpress.
         wget http://wordpress.org/latest.tar.gz
tar -zxvf latest.tar.gz -C /wordpress
Notice how we used wget here instead of curl? Either work, in this instance and are pretty much interchangeable. Within this context, they are both doing the same thing, more or less.
Move Wordpress to /var/www and grant read, write and execute permissions to this directory. Take care to include the -R flag. This makes it recursive.
         mv wordpress/ /var/www
chmod -R 777 /var/www
Now, in your browser, navigate to <ip address>/wordpress. If you’ve followed these instructions, you should see this page. You’ll then be required to create a configuration file using the web interface. Follow the instructions provided, and soon enough you’ll have your very own Wordpress installation. Sweet, eh?
What about Bitnami?
Before we finish up, I want to talk briefly about Bitnami. If you’re rocking an AWS server, this is definitely something you should investigate. This Spanish startup makes it easy to remotely deploy popular web applications to your AWS slice, including Drupal and Wordpress.
If that sounds like too much hassle, you can even get Bitnami to sort you out with a server. Just expect to pay a slight premium for this.
I’m not going to look too much into this, as it’s a bit platform specific. However, if you’re desperate to give them a try, they offer free 1 hour installations of your web-application of choice. As for the rest of this article, what I’m going to discuss should work on any server running GNU/Linux.
Conclusion
The Linux command line can be intimidating at first. There’s no doubt about that. If you’ve accidentally found yourself saddled with SSH-only web hosting, you’re going to have to get your feet wet with the command line in order to get anything done.
Fortunately, if you can install one web app, you can install them all. All you need is a bit of confidence with the Linux command line, and the ability to google whatever problems crop up.
Have you ever signed up for SSH only web hosting by accident? I’d love to hear all about it. Drop me a comment below.
Photo Credit: Innovation Trends in Data Center Technology Think Tank (Dell)


