


Homemade Toys ~ Button Spinner made from Recycled Material
Ready for a simple blast from the past? Today I made easy Buttons Spinners with the kids, and they were a huge hit! I seriously can’t believe that this is the first time that we have made a set together. I have fond memories of building these little handmade toys while spending the day at Grandpa and Grandma’s house. Grandma had a large button collection and that I loved sifting and sorting. Read on to find out how easy these little handmade toys are to make.
I love creating with the kids, especially when I don’t have to make a trip to the store for a special ingredient. If you are like me, then these little button spinners are perfect. You probably have everything at home already. Love that!
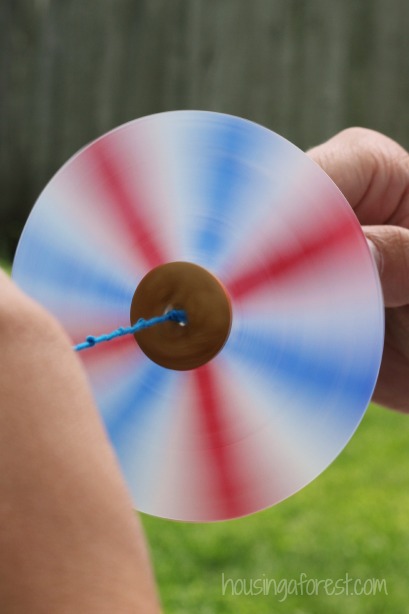
Kids have been playing with homemade button spinners for years. So the concept is nothing new. However, we added out own little twist. I combined my obsession with sharpies and using recycled materials to make a super cool 4th of July Spinner. How fun is that?!?
Ready for the simple list of materials?

To make a Button Spinner, you will need:
- Large Button
- String ~ most any thin string/yarn will work. However, we used a wax covered string that made it a little easier for the kids.
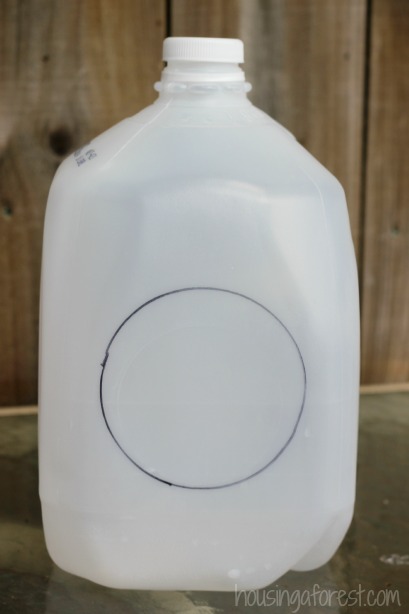
- Milk Jug or similar plastic from your recycle bin
- Colorful Sharpies or permanent markers
- Hot Glue Glue
- Craft foam ~ (optional) to make handles

How to make a Button Spinner
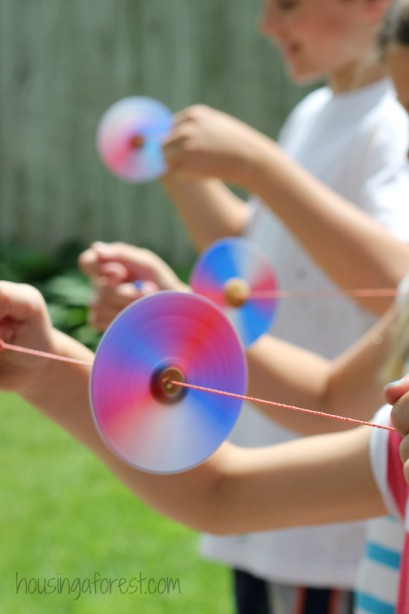
They are super easy to put together. To create the traditional spinner…simply thread the string through 2 of the button holes, tie a knot and your all set.
To create our Colorful Button Spinner.
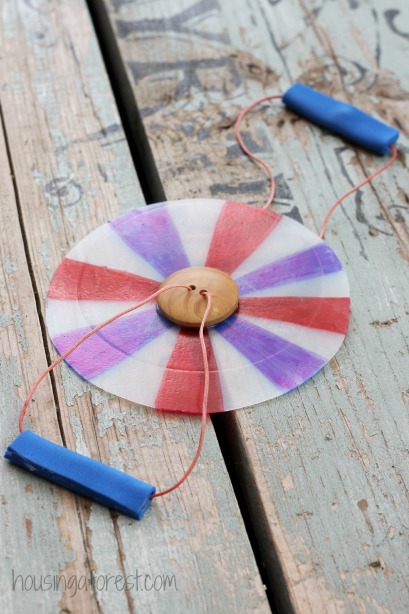
Simply cut a circle from a milk jug (about 3″ in diameter) and color with sharpies. Next, cut a circle out of the center of the plastic (just smaller than your button). We only colored one side of our plastic, since you could see the kids designs from both sides. Finally, hot glue the colorful plastic onto the button, thread the string through 2 of the button holes, tie a knot and your done! Quick and easy.
To add handles
The string can make little fingers sore, so we chose to add simple foam handles. Simply cut little rectangles of craft foam, folded it over the string and then hot glue in place. Easy Peasy. Just make sure that the handles are spaced an equal distance apart.
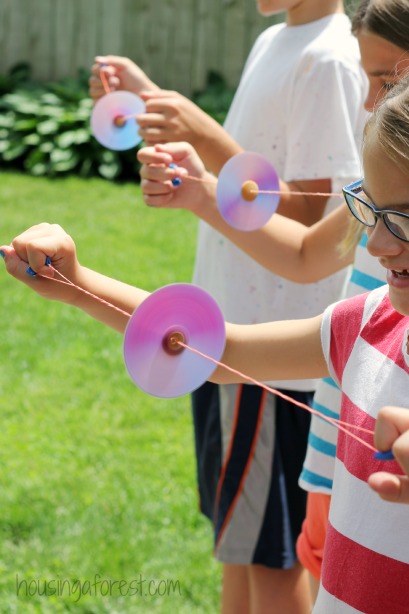
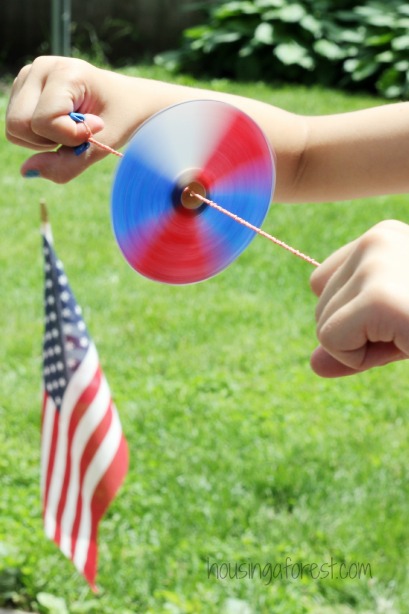
Holding the string in each hand, twirl your spinner until the string is pretty tight. Stretch the string out and pull to make the button spin. Pull hard stretching and then relaxing the string by moving your hands close together and then apart. This takes practice to keep it going, but once it does it’s really cool! The kids loved the little zinging noise it made as it spun around.
Seriously, could it be any easier? Perfect for your 4th of July Party.


Great!
You have given an easy trick to create from a few simple materials. This dancing button is now very easy to make. Yeah, Children are naturally attracted to these homemade toys.