

Introduction: Arduino Teenage Mutant Ninja Turtles Pumpkin


This tutorial will show you how to create a colorful TMNT pumpkin! It will focus on the design and programming of LED that lights up the pumpkin.
Materials:
1 Arduino Uno with USB cable and 9 V batter power option
3 150 ohm resistors
1 RGB LED
4 Jumper wires
1 Carved pumpkin
Step 1: Carving the Pumpkin

Begin by carving out the turtle mask on your pumpkin. You can print the stencil I used (shown) or find another one off the internet. You will be cutting out the grey part of the stencil.
For a really good tutorial on how to carve the pumpkin, I recommend the following link:
https://www.instructables.com/id/How-to-Carve-a-Pumpkin-4/
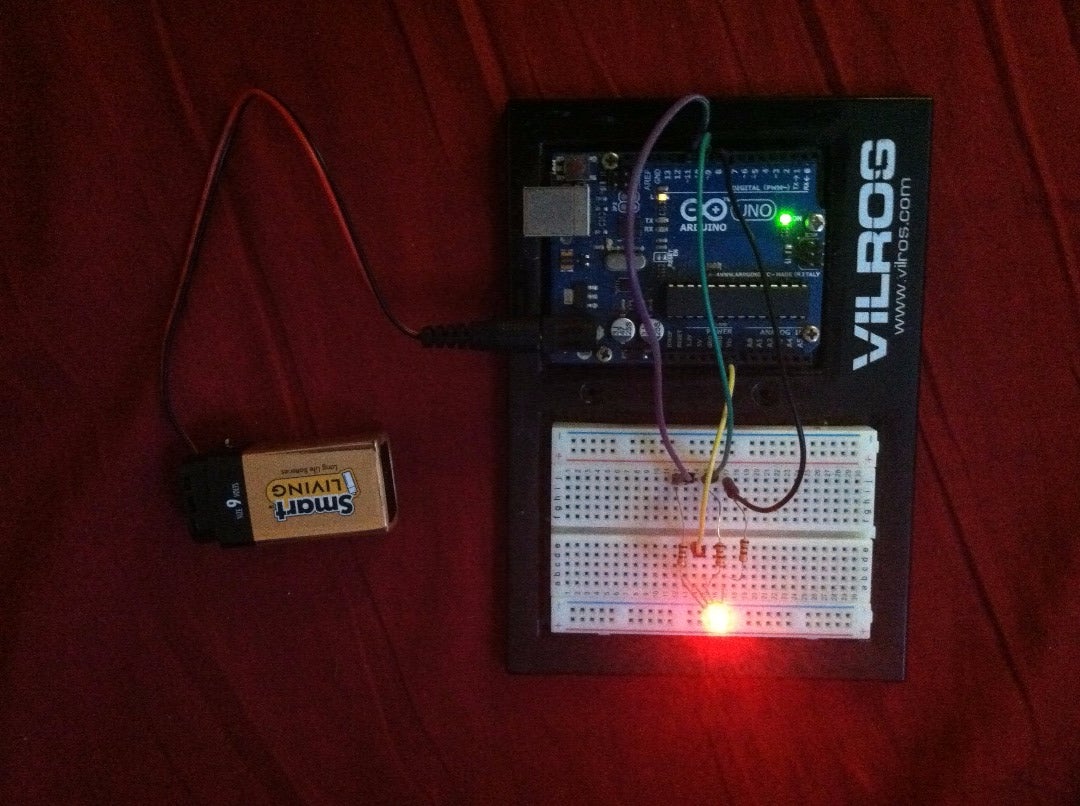
Step 2: Arduino


To cycle through the colors, we used an Arduino Uno to run an RGB LED
The code is set up so that red goes to pin 11, green is pin 10 and blue is pin 9 on the Arduino board.
The code:::::::::::::::::::::::::::::::::::::::::::::::::::::::::::::::::::::::::::::::::::
//Making an integer for each colored pin (redPin, greenPin, bluePin)the number is the pin that the color will be plugged inot on the ardiuno board
int value = 0; int redPin = 11; int greenPin = 10; int bluePin = 9;
void setup() {
pinMode(redPin, OUTPUT);
pinMode(greenPin, OUTPUT);
pinMode(bluePin, OUTPUT); }
void loop() {
//set brightness of pin 8 blue
for(value = 0 ; value <= 255; value+=5) // fade in (from min to max)
{
analogWrite(bluePin, value); // sets the value (range from 0 to 255)
delay(30); // waits for 30 milli seconds to see the dimming effect
}
delay(2000);
for(value = 255; value >=0; value-=5) // fade out (from max to min)
{
analogWrite(bluePin, value);
delay(50);
}
// set brightness of red pin
for(value = 0 ; value <= 255; value+=5) // fade in (from min to max)
{
analogWrite(redPin, value); // sets the value (range from 0 to 255)
delay(30); // waits for 30 milli seconds to see the dimming effect
}
delay(2000);
for(value = 255; value >=0; value-=5) // fade out (from max to min)
{
analogWrite(redPin, value); delay(50);
}
//set brightness of purple pin
for(value = 0 ; value <= 130; value+=3) // fade in (from min to max)
{
setColor(value, 0, value); // sets the value (range from 0 to 255)
delay(50); // waits for 30 milli seconds to see the dimming effect }
delay(2000);
for(value = 130; value >=0; value-=3) // fade out (from max to min)
{
setColor(value, 0, value); delay(50);
}
//set brightness of orange pin
for(value = 0 ; value <= 25; value+=1) // fade in (from min to max)
{
setColor(10*value, value, 0);
delay(50); // waits for 30 milli seconds to see the dimming effect
}
delay(2500);
for(value = 25; value >=0; value-=1) // fade out (from max to min)
{
setColor(10*value, value, 0);
delay(50);
}
}
void setColor(int red, int green, int blue)
{
#ifdef COMMON_ANODE
red = 255 - red;
green = 255 - green;
blue = 255 - blue;
#endif
analogWrite(redPin, red);
analogWrite(greenPin, green);
analogWrite(bluePin, blue);
}
Step 3: Final Pumpkin

You can just drop the entire Arduino board (powered by the battery) into the pumpkin. I also added tinfoil to the inside to increase the brightness of the colors and even them out a bit (they all looked a bit more orange than desired due to the pumpkin color)

Participated in the
Halloween Decor Contest 2015


