Keeping a fair amount of texture seems to be an issue for a lot of photographers and retouchers. No matter what technique they use to clean the skin of a model, I often hear people trying to find a solution to get a more natural and visible texture. Here is one for you!
Get the Basics Right First
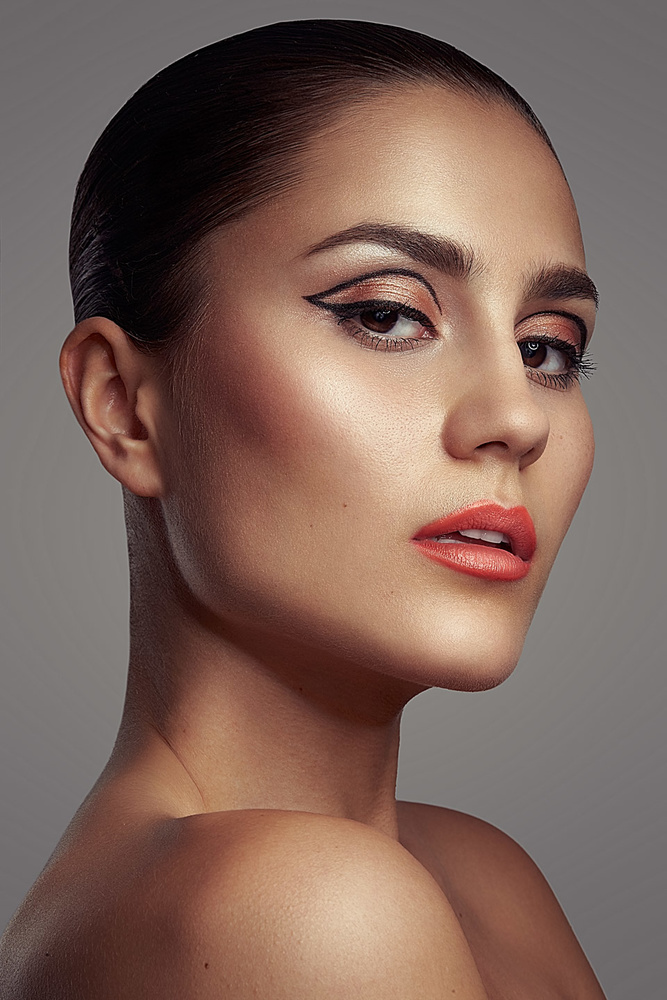
I won’t lie to you, having a great skin texture starts by having clean skin. If your model has terrible skin, your end results will hardly ever be world class. Kendra and Anna already covered the casting part for your with their awesome articles on why it is important to cast and seven tips to help you with it.
Then, of course, makeup plays a huge role. A cakey makeup won’t cut it. Some makeup artists don’t seem to know how to put foundation on someone, and will just plaster it away with a trowel – or, at least, the result will look very similar. Be sure to have a great makeup artist with you on set. A good makeup goes a long way and will diminish your retouching time by a fair amount!
With that being said, let’s move on to the post-processing part, what really interests us today. There isn’t a right or wrong way to retouch (apart from using gaussian blur to clean the skin). Some retouchers will cringe when they hear the words "frequency separation," others will laugh at you for cleaning skin using negative dodging and burning, while a lot of people use a combination of both. If what you do yields a good result, don’t change it just for the sake of making others happy. However, do try other techniques from time to time. You might be surprised what you have missed until trying it out for yourself.
Once your model's skin is cleaned and looking reasonably good to your eyes, it is time to give it a bit of sharpening to enhance the texture. Don’t stop reading just now, I’m not talking about sharpening the whole image with Photoshop’s high pass filter cranked up all the way. Rather, using a proper sharpening technique and then applying it only where needed.
How to Sharpen an Image
There are tons of methods to add sharpness to a picture. The technique I used in the video above is the one Michael Woloszynowicz presented here:
As he explains in his video, this technique will yield much cleaner results than the traditional high pass filter method. It will pretty much avoid any halo/glow around the edges.

Left was sharpened with a high pass filter (look at the glow around the head), right using surface blur and apply image.
How the technique works is quite easy if you know how frequency separation works. You must create one merged layer of your file (cmd/ctrl+shift+e) and then duplicate it (cmd/ctrl+j). The lower layer you just created will be your blur/color/low layer. To extract the texture out of this layer, blur it using surface blur (don’t forget to disable the Sharpening layer beforehand or you won’t see what you’re doing). The goal when setting the blur and threshold sliders is to blur the texture/areas that you want to sharpen but keep the global edges of your image as sharp as possible (this is what will avoid any halo/glow).
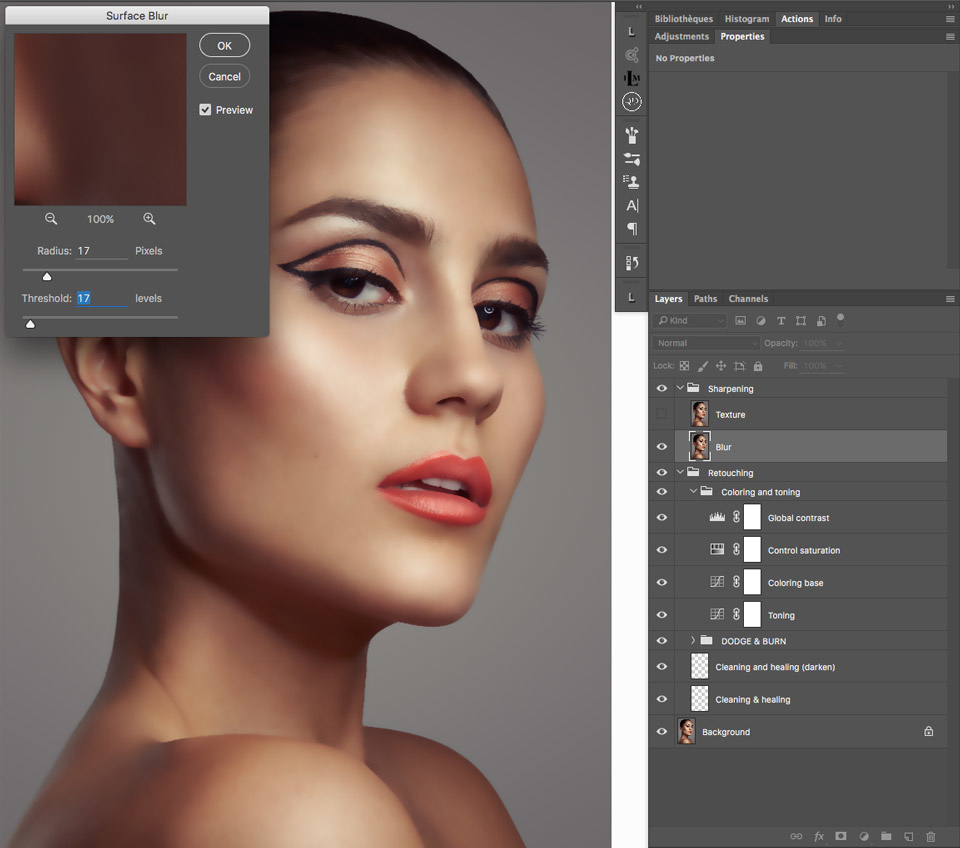
Once you have found a blur that matches your need, press ok, and reactivate the Sharpening layer. Now go to the image menu, open Apply Image, and set it as you would for a frequency separation. Meaning if you are in:
- 16-bit mode, change your source layer to the blur/color/low one, click invert, set the blending mode to add, change the scale to 2 and the offset to 0;
- 8-bit mode, change your source layer to the blur/color/low one, set the blending mode to subtract, change the scale to 2 and the offset to 128.
With the apply image work done, two things remain to do to sharpen the whole picture: delete the blur layer and then change the layer blending mode. You can set it to Linear light for an intense sharpening, Soft light for a light sharpening, or Vivid light as well as Overlay for something in between. Note that you can always adjust the opacity of your layer to refine further the amount of added sharpness you desire. I personally use Linear light or Overlay most of the times, but also play around with the opacity.

Luminosity Mask for a More Natural Result
Last week, I wrote an article showing you a couple of different ways to create luminosity masks. However, I hung you out to dry and didn't show any real way to use the technique. The only use I showed you was in a previous article talking about color grading. But, today, we are going to use them!
For this purpose, we want to pick only the highlights to increase the texture available in that luminosity range. It will help keep the sharpening look more natural and, in some cases, it adds a more bit depth to the model's face. In the video, I used the color range method (Select menu > Color range), picking only the highlights to make it very quick and easy to follow. In my everyday workflow, I use Lumenzia to create most of my luminosity masks because it is more precise and much faster. So feel free to use any method and see what works best for you.
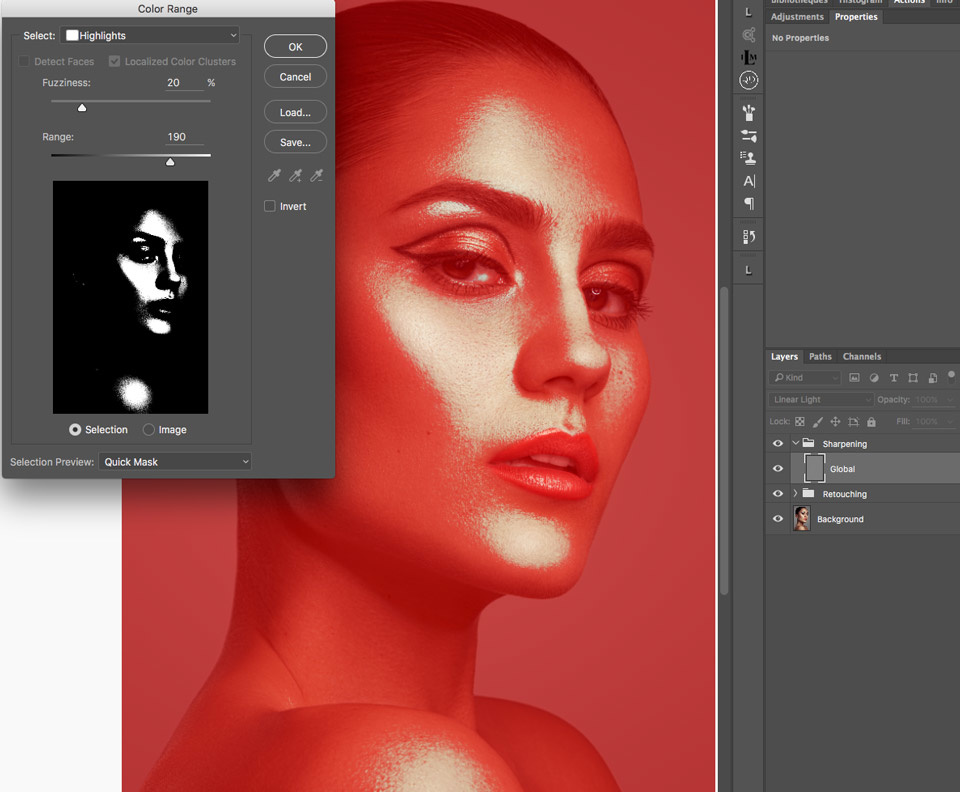
Once the selection is active, just click on the mask button (bottom of the layers panel), and it will mask everything but the highlights on the sharpening layer. Your image should now be sharpened locally and already give you a more pleasing look than when everything was sharpened at the same level.


Left is the image before any sharpening, right is the image with only the highlights sharpened
You can even go further by duplicating that sharpening layer, including its mask, but inverting the mask. It will create two sharpening layers for you. One sharpening the highlights and the other one the shadows as well as the midtones.
That is great for whenever the shadows and midtones are a bit soft in comparison to the highlights, or when you want to add sharpening to the whole image but still retain a natural look.

Finally, don’t forget that you can also paint on your masks to hide or reveal the sharpening layer. Sometimes, the highlight luminosity mask will include specular highlights which might not look good when sharpening. Sharpened hair also has a tendency to look a bit plastic-y. Same with the lashes and eyebrows. So be sure to keep that in mind before saving your pictures for the web or printing.


Great tips Quentin! Merci!
Awesome guide! Filled in a lot of gaps for sure!
Definitely will be giving this a try - I usually go for frequency separation but this might help with different shots
Nice article, I usually just paint my masks but may go for luminosity instead
Very helpful as always. Thank you!