
Videos captured with 360-degree camera systems allow viewers to pan around and explore recorded scenes. The immersive experience is especially fun on mobile devices, which translate physical movements of your phone or tablet into onscreen exploration of the 360-degree environment.
There are a few consumer 360-degree cameras currently on the market — Ricoh's sets two 180-degree lenses back-to-back on their Theta M15, and VSN's Mobil V.360 uses one lens and a mirror — but both have poor image quality.
If you have $15,000 to spend and happen to be near a YouTube Space, Google’s Jump VR camera system can shoot 360-degree footage, but at 15 pounds it weighs too much for most drones. Or, you can mount six GoPro cameras in a ball-like configuration to create a 360-degree view, but you are still going to have to shell out $2,000 to $3,000 just for the cameras, and only large multi-rotor drones can carry their weight.
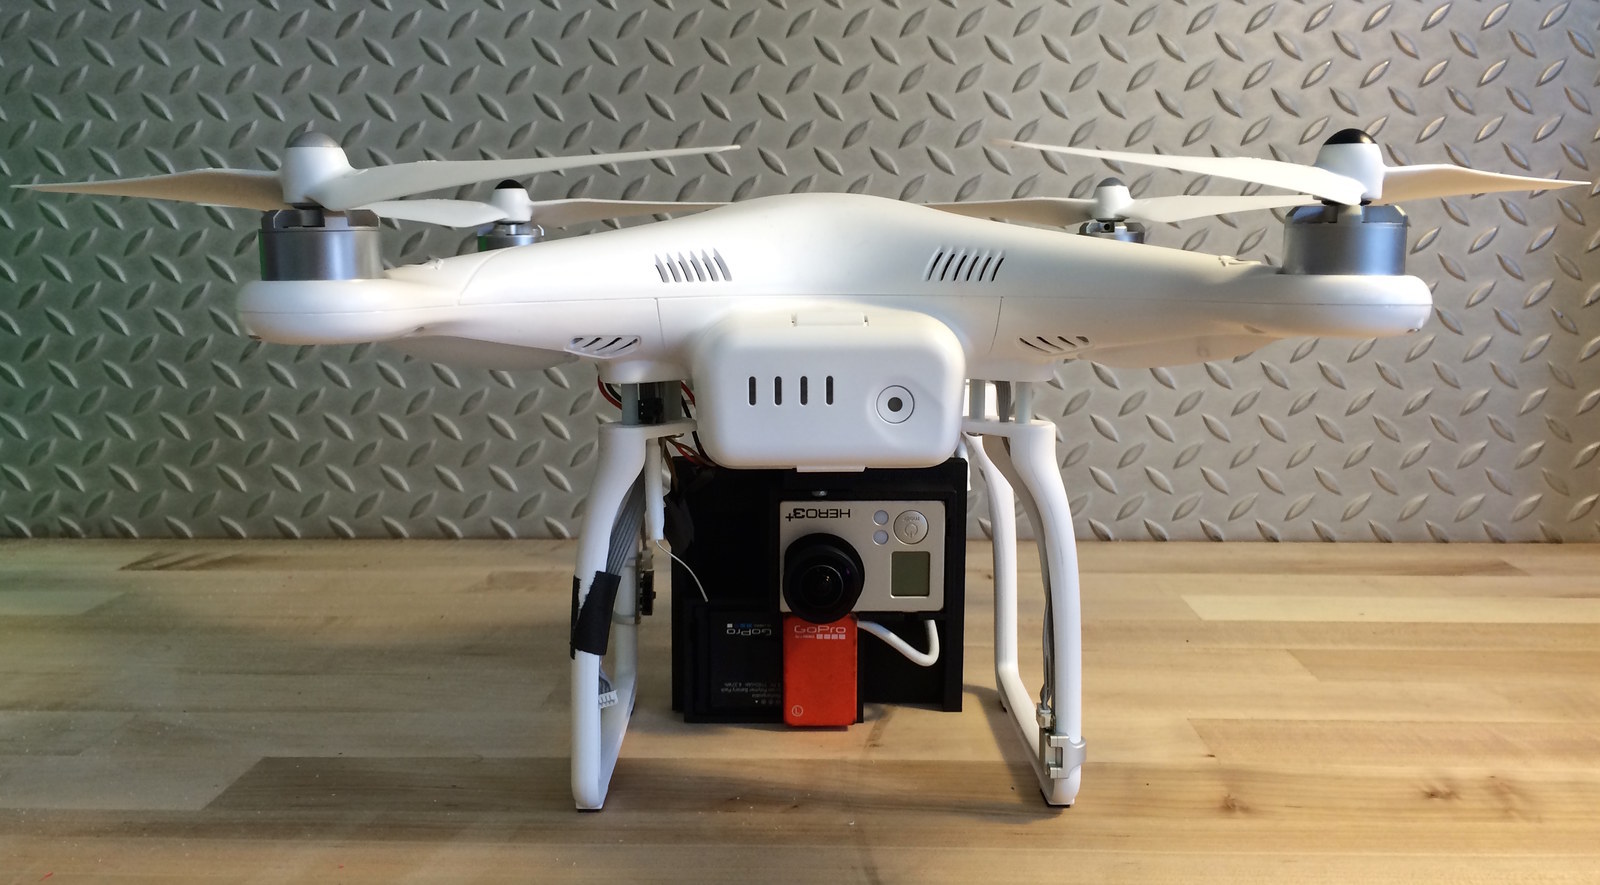
I wanted to build a 360-degree video camera rig that is low cost, is light enough to mount on the ubiquitous DJI Phantom 2 drone, and has good video quality.
My solution: a camera rig consisting of two GoPro 3+ Black cameras with aftermarket 185-degree field-of-view lenses. As a bonus, the GoPro’s video out capability also enables first-person view video for piloting.
Shopping List
Camera Parts
Two GoPro 3+ Black Cameras ($357.99/camera) — unlike other third- or fourth-generation GoPros the 3+ Black is compatible with the Dual Hero System.
One Dual Hero System ($199.99) to sync the frame rates of the two GoPros. It is only compatible with the GoPro Hero 3+ Black (there is no Dual Hero System for the GoPro Hero 4).
Two M12 185-degree lenses ($89/lens) to replace the stock lenses in the GoPros. Note: The URL and page title incorrectly state the lens is 180 degrees.
One GoPro Mini USB to RCA Composite Cable ($13.99) so you can focus your new lenses on a television — video quality on the GoPro app is not great and makes focusing harder.
White thread seal tape (aka plumbers tape) ($2)
Drone Parts
One DJI Phantom 2 drone system ($499.99)
One Kyosho Z8006 Zeal Vibration Absorption Sheet ($14.94)
Two 3mm x 18mm machine screws
Eight ½-inch long by ⅛-inch diameter nylon spacers
Eight 3mm x 20mm machine screws
One DJI Phantom 2 GoPro Mounting Bracket ($12)
3D Printing
Access to a 3D printer with enough filament to print the camera mount (on a MakerGear M2 this mount required 38.2 meters of 1.75mm filament). If you don’t have a 3D printer:
Check with your local library or maker space.
Try UPS.
Send the file out to a service — there are dozens. Shapeways quoted us $66.15 plus shipping to print the dual GoPro mount.

Video Stitching Software
For editing the stitched video:
Autopano Video 2 ($326) or Autopano Video Pro 2 ($653)
For editing the stitch itself:
Autopano Pro 4 ($109) or Autopano Giga 4 ($217)
To be clear, Autopano Video 2 / Autopano Video Pro 2 works in conjunction with Autopano Pro 4 / Autopano Giga 4.
Swap Out the Lenses
1. Wrap the threading on your 185-degree lenses with thread seal tape. The tape will keep the lens firmly seated in the camera barrel.
2. PeauProductions released a great tutorial on replacing lenses in a GoPro 3+ Black or GoPro 4 Black. A word of caution before opening your GoPros and changing the lenses:
When you are ready to screw the new lens in only give it five turns. Do not screw the lens in all the way into the camera. You could permanently damage your GoPro’s CMOS imaging sensor by smashing into it with the lens barrel. Five turns is enough to keep it in place until you are ready to focus the lens and have the camera outputting video to a television or the GoPro app on your mobile device.
3. Focus your new lenses — use the GoPro Mini USB composite cable and a television, or use the GoPro app and your mobile device. Once you see an image, rotate the lens until the image comes into focus.
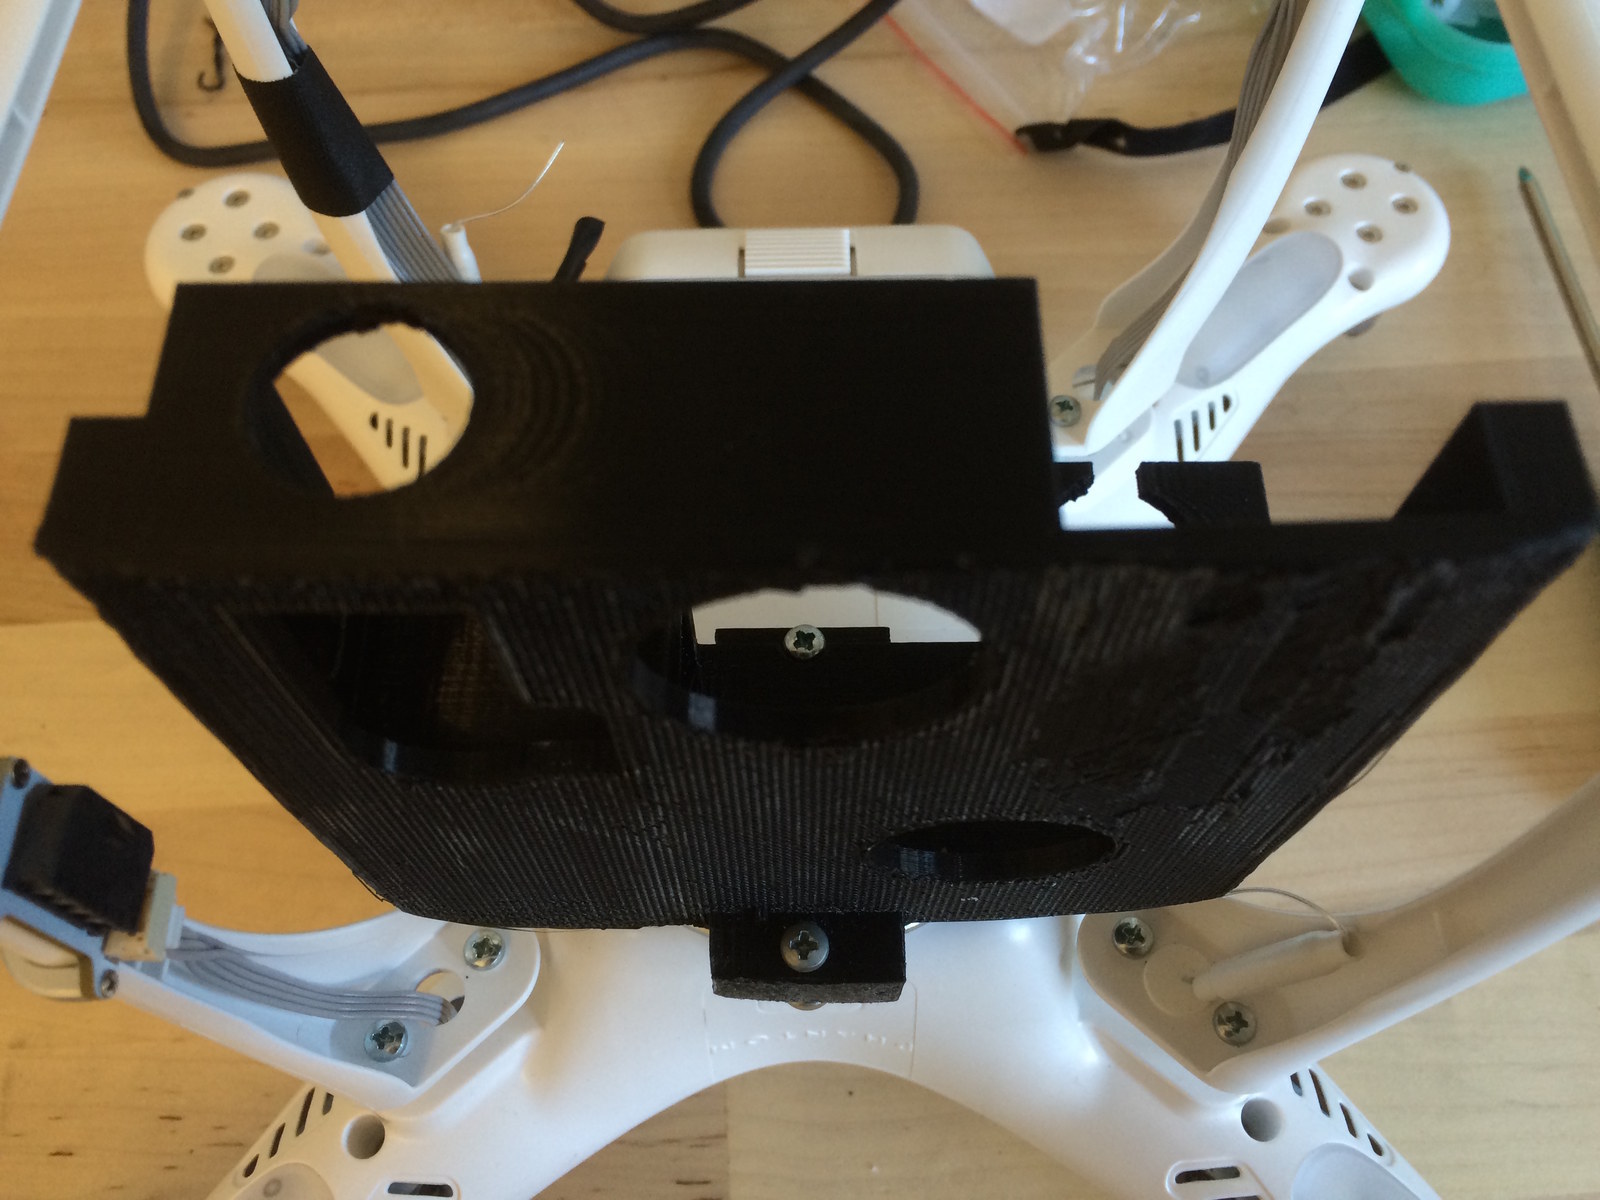
The Camera Mount
1. The file for my 3D-printed camera mount is available on Thingiverse.
2. Before attaching the 3D-printed mount to your Phantom 2, screw down the aluminum DJI Mounting Bracket. Place a piece of anti-vibration gel on the bracket, leaving the screw holes uncovered.
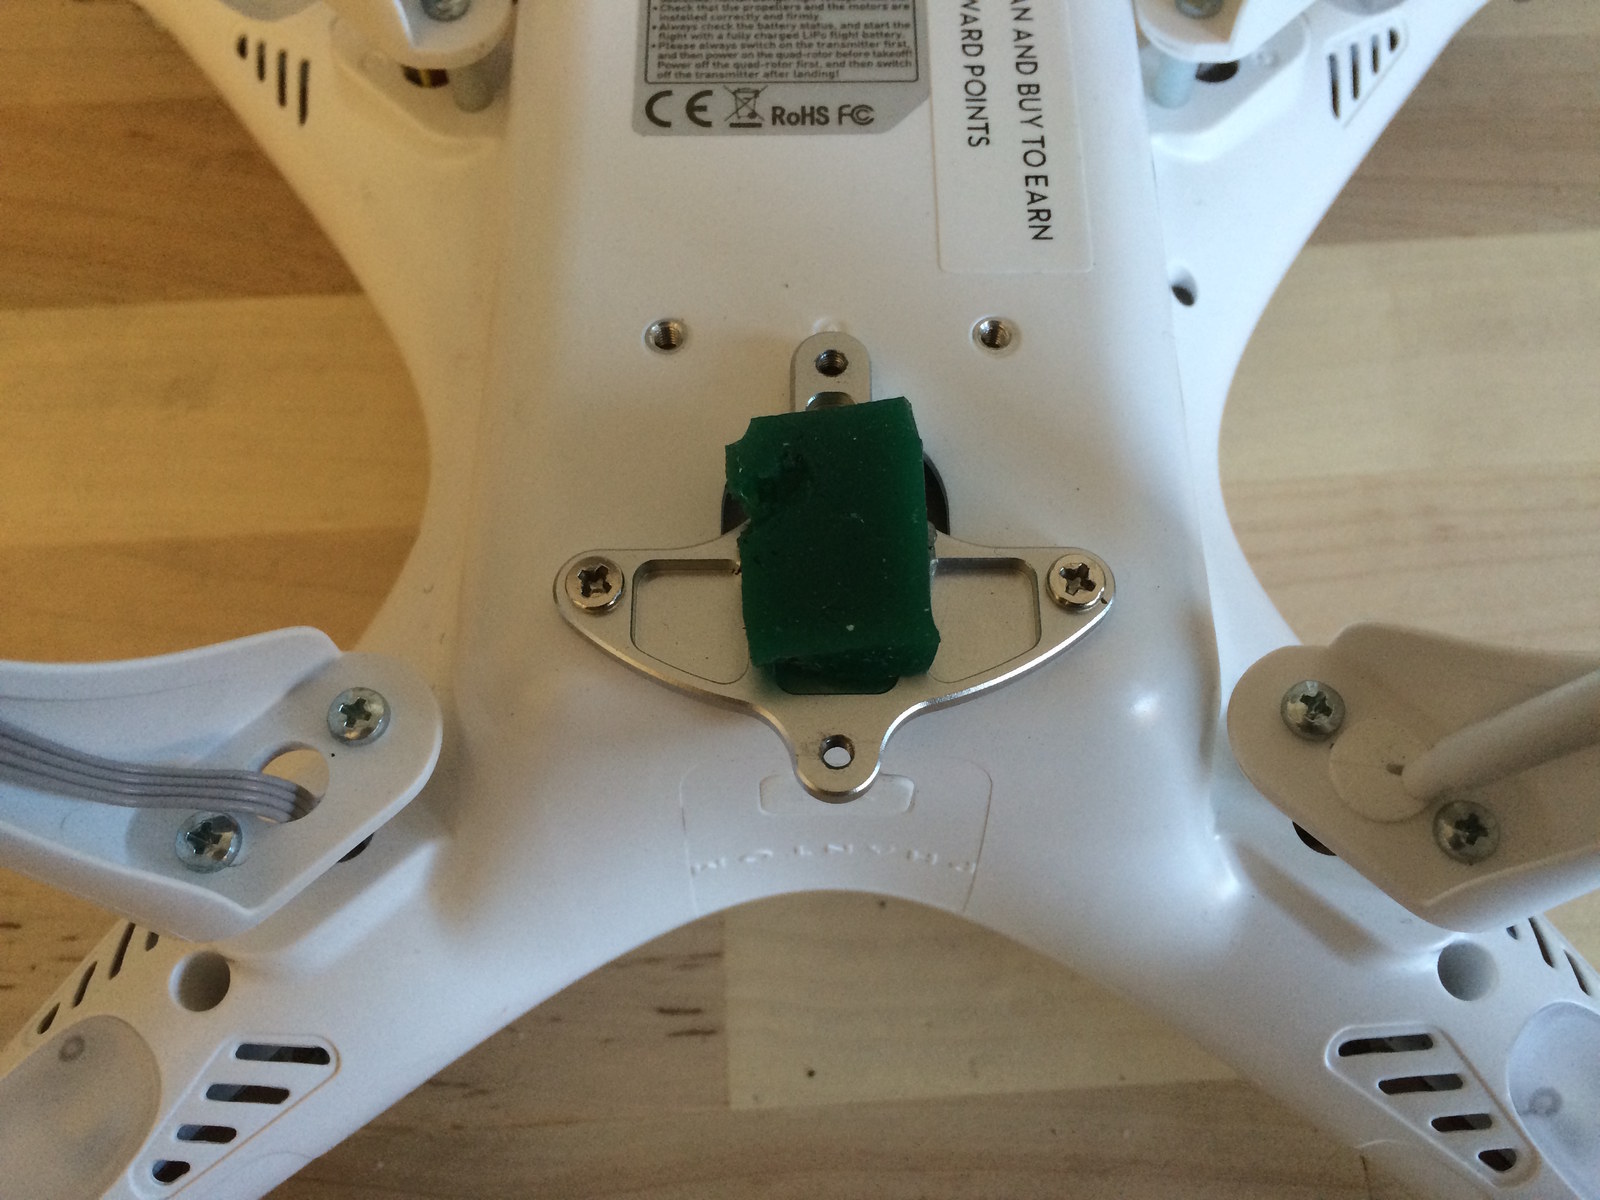
3. Use the two 3mm screws to attach the GoPro mount to the aluminum mounting bracket on the drone. Make sure the flat face of the mount faces forward on the drone.
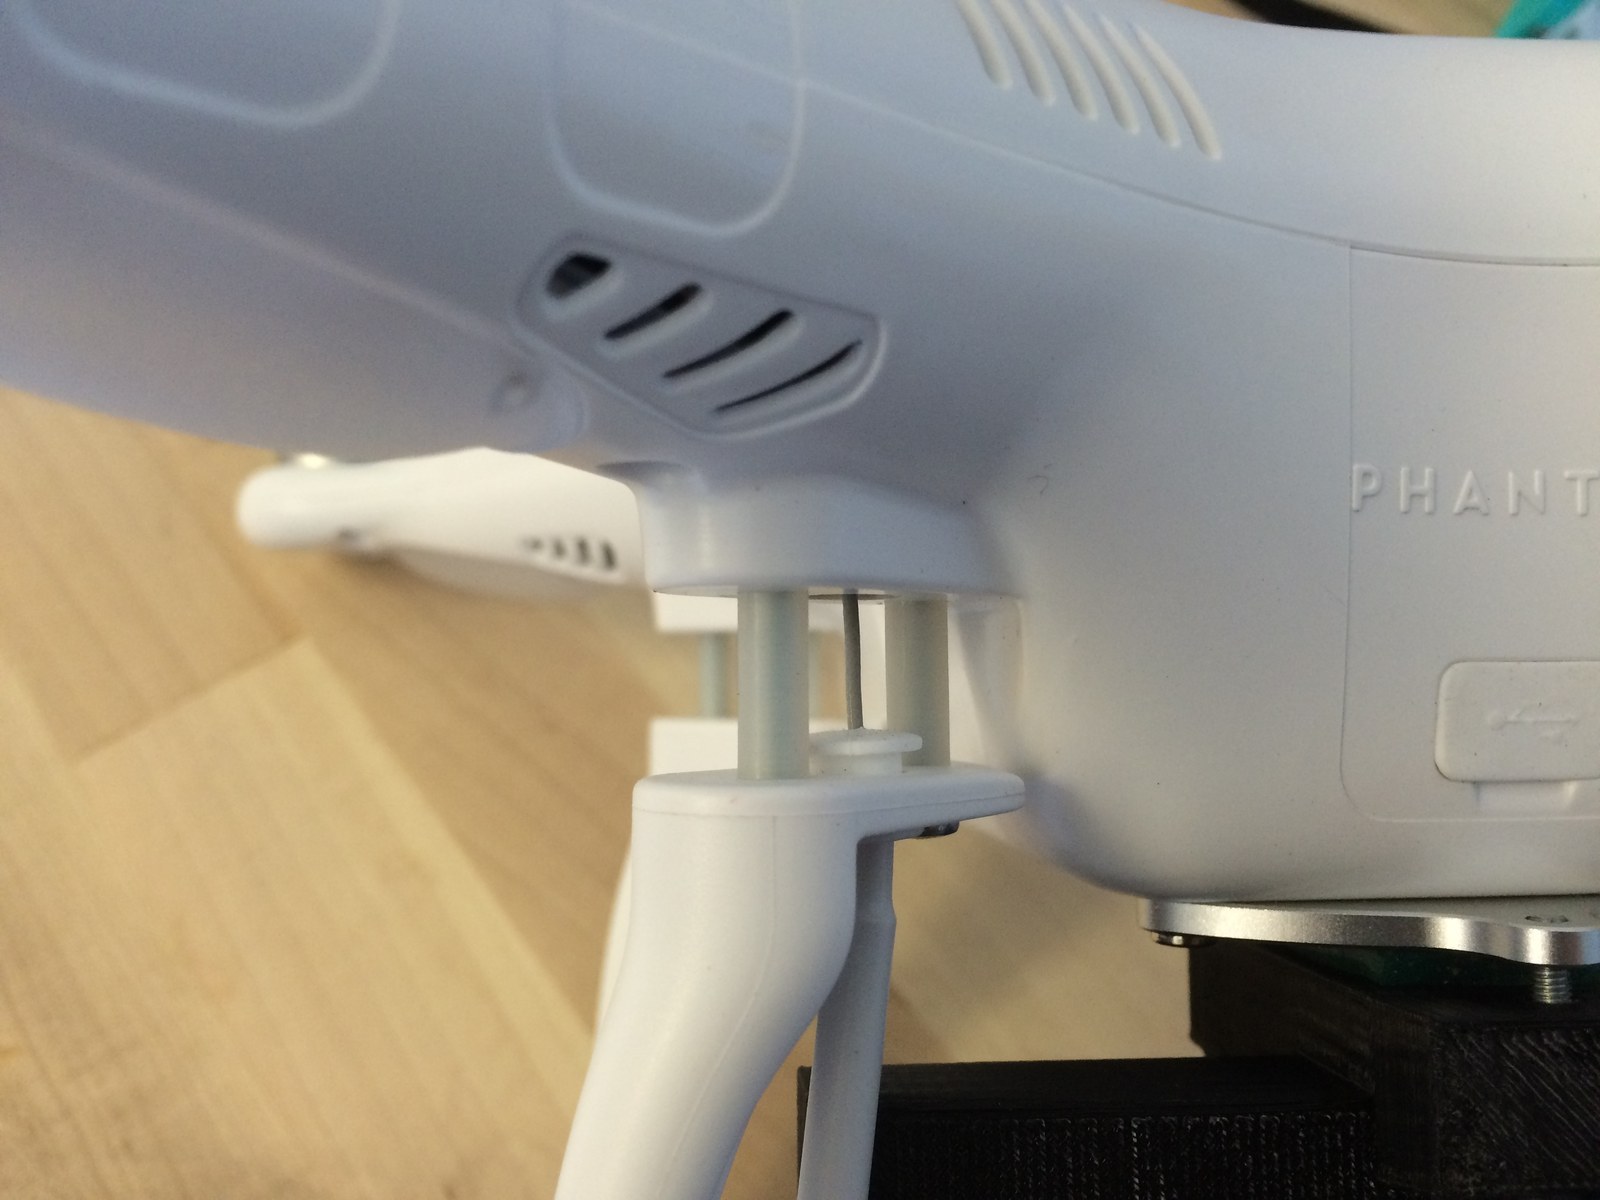
4. Extend the Phantom 2’s landing gear using the ½-inch spacers and 3mm x 20mm machine screws.
5. Attach the Dual Hero System to your GoPros and seat them in the mount.
6. Go fly! (but not near an airport!)
Stitching the Video
Any video you capture will need to be stitched together if you want to use it as 360-degree footage.
Download the Izugar Z2XC Lens Calibration File from Autopano and load it — look under Autopano Video > Preferences for the Edition tab where you'll find the Data Location setting. Put the calibration file in your Data folder under User > Presets > Cameras.
Note: This lens calibration was done for 194-degree lenses, but the results are OK with a 185-degree lens.
I had to use a combination of Autopano Giga and Autopano Video to stitch the footage together. There are a few tutorials out there, but the video below walks through my process.

