OctoberCMS is one of the rising stars in content management systems, and as in every CMS we need plugins to extend the functionality. In this article, we’re going to go through the basics of creating a plugin for October CMS.

What we’re building
Almost all websites need Google Analytics. We’re going to make a plugin that inserts the Google Analytics tracking code into the page using a component tag.
After inserting your tracking id in the settings form, you’ll need to insert the component tag on the pages that you want to track, or inside a partial.
{% component 'gaCode' %}You can see the final result on github and try it out.
Managing Plugins
October has a plugins folder inside the root directory, where you can find, install, remove and develop plugins.
To manage your plugins, you can click the System > updates link. We have two different ways to manage our plugins.
Creating a New Project
Under the System > Updates page, you have an attach project link.
To attach a project you need to sign up on the October CMS website, go under the projects page, and you can create a new one.
After creating the project you’ll have a key that you can use to attach a project. You can add a plugin from the marketplace to your project and update your website under the updates page on the back end.
Using The Command Line
Another way to install new plugins is through the command line, but you still need to find the plugin name on the website (which is quite annoying). At the time of this writing, to install a new plugin you need to specify Author.PluginName to find it.
Creating A New Plugin
Scaffolding
October CMS made creating a new plugin as easy as possible. You either create a new folder inside the pluginsdirectory or use the command line helper.
The folder name is your unique namespace that you’ll be using publicly, and it should not conflict with others.
To get your unique namespace, you need to register as an author on the October CMS website and register your namespace.
Under the plugins folder, I will create a folder named RAFIE which is my namespace, where I can put all my plugins.
For this article, we will name our plugin GoogleAnalyticsCode. Under this folder, we only need to create a file named Plugin.php to define our plugin.
The other way to get started is to use a scaffolding command provided by October.
php artisan create:plugin RAFIE.GoogleAnalyticsCode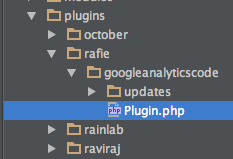
The command also adds a folder named uploads which contains a version.yaml file that keeps your plugin’s versioning history.
The pluginDetails method overridden from the System\Classes\PluginBase class must return an array defining our plugin.
public function pluginDetails(){
return [
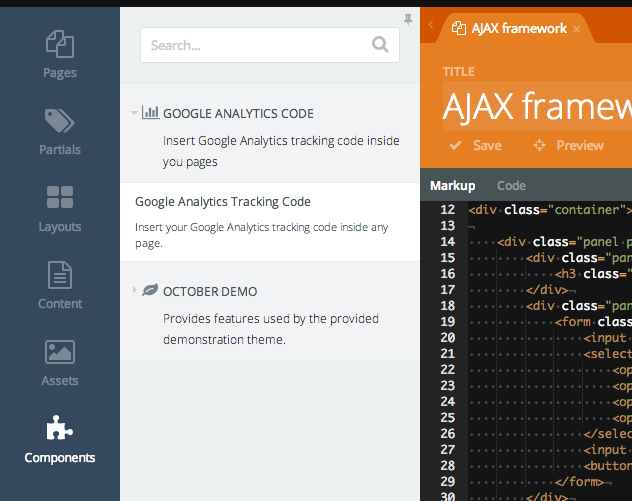
'name' => 'Google Analytics Code',
'description' => 'Insert Google Analytics tracking code inside you pages',
'author' => 'RAFIE Younes',
'icon' => 'icon-bar-chart-o'
];
}You can check the doc for the complete list of methods, but we will explore each one in depth later.
Note that if the plugin is not appearing on the list of registered plugins, press the check for updates button to refresh the list.
Using Components
To be able to interact with the page, October uses components, which allow the user to insert the plugin to interact with their pages or partials.
{% component 'gaCode' %}To create a component, you need to create a folder named components, and put any classes that you’ll be using in there.
Instead of creating those files and folders, we can use console util commands provided by October.
php artisan create:component RAFIE.GoogleAnalyticsCode GoogleAnalytics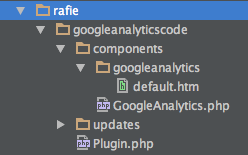
The componentDetails method overridden from the Cms\Classes\ComponentBase is where we define our component. The name and description are going to be shown on the admin dashboard.
To register a component, we need to override the registerComponents method inside the Plugin class.
public function registerComponents(){
    return [
  'RAFIE\GoogleAnalyticsCode\Components\GoogleAnalytics' => 'gaCode'
    ];
}
We basically return an array of class names and component names. Every plugin can register multiple components.
After the component is executed, it will render the default.htm partial, which by default will output:
<p>This is the default markup for component GoogleAnalytics</p>
<small>You can delete this file if you want</small>
We will alter this content with the Google Analytics tracking code from Google.
<script>
    (function(i,s,o,g,r,a,m){i['GoogleAnalyticsObject']=r;i[r]=i[r]||function(){
        (i[r].q=i[r].q||[]).push(arguments)},i[r].l=1*new Date();a=s.createElement(o),
            m=s.getElementsByTagName(o)[0];a.async=1;a.src=g;m.parentNode.insertBefore(a,m)
    })(window,document,'script','//www.Google-analytics.com/analytics.js','ga');

    ga('create', 'YOUR TRACKING CODE HERE', 'auto');
    ga('send', 'pageview');

</script>
Of course, the tracking code script needs to be loaded at the end of the page, but that will depend on your theme.
The default page must receive the tracking code from the user, that’s where we can use component properties.
Component Properties
{% component 'gaCode' code='UA-12345678-1' %}To define properties you can use the defineProperties method, and must return an array of available properties.
public function defineProperties(){
    return [
        'code' => [
            'title'             => 'Google Analytics tracking code',
            'description'       => 'Your Google Analytics tracking code, can be found in your Google Analytics dashboard',
            'default'           => '',
            'type'              => 'string',
            'validationPattern' => '^UA-\d{4,9}-\d{1,4}$',
            'validationMessage' => 'Not a tracking code',
            'placeholder'       => 'UA-XXXXXXX'
        ]
    ];
}
The array keys are self descriptive, you can check the docs for more details.
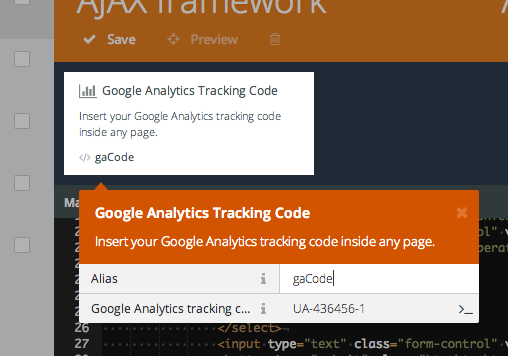
You can either use the form or manually enter the property. Now we need to catch the value and pass it to the partials.
Inside our class component we have an onRender method where we can pass the values to our page.
public function onRender(){
    $this->page['code'] = $this->property('code');
}
The ComponentBase class has a page attribute that represents the rendered page.
<script>
    (function(i,s,o,g,r,a,m){i['GoogleAnalyticsObject']=r;i[r]=i[r]||function(){
        (i[r].q=i[r].q||[]).push(arguments)},i[r].l=1*new Date();a=s.createElement(o),
            m=s.getElementsByTagName(o)[0];a.async=1;a.src=g;m.parentNode.insertBefore(a,m)
    })(window,document,'script','//www.Google-analytics.com/analytics.js','ga');

    ga('create', '{{ code }}', 'auto');
    ga('send', 'pageview');

</script>
In most cases, you don’t want to write your tracking code on every page using properties. The best way is to have a settings form where the user can enter his code once.
Using Settings
Plugin settings go under the models directory. The plugin structure should look something like this.
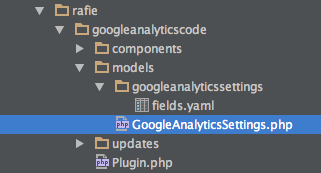
The Settings.php file is where we can define our settings. The class should extend the Laravel Model class.
// googleanalyticscode/models/GoogleAnalyticsSettings.php

class GoogleAnalyticsSettings extends Model{
    public $implement = ['System.Behaviors.SettingsModel'];

    public $settingsCode = 'rafie_google_analytics_code';

    public $settingsFields = 'fields.yaml';
}
Every settings form should implement the SettingsModel from the October CMS core.
The settingsCode attribute is our unique key that we should be using when saving to the database.
settingsFields is the file name where we define our form settings fields. The CMS will look in a folder named the same as the settings class file.
// fields.yaml
fields:
  code:
    label: Your Google Analytics ID
    placeholder: UA-XXXXXXXX-X
We define only one input where we can put our tracking code. You can also define a password field, a datepicker or a list of options; be sure to check the list of available options.
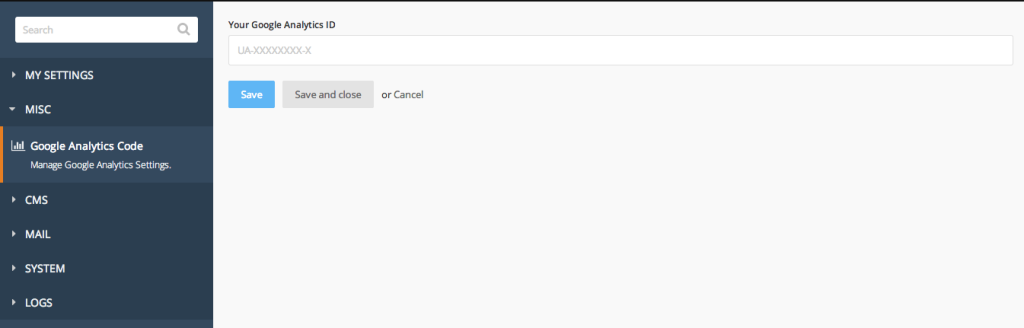
The only remaining part is to register our settings form inside our plugin file.
public function registerSettings(){
    return [
        'settings' => [
            'label'       => 'Google Analytics Code',
            'description' => 'Manage Google Analytics Settings.',
            'icon'        => 'icon-bar-chart-o',
            'class'       => 'RAFIE\GoogleAnalyticsCode\Models\GoogleAnalyticsSettings',
            'order'       => 1
        ]
    ];
}
The label and description are shown in the left menu on the dashboard. We also define an icon, and a position in the menu.
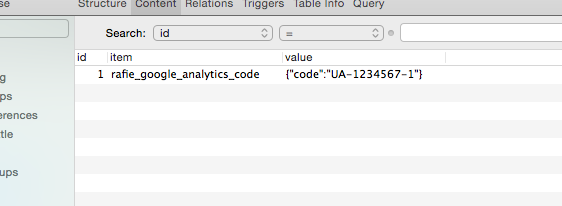
After updating the settings and visiting the database, you should see your settings saved with your unique ID.
Now we need to retrieve the user settings and pass them to our component partial. Initially, we did it using a property. We need to make some changes inside our component class now.
//Plugin.php

public function onRender(){
    $settings = GoogleAnalyticsSettings::instance();
    $this->page['code'] = $settings->code;
}
We create an instance of the model, then we access our code field as a property. This will give the same result as the previous one.
Conclusion
October is a really promising CMS with a different way of handling plugins and themes. You can learn a lot more by diving into the source code and being one of the early adopters. We will have more in depth articles about plugins and themes, but for now let us know what you think about this introduction in the comments below.
Frequently Asked Questions about Building OctoberCMS Plugins with Google Analytics
How do I install OctoberCMS for Google Analytics integration?
To install OctoberCMS for Google Analytics integration, you first need to download and install OctoberCMS on your server. Once installed, you can then download and install the Google Analytics plugin from the OctoberCMS marketplace. After installation, you can configure the plugin with your Google Analytics tracking ID to start tracking your website’s traffic.
What are the prerequisites for installing OctoberCMS?
Before installing OctoberCMS, ensure that your server meets the following requirements: PHP version 7.0 or higher, PDO PHP Extension, cURL PHP Extension, OpenSSL PHP Extension, Mbstring PHP Library, ZipArchive PHP Library, and GD PHP Library. Also, you need to have a database ready, either MySQL, SQLite, or PostgreSQL.
How do I configure the Google Analytics plugin in OctoberCMS?
After installing the Google Analytics plugin, go to the backend settings page of your OctoberCMS site. Here, you’ll find the Google Analytics settings. Enter your Google Analytics tracking ID in the provided field and save the changes.
Can I use OctoberCMS with other analytics tools?
Yes, OctoberCMS is flexible and can be integrated with other analytics tools. However, you may need to install specific plugins for each tool, similar to the Google Analytics plugin.
How do I update my OctoberCMS plugins?
To update your OctoberCMS plugins, go to the backend of your OctoberCMS site and navigate to the updates page. Here, you can see all available updates for your installed plugins. Click on the update button to update a specific plugin.
How do I troubleshoot issues with my OctoberCMS plugins?
If you’re experiencing issues with your OctoberCMS plugins, check the plugin documentation for any known issues or troubleshooting guides. If the issue persists, you can contact the plugin developer or the OctoberCMS community for assistance.
How do I uninstall a plugin in OctoberCMS?
To uninstall a plugin in OctoberCMS, go to the backend of your site and navigate to the plugins page. Here, you can see all your installed plugins. Click on the plugin you want to uninstall and then click on the uninstall button.
How secure is OctoberCMS?
OctoberCMS is built with security in mind. It uses Laravel, which is known for its robust security features. However, the security of your site also depends on your server configuration and the plugins you install.
Can I customize my OctoberCMS plugins?
Yes, OctoberCMS plugins are highly customizable. You can modify the plugin’s code to suit your needs. However, keep in mind that modifying the plugin’s code may affect its functionality and compatibility with future updates.
How do I track real-time data with Google Analytics in OctoberCMS?
To track real-time data with Google Analytics in OctoberCMS, you need to have the Google Analytics plugin installed and configured. Once set up, you can view real-time data in your Google Analytics dashboard.
 Younes Rafie
Younes is a freelance web developer, technical writer and a blogger from Morocco. He's worked with JAVA, J2EE, JavaScript, etc., but his language of choice is PHP. You can learn more about him on his website.