

Introduction: Voice Controlled Arduino Lighting - Autobot


In this instructable I will walk through the process and the code to make your Arduino and your home PC into a voice controlled command system for lights or about anything else you can control with an Arduino. The voice controlled arduino lighting is my first instructable so hopefully I can put everything.together and make sense. This is part of a much bigger project so please consider this as part. 1 of a series of instructables.
Step 1: Materials
- Arduino Mega (although if you use less lights you can use any arduino compatible board except the due or leonardo)
- Full size bread board.
- Optional - Arduino Mega screw shield (pictured in this project)
- 22 LEDs in various colors
- 22 330oh resistors
- 22 jumper wires - square ends if possible
- USB cable.
- PC with Windows XP to Windows 8
- BitVoicer voice recognition software (For full details on software requirements please see their website.)
- Some extra time
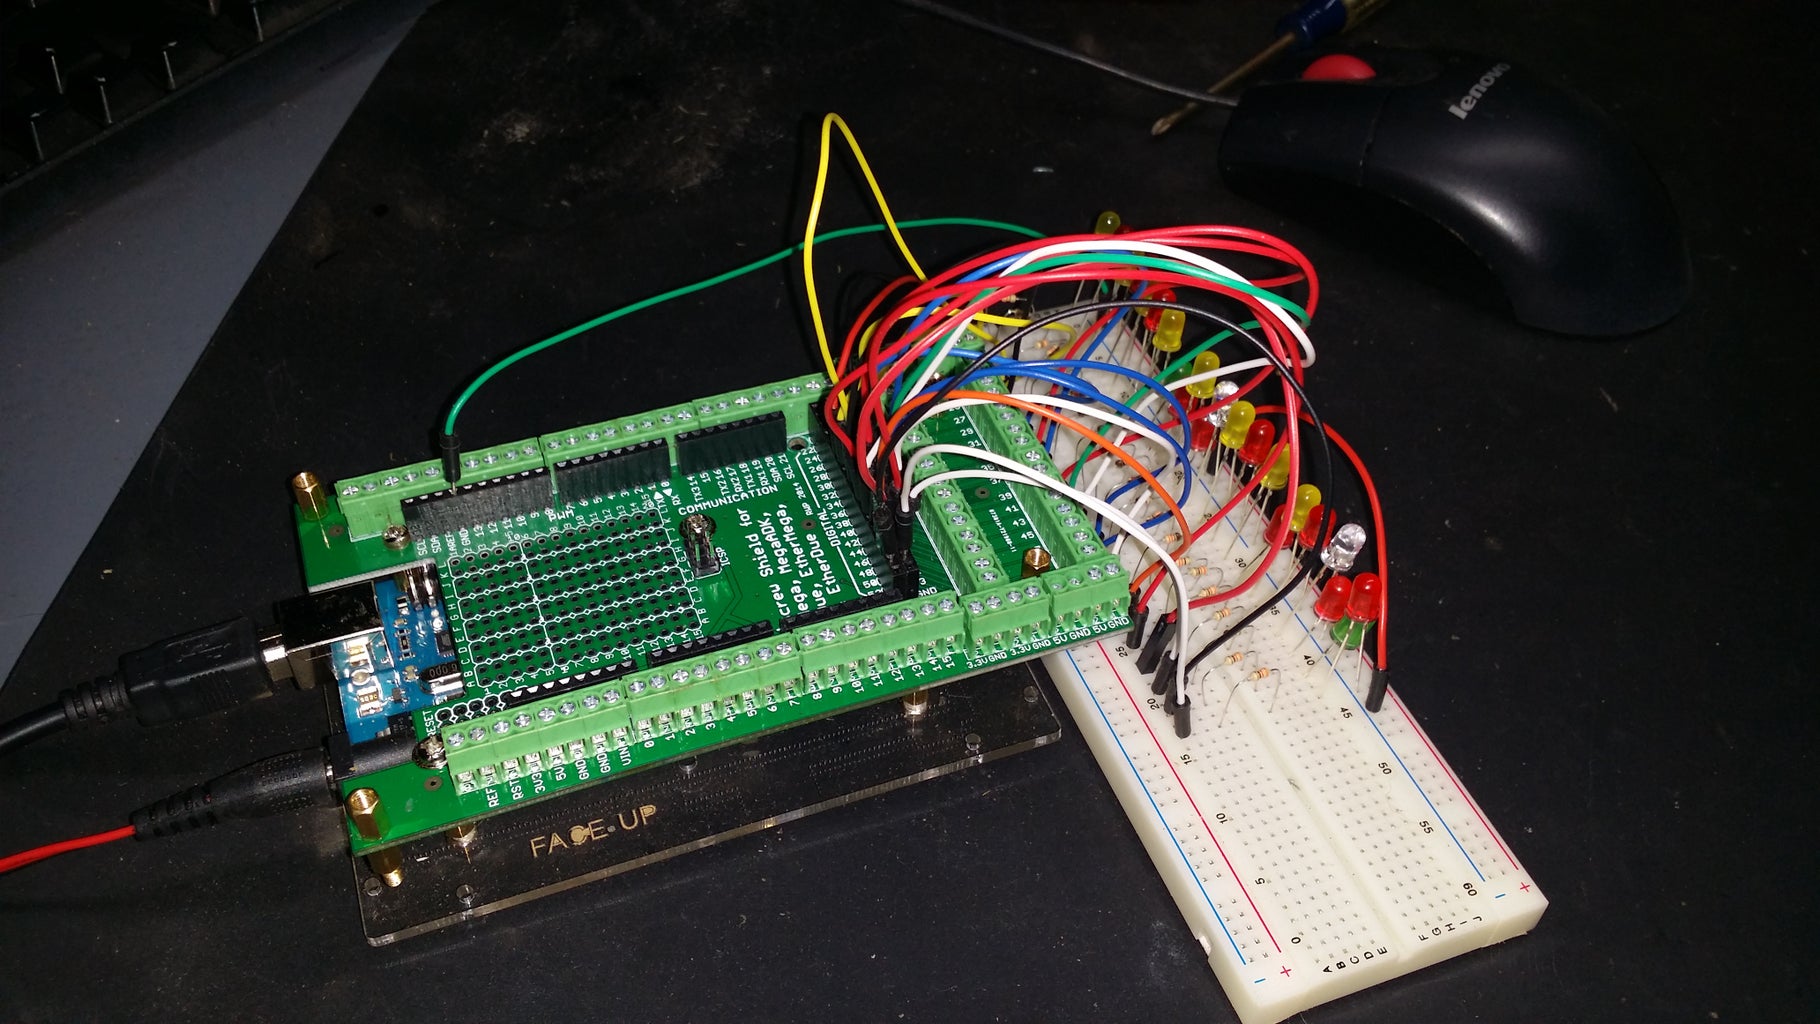
Step 2: Setting Up Your Bread Board.

I recommend using a full size breadboard for this because it gives you a little bit of spacing between the LEDs.
First thing we want to do is start putting LEDs into the bread board. I skipped one space per LED which in the turn on and turn off sequence makes a neat effect.
- Put the positive lead on the very last space in the row
- Stick the negative lead in the negative row on the bread board. Be careful here because my breadboard actually has a break in the row that needs to be jumped over to make it work.
- going across the middle of the bread board insert 1 330ohm resistor in line with every LED.
At this point your bread board is pretty much done. Now we need to work on connecting the Arduino to the bread board.
Step 3: Connecting the Breadboard to the Arduino


In my sketch I used pins 32 to 53 on the Arduino Mega so if you are just trying to copy make sure to connect the breadboard pins to the same Arduino pins that I used.
One helpful hint here. You really should have the "premium" square connector jumper wires for this. I realized while hooking up my round jumper wire connectors that it got a bit tight real fast.
So in order connect all of the rows from the bread board to the Arduino Pins.
At this point go ahead and connect the USB cable from the Arduino to your computer. Unless you had a previous sketch using these pins nothing should occur. But it will prepare us for some information in the next few steps.
Step 4: Go Download BitVoicer and Get a Key
The next part you will need to go to http://www.bitsophia.com/Downloads.aspx to download a copy of the software. You can download and install(***see warning below) it with out paying but you will need to buy a license in order to communicate with the Arduino. To do that you can go to http://www.bitsophia.com/Buy.aspx . Its only about $5 so its not too bad for software.
*** Make sure you are on the computer that you want to use for controlling the Arduino. The license key is only good for one PC and yes it does check. BUT its only $5 so if you want to install on one machine for set up then another machine for use you are not out very much.
*** Windows 8 users warning, the install will install a few extra things to make BitVoicer work on your system. Also the program will need to always run as administrator in order to be able to communicate over serial. I have installed on both Windows 8 and 7 and that was the main difference I saw.
BitVoicer is a pretty neat little program that has a lot of power but lacks a few features I would like to have at this time. That being said I have been in communication with them and they will be releasing new software next year. I have no real other details on it at this time. Just keep watching.
In the next step we will go ahead and set up BitVoicer for the commands and outputs that we want.
Step 5: Set Up BitVoicer Part 1
First you need to make sure that you activate your software with the license key. Not doing so will not enable the communication portion to the microcontroller so please make sure to do that first.
Instead of typing out the entire step by step process I have created a video with instructions. Please see the video to set up bitvoicer. Also attached is the bitvoicer profile if you want to copy what I am doing exactly. You will not be able to open the file unless you have BitVoicer.
Attachments

Step 6: Getting the Arduino Library for Bitvoicer.
When you installed the BitVoicer program it already put a copy of the library on your PC. We need to get this library into the Arduino library area in order for the BitVoicer to work.
You can go through the step by step here or watch the video below.
- Navigate to the install directory of BitVoicer. In my case it was at C:\Program Files\BitSophia\BitVoicer
- Go into the "Library" folder
- Notice that there is a "BitVoicer 11" Folder
- Right click on that folder and click on copy or Ctrl+v
- Navigate to the Arduino Library directory. Mine was at. C:\Program Files (x86)\Arduino\libraries
- Right click in the folder and select Paste or Ctrl+v
- You may have to say ok to a pop up regarding administrator permissions.
- You will need to close the Arduino Program and reopen for it to know the library is there.
Note: There are no samples in this library but I will show you how to make a sample later.
Step 7: Our First Arduino Sketch
Now we want to start our first sketch with in the Arduino IDE. So go ahead and open up a new sketch. And we will get started.
The Arduino IDE always inputs some basic code when you start a new sketch. The first thing we want to do is to move that code down a few lines so we can see what is going on.
We were going to step through this in text but I cant seem to find a way to put code into the instructable text to where it is readable. So attached is the Arduino sketch file with comments to explain what is going on. I did however step through the code in a video so please watch it to understand what is going on and why.
Attachments
Step 8: Running Everything for the First Time.
Ok so we have our basic sketch on the Arduino and BitVoicer set up. Now it is time to run it.
You should have already uploaded your sketch to the Arduino. So go ahead and make sure that BitVoicers is loaded with the proper profile and start the speech engine. Based on the sentences we programmed in BitVoicer we should be able to control all of our lights. Watch the video to see how it turned out.
But that is not where we stop. It is no fun to have to turn on and off lights individually so in the next step we will create some groups of lights and have a little fun.
Step 9: Adding Zones to BitVoicer and Arduino Sketch.
In this step we will add a few zones to both the Arduino sketch and BitVoicer so that we can turn off multiple lights at a time based on an array. Attached is the new Arduino sketch and the BitVoicer profile if you need them. Please watch the video for full instructions and explanations of what we changed.
Step 10: All Done - Watch It Run.
So everything should be saved, you should have uploaded the new sketch to your Arduino and have everything connected. If everything went right you should be able to repeat what occurs in the video. That's it for this instructable I hope you enjoy it. I will be entering this one into the Make it glow contest so if you like it please vote. I could really use the 3d printer to make other instructables and projects.
If you use it please let me know and keep a watch out for the next Instructable for extending the autobot.
Special thanks to my brother in law Galen for assisting with the coding on this and the invert function which was a very nice feature.

Participated in the
Let's Party! Challenge

Participated in the
Make it Glow!


