October CMS is the new star in the sky of CMSes. Built on top of Laravel, it promises joyful coding and a back to basics approach. Read our introduction here and find out how to build plugins for it here. In this article, we’re going to see how we can build a theme.

What We Are Going to Build
We are going to build a blogging theme. The theme will depend on the rainlab blog plugin, and will contain:
- Default page layout
- About page
- Home page
- Posts page
- Categories page
- Single post page
These are the main parts of a blogging website. At the end of this article, you’ll be able to create your own pages and extend the theme with new functionality.
The entire source code mentioned in this post is available on Github, so you’d do best if you open the repo in another tab and follow along as we explain each file in detail.
Building The Theme
OctoberCMS stores themes inside the themes directory, and they get automatically loaded when visiting the backend theme interface.
To speed up the process, I will use a free theme from startbootstrap.com.
OctoberCMS Theme Folders Structure

The screenshot shows the final structure of our theme. The folder structure is not too complicated – read the docs for more info.
Installing Necessary Plugins
Because we’re going to build a blogging theme, we will install the rainlab blog plugin which provides a handful of components we can use. If you are not familiar with components, be sure to check my previous article about building OctoberCMS plugins.
Scaffolding Our Theme
To begin building our theme, we only need to create a folder with our unique name. I will call mine rafietheme. If you visit /backend/cms/themes, you’ll see that the new theme has been added to the list.
For now, the theme doesn’t have a description or a name, and October is only using our folder name.
The theme.yaml file inside our root theme directory will contain information about our theme.
// rafietheme/theme.yaml

name: RAFIETHEME
author: RAFIE Younes
authorUrl: http://younesrafie.com
description: Simple blogging theme
If you visit the theme management interface, you’ll see our theme with a new description and author info. Now we will add a placeholder screenshot. OctoberCMS will look for the screenshot in rafietheme/assets/images/theme-preview.png by default.
The version.yaml file tells your theme’s versioning story, and because this is just our first version we can add:
1.0.1: First versionTemplate Structure
October template pages are split into three parts. Each section is separated from the others with ==.
Configuration Section
This section is where we describe our template to the CMS. We can specify the page url, title, etc.
url = "/posts"
title = "Latest Posts"
description = "Just another posts page"
layout = "default"
We can use also initialize components, and configure them. More about that in the docs.
PHP Section
This section is going to be wrapped inside a cached class, so we are only allowed to use functions or the use keyword if you want.
You’ll frequently see the onStart method used here. This method is automatically run because it’s part of the page life cycle. Check the list of available functions, as well as some global variables (layout, page, component).
Markup Section
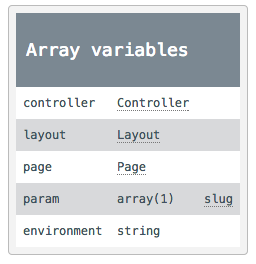
October is using Symfony’s Twig template engine, and inherits all the core features. The variables passed from the PHP section are available in the view. The this variable contains information about our page, controller, layout, environment, and params.
Using Placeholders
Placeholders are a way to inject content into the page. They can be used as one of the ways to inject your scripts, for example.
// defining the placeholder
...
	{% placeholder scripts %}
	</body>
</html>
Here we defined a placeholder. Before closing the body tag, we give the user the opportunity to inject some scripts, like so:
{% put scripts %}
	<script src="js/slider.min.js"></script>
{% endput %}
Placeholders have other features like injecting default content, or testing if a placeholder exists. Be sure to check the docs for more examples.
Using Partials
Partials are very useful for separating our page parts, header, footer, etc. As we said before, they are stored inside the partials directory and can be nested using sub-directories.
|---- partials/
|-- header.htm
|-- footer.htm
|-- navigation.htm
|-- comments.htm
|-- ajax/
|- posts.htmheader.htm: contains the doctype and header definition, also some assets links.footer.htm: will contain some copyright text and close the document, also some JavaScript assets.navigation.htm: will only contain our navigation menu.comments.htm: Because we’re only going to use Disqus, let’s put it in its own partial.
// partials/header.htm

<!DOCTYPE html>
<html lang="en">
<head>
    <title>{{ this.page.title }}</title>
	{% styles %}
    <link href="{{ [
            'assets/css/bootstrap.min.css',
            'assets/css/clean-blog.min.css'
        ]|theme }}" rel="stylesheet">

</head>
<body>
Inside every partial or page we can access the this variable which contains the page, layout, controller, param and environment variables, as stated in the docs.
When loading assets, we pass an array of links to the theme filter that combines the files and generates a cached link.
The {% styles %} tag allows the plugin developers to inject their assets to the page, and the same thing applies to {% scripts %}.
To inject your assets to the pages, you have two ways:
Using the
onStartfunction in your PHP code part of the page:function onStart(){ $this->addCss('assets/css/main.css'); $this->addJs('assets/js/app.js'); }Using component placeholders:
{% put scripts %}
	    <script type="text/javascript" src="{{ ['assets/js/app.js']|theme }}"></script>
	{% endput %}
// partials/footer.htm

<script src="{{ [
    '@jquery'
    'assets/javascript/bootstrap.min.js',
    'assets/javascript/clean-blog.min.js']|theme }}"></script>
{% scripts %}
</body>
</html>
You’ve noticed that we added @jquery instead of a file path!
This simply means that we want to use the jQuery file available in the back end. These notations are called aliases.
<ul class="nav navbar-nav navbar-right">
	<li class="{% if( this.page.id == 'home') %}active {% endif %}">
	    <a href="{{ 'home'|page }}">Home</a>
	</li>
	<li class="{% if( this.page.id == 'about') %}active {% endif %}">
	    <a href="{{ 'about'|page }}">About</a>
	</li>
	<li class="{% if( this.page.id == 'posts') %}active {% endif %}">
	    <a href="{{ 'posts'|page }}">Posts</a>
	</li>
</ul>
We said before that the page object is available for use inside any page or partial. We use the page.id to set the active menu item, and for the links’ href attribute, we pass the page ID to the page filter that will generate a full URL. Note that the page id is the template filename.
Using Layouts
October has a layouts folder where we can register our layouts. We will start with one default layout that we’ll be using for our pages.
description = "Default Layout"
==
{% partial 'header' %}
{% partial 'navigation' %}
{% page %}
{% partial 'footer' %}
In the configuration part, we can specify a description for our layout. Inside the twig markup part we include the necessary partials. The page tag will output the page content using this layout.
We can use most of the partial and page features, and also include HTML markup, assets, etc.
Creating Pages
OctoberCMS stores user defined pages insides the pages folder. Let’s start by creating our about page first, and we will explore the different possibilities along the way.
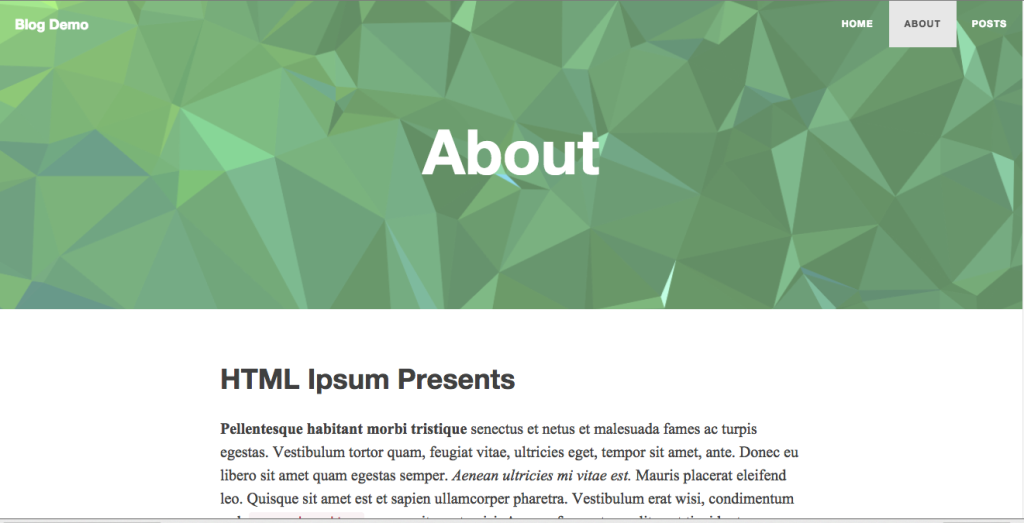
About Page
Because this is our first page, we’re going to make it as simple as possible, and the first part is to use the configuration section.
title = "About"
url = "/about"
layout = "default"
description = "Just another about page"
The template section will contain only some Lorem ipsum HTML content inside a container.
<div class="container">
	Lorem ipsum.....
</div>
That’s it! you can visit the new page by hitting the /about URL of your blog’s front end.
Home Page
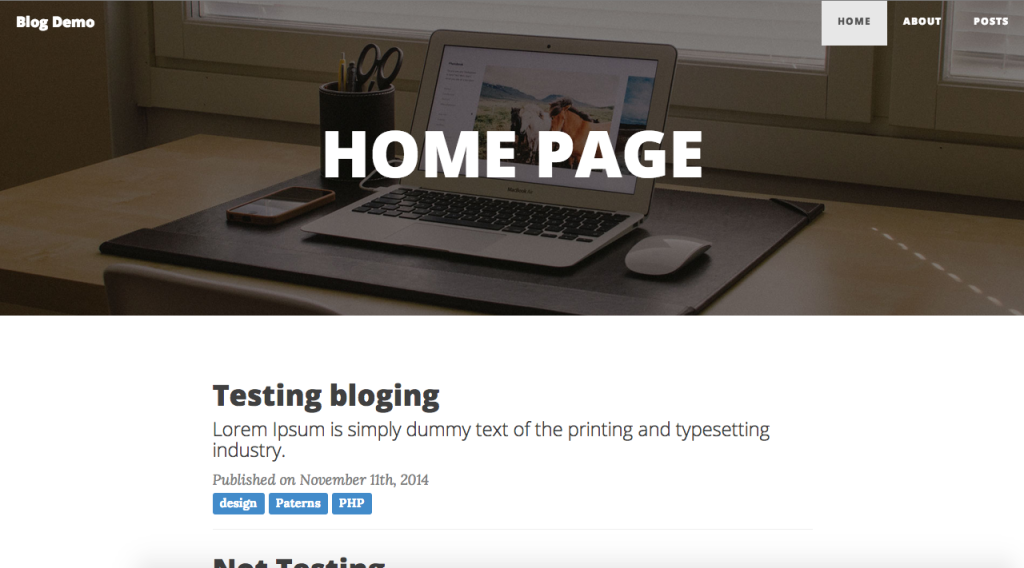
Inside our configuration part, we map our page to a URL and use a specific layout, along with a title and description.
title = "HOME PAGE"
url = "/"
layout = "default"
description = "Blog Home Page"
Inside our PHP section, we use the onStart method to set ready our page variables. This method is executed after all components are initialized.
<?php
use RainLab\Blog\Models\Post;

function onStart(){
    $this['posts'] = Post::isPublished()
					    ->orderBy('published_at', 'desc')
					    ->take(5)
					    ->with('categories')
					    ->get();
}
?>
The rainlab plugin provides a set of models that we can use to query the database. We take only the five latest published posts from our database and we set it as a global variable.
<div class="col-lg-8 col-lg-offset-2 col-md-10 col-md-offset-1">
{% for post in posts %}
<div class="post-preview">
<a href="{{ 'post'|page({slug: post.slug}) }}">
<h2 class="post-title">
{{ post.title }}
</h2>
<h3 class="post-subtitle">
{{ post.excerpt }}
</h3>
</a>
<span class="post-meta">Published on {{ post.published_at|date("F jS, Y") }}</span> <br/>
{% for category in post.categories %}
<a href="{{ 'category'|page({slug: category.slug }) }}">
<span class="label label-primary">{{ category.name }}</span>
</a>
{% endfor %}
</div>
<hr>
{% else %}
<h2>No posts found.</h2>
{% endfor %}
<ul class="pager">
<li class="next">
<a href="{{ 'posts'|page }}">Older Posts →</a>
</li>
</ul>
</div>Getting to the view part, we loop through the list of posts, we loop through the list of attached categories also, and when the user clicks on a post, we should redirect him to the single post page.
The page filter generates a URL to a given page, but you can also pass some URL parameters to be included. Check the docs for more info.
Single Post Page
title = "Blog Post"
url = "/post/:slug"
layout = "default"
description = "Single post page"
The only difference from the home page is the URL part. The slug parameter is the slug in the database. If we want to be more explicit we can use regular expressions to match our rules.
url = "/post/:slug|^[a-zA-Z0-9]$"You can check the documentation for more info about the URL syntax and the use of regular expressions.
<?php
use RainLab\Blog\Models\Post;

function onStart(){
    $slug = $this->param('slug');
    $this['post'] = Post::where('slug', '=', $slug)
                            ->isPublished()
                            ->with('categories')
                            ->first();
    if( !$this['post'] )
        return Redirect::to('/404');
}
?>
Inside our PHP section, we look at the database for a post using the slug parameter. If the post doesn’t exist, we redirect to our 404 page.
<header class="intro-header" style="
            {% if post.featured_images.isEmpty() %}
                background-image: url('{{ "/assets/images/post-sample-image.jpg"|theme }}')
            {% else %}
                background-image: url('{{ post.featured_images.first().getPath() }}')
            {% endif %}">
    <div class="container">
        <div class="row">
            <div class="col-lg-8 col-lg-offset-2 col-md-10 col-md-offset-1">
                <div class="post-heading">
                    <h1>{{ post.title }}</h1>
                    <span class="meta">Published on {{ post.published_at|date("F jS, Y") }}</span><br/>
                    {% for category in post.categories %}
                    <a href="{{ 'category'|page({slug: category.slug }) }}">
                        <span class="label label-primary">{{ category.name }}</span>
                    </a>
                    {% endfor %}
                </div>
            </div>
        </div>
    </div>
</header>

<article>
    <div class="container">
        <div class="row">
            <div class="col-lg-8 col-lg-offset-2 col-md-10 col-md-offset-1">
                {{ post.content|raw }}
            </div>
        </div>
        <div class="row">
            <hr/>
            <div class="col-lg-8 col-lg-offset-2 col-md-10 col-md-offset-1">
                {% partial 'comments' %}
            </div>
        </div>
    </div>
</article>
We test if the blog has any featured posts. If so, we grab the first one, else we show a default featured image. After that, we print the title, date, categories, and we escape the content before outputting it.
The partial tag will load our comments. For now, it just outputs <h2>Comments</h2>, but you can use Disqus if you want.
Category Posts Page
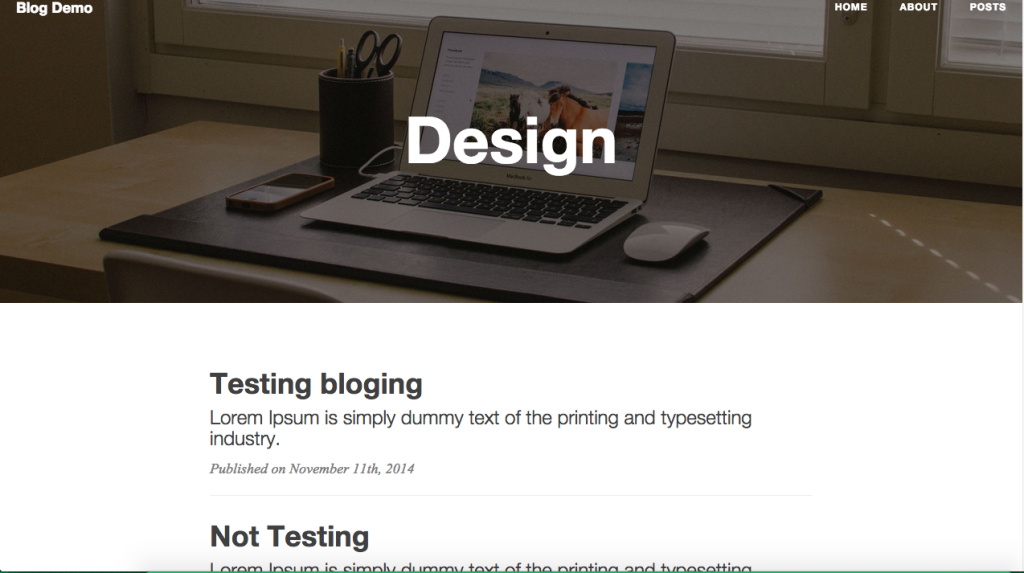
The configuration section of our page is basically the same.
title = "Category"
url = "/category/:slug"
layout = "default"
description = "Filter posts by category"
use RainLab\Blog\Models\Post;
use RainLab\Blog\Models\Category;
function onStart(){
$slug = $this->param('slug');
$this['category'] = Category::where('slug', '=', $slug)->first();
if( $this['category'] ){
$post = new Post;
$query = $post->isPublished()
->orderBy('published_at', 'desc')
->with('categories');
$this['posts'] = $post->scopeFilterCategories($query, [ $this['category']->id ])->get();
}
}In the PHP section part, we test to see if the category exists. If so, we query the database for the matching posts.
I was going to use a join on the pivot table between posts and categories, but the rainlab blog plugin provides a RainLab\Blog\Models@scopeFilterCategories method to filter through posts using an array of category IDs: it accepts an Illuminate\Query\Builder as the first parameter and an array of category IDs.
The HTML part is the same as the home page, we only changed the header title to put the category name.
Posts Page
The posts page will print the five latest posts, and at the bottom of the page we have a load more button that will use OctoberCMS’ ajax framework functionality to load more.
To be able to use the ajax framework you need to include the {% framework %} tag. This will output a link to the framework.js file from the modules directory.
The tag also supports a {% framework extra %} parameter. This will add some styles, like the loading indicator when using ajax.
AJAX Framework
October has a nice way of handling some of the most common usage of loading content via ajax requests. To enable the ajax framework on an element, you simply add the HTML5 data-request="onMethodName" attribute. The method that will be executed must start with on followed by your method name.
There are two ways to define your ajax handler method:
Inside the php section:
function onMethodName(){
		//handle it here
	}
Inside a component:
You can define your handler inside a component class. Be sure to include the component inside the configuration section of your page (see example below). If you want to learn more about how to create components, be sure to check my previous article.
title = "My page"
	url = "/"

	[componentName]
	==
Before sending the request, we can show a confirmation message, or redirect after the response is back. You can check the list of supported attributes here.
<div class="col-md-2 col-md-offset-5">
            <a id="load_more"
               href="#"
               class="btn btn-primary"
               data-request="onLoadMorePosts"
               data-request-update="'ajax/posts': '@#posts'"
               data-request-data='"postsCount": 1'
               data-request-success="incrementPostsCounter($el);">
                Load more
            </a>
</div>data-request: bind ouronLoadMorePostshandler that we defined inside our PHP section.data-request-update: is where we specify the partial that will be loaded on the server, and also an ID or class of the target element. If you’ve noticed the@symbol before the ID, this simply means that we want to append to the element and not replace its content.data-request-data: we can add more parameters to the request, in this case we send a posts count variable.data-request-success: JS code to be executed after every successful request, in this case, theincrementPostsCounterfunction will update ourdata-request-dataattribute.
function onLoadMorePosts(){
	$postsCount = (int) post('postsCount');

	$this['posts'] = Post::isPublished()
	    ->orderBy('published_at', 'desc')
	    ->skip( $postsCount * 5 )
	    ->take(5)
	    ->with('categories')
	    ->get();
}
The post method retrieves the postsCount from the page, then we skip the specified count and select the next five posts.
The partials/ajax/posts.htm page gets called automatically, and the list of posts remains available to loop through.
// partials/ajax/posts.htm
{% for post in posts %}
    <div class="post-preview">
        <a href="{{ 'post'|page({slug: post.slug}) }}">
            <h2 class="post-title">
                {{ post.title }}
            </h2>
            <h3 class="post-subtitle">
                {{ post.excerpt }}
            </h3>
        </a>
        <span class="post-meta">Published on {{ post.published_at|date("F jS, Y") }}</span> <br/>
        {% for category in post.categories %}
            <a href="{{ 'category'|page({slug: category.slug }) }}">
                <span class="label label-primary">{{ category.name }}</span>
            </a>
        {% endfor %}
    </div>
    <hr>
{% endfor %}
Really that’s all it takes to load more posts – the animation and insertion is automatically handled by the framework.
If you have caching troubles with ajax loading, try php artisan cache:clear from the command line to clear the cache and make sure the JS refreshes.
Conclusion
In this article, we saw how to create a basic theme for October CMS. We didn’t cover every feature, but this should help you consider taking a look, or even assist you in exploring some new possibilities. You can take a look at the final result on Github, and if you have any question or opinions let me know in the comments!
Frequently Asked Questions (FAQs) about Building OctoberCMS Theme
What are the prerequisites for building an OctoberCMS theme?
Before you start building an OctoberCMS theme, you need to have a basic understanding of HTML, CSS, and PHP. You should also be familiar with Laravel, the PHP framework that OctoberCMS is built on. Additionally, you need to have OctoberCMS installed on your local development environment.
How do I install OctoberCMS on my local development environment?
To install OctoberCMS, you need to have Composer, a dependency management tool for PHP. Once you have Composer installed, you can run the command composer create-project october/october myproject in your terminal. This will create a new OctoberCMS project in a directory named ‘myproject’.
How do I create a new theme in OctoberCMS?
To create a new theme in OctoberCMS, navigate to the ‘Themes’ section in the backend of your OctoberCMS installation. Click on the ‘New Theme’ button and fill in the required details such as the theme name, author, and description. Once you’ve filled in these details, click on ‘Create’ to generate your new theme.
How do I customize the layout of my OctoberCMS theme?
OctoberCMS uses a system of layouts, pages, and partials to structure the theme. You can customize the layout by editing the layout files in your theme directory. These files are written in Twig, a templating language for PHP. You can use Twig syntax to include dynamic content in your layout.
How do I add dynamic content to my OctoberCMS theme?
You can add dynamic content to your OctoberCMS theme by using components. Components are reusable chunks of code that can be added to your pages or layouts. You can create a new component by navigating to the ‘CMS’ section in the backend of your OctoberCMS installation and clicking on ‘Components’.
How do I style my OctoberCMS theme?
You can style your OctoberCMS theme by editing the CSS files in your theme directory. OctoberCMS also supports LESS and SASS, which are CSS pre-processors that allow you to use variables, nested rules, and other features that can make your CSS more maintainable.
How do I add a navigation menu to my OctoberCMS theme?
You can add a navigation menu to your OctoberCMS theme by using the ‘Static Pages’ plugin. This plugin allows you to create a tree-structured navigation menu that can be easily customized and reordered.
How do I make my OctoberCMS theme responsive?
You can make your OctoberCMS theme responsive by using media queries in your CSS. Media queries allow you to apply different styles depending on the size of the user’s screen. You can also use a responsive CSS framework like Bootstrap or Foundation to help you create a responsive design.
How do I add a blog to my OctoberCMS theme?
You can add a blog to your OctoberCMS theme by using the ‘Blog’ plugin. This plugin provides a simple and flexible way to add a blog to your website. You can customize the look and feel of your blog by editing the blog component’s views.
How do I optimize my OctoberCMS theme for SEO?
You can optimize your OctoberCMS theme for SEO by using the ‘SEO’ plugin. This plugin allows you to add meta tags, canonical URLs, and other SEO-friendly features to your website. You can also improve your SEO by ensuring that your website has a clear structure, fast loading times, and high-quality content.
 Younes Rafie
Younes is a freelance web developer, technical writer and a blogger from Morocco. He's worked with JAVA, J2EE, JavaScript, etc., but his language of choice is PHP. You can learn more about him on his website.


